Raspberry cake filling brings bright, tart fruit flavor to layer cakes, cupcakes, and tarts with a smooth texture that sets beautifully between cake layers. This from-scratch recipe uses real raspberries, lemon juice, and cornstarch to create a glossy filling that’s intensely flavorful without being overly sweet.
It takes just 15 minutes on the stovetop and doesn’t require pectin, gelatin, or any complicated techniques. Whether you’re making a birthday cake, wedding cake, or simply want to elevate vanilla layers, this raspberry filling delivers bakery-quality results with simple pantry ingredients and fresh or frozen fruit.
Why You’ll Love This Recipe
- Bright, fresh raspberry flavor that isn’t overly sweet
- Ready in 15 minutes with simple stovetop cooking
- Sets firmly enough to hold between cake layers without bleeding
- Works with fresh or frozen raspberries for year-round convenience
- No pectin or gelatin required, just cornstarch for clean thickening
Equipment Needed
- Medium saucepan
- Wooden spoon or silicone spatula
- Small bowl for cornstarch slurry
- Whisk
- Fine mesh sieve (optional, for seedless filling)
- Glass jar or airtight container for storage

Easy Raspberry Cake Filling
- Total Time: 15 minutes
Description
This easy raspberry cake filling uses fresh or frozen berries with lemon and cornstarch to create a tart, glossy filling that sets perfectly between cake layers.
Ingredients
-
- 2 cups (240g) raspberries, fresh or frozen
-
- 1/2 cup (100g) granulated sugar
-
- 2 tablespoons fresh lemon juice (from about 1 lemon)
-
- 2 tablespoons cornstarch
-
- 2 tablespoons cold water
-
- 1/2 teaspoon vanilla extract (optional)
-
- Pinch of salt
Instructions
In a medium saucepan, combine raspberries, sugar, lemon juice, and salt. Cook over medium heat, stirring frequently, for 5 to 6 minutes or until the raspberries break down and release their juices.
In a small bowl, whisk together the cornstarch and cold water until fully dissolved and smooth.
Once the raspberry mixture reaches a gentle boil, slowly pour in the cornstarch slurry while stirring continuously with a whisk or spatula. Cook for another 2 to 3 minutes, stirring constantly, until the mixture thickens enough to coat the back of a spoon and hold a clean line when swiped with your finger.
Remove the saucepan from heat and stir in the vanilla extract if using. Let the mixture cool for 5 to 10 minutes in the pan, then transfer to a jar or airtight container.
For seedless filling, pour the warm mixture through a fine mesh sieve, pressing gently with a spatula to extract all the liquid while leaving seeds behind.
Let the filling cool fully at room temperature, then refrigerate until ready to use. It will thicken more as it chills and should be smooth, scoopable, and able to spread without dripping when fully set.
Notes
Don’t skip the salt; it balances sweetness and makes flavors pop
Avoid high heat as it can scorch the fruit before it thickens properly
Scrape down the sides of the pan frequently to prevent burning
Test consistency by placing a spoonful on a cold plate; it should hold its shape
- Prep Time: 5 minutes
- Cook Time: 10 minutes
- Category: Cake Filling
- Method: Stovetop
- Cuisine: American
Nutrition
- Calories: 88
- Sugar: 15g
- Sodium: 1mg
- Fat: 0.3g
- Saturated Fat: 0g
- Unsaturated Fat: 0.3g
- Trans Fat: 0g
- Carbohydrates: 21g
- Fiber: 3g
- Protein: 0.5g
- Cholesterol: 0mg
Ingredients You’ll Need
- 2 cups (240g) raspberries, fresh or frozen
- 1/2 cup (100g) granulated sugar
- 2 tablespoons fresh lemon juice (from about 1 lemon)
- 2 tablespoons cornstarch
- 2 tablespoons cold water
- 1/2 teaspoon vanilla extract (optional)
- Pinch of salt
Ingredient Notes
Raspberries are the star ingredient and should be bright red with no signs of mold. Frozen berries work beautifully and release liquid faster, which helps reduce cooking time slightly.
Granulated sugar sweetens while helping break down the berries as they heat; adjust to 3/4 cup if your berries are very tart. Lemon juice sharpens the fruit notes and prevents the filling from tasting flat or one-dimensional; always use freshly squeezed for best flavor.
Cornstarch creates the glossy finish and structure that holds between cake layers; mix it with cold water first to prevent lumps. A pinch of salt rounds out the sweetness and makes all the flavors more pronounced.
Vanilla extract is optional but adds depth if pairing with chocolate or vanilla cakes.
Step-by-Step Instructions
Cook the Raspberries
In a medium saucepan, combine raspberries, sugar, lemon juice, and salt. Cook over medium heat, stirring frequently, for 5 to 6 minutes or until the raspberries break down and release their juices.
Make the Cornstarch Slurry
In a small bowl, whisk together the cornstarch and cold water until fully dissolved and smooth.
Thicken the Filling
Once the raspberry mixture reaches a gentle boil, slowly pour in the cornstarch slurry while stirring continuously with a whisk or spatula. Cook for another 2 to 3 minutes, stirring constantly, until the mixture thickens enough to coat the back of a spoon and hold a clean line when swiped with your finger.
Finish and Cool
Remove the saucepan from heat and stir in the vanilla extract if using. Let the mixture cool for 5 to 10 minutes in the pan, then transfer to a jar or airtight container.
For seedless filling, pour the warm mixture through a fine mesh sieve, pressing gently with a spatula to extract all the liquid while leaving seeds behind.
Chill Completely
Let the filling cool fully at room temperature, then refrigerate until ready to use. It will thicken more as it chills and should be smooth, scoopable, and able to spread without dripping when fully set.

Pro Tips & Cooking Hacks
- Use a silicone spatula for better control when straining for seedless filling
- Whisk the cornstarch slurry well to eliminate any lumps before adding to hot fruit
- Don’t skip the salt; it balances sweetness and makes flavors pop
- Avoid high heat as it can scorch the fruit before it thickens properly
- Scrape down the sides of the pan frequently to prevent burning
- Test consistency by placing a spoonful on a cold plate; it should hold its shape
Tips & Variations
Storage: Store raspberry filling in an airtight glass jar in the refrigerator for up to 5 days. Do not freeze as the texture changes significantly. Let it come to room temperature before spreading for easiest application.
Seedless version: Press the warm mixture through a fine mesh sieve immediately after cooking for a completely smooth, elegant filling perfect for white layer cakes.
Berry blend: Add 1/4 cup blackberries with the raspberries for deeper color and a more complex berry flavor with slight earthiness.
Sweeter filling: Stir in 1 teaspoon raspberry jam after cooking for a candy-like sweetness that kids especially love.
Serving Suggestions
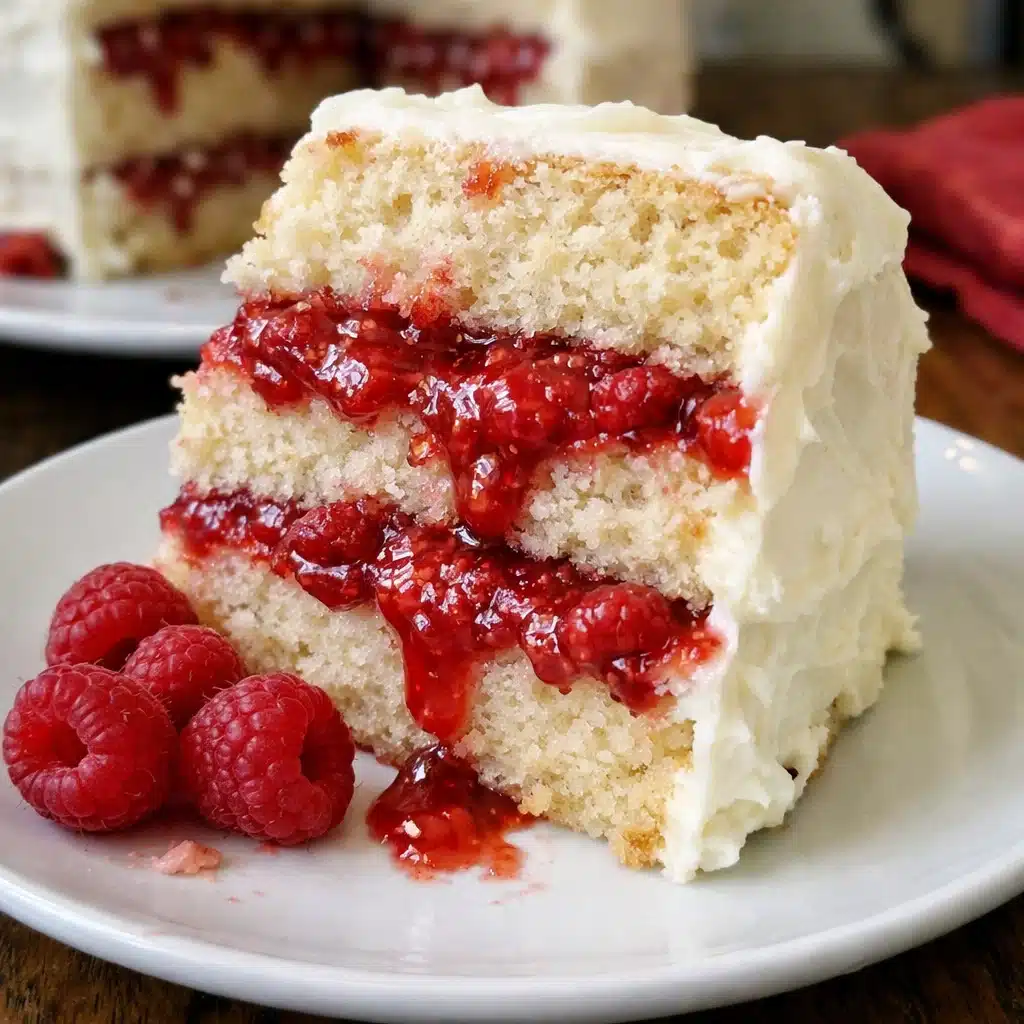
Layer cakes: Spread between vanilla or white chocolate cake layers for classic flavor pairing. The tartness cuts through sweet frosting beautifully.
Cupcake filling: Use a piping tip to fill cupcakes from the top, then frost over. Each bite reveals a fruity surprise in the center.
Tart filling: Pour into pre-baked tart shells and chill until set. Top with fresh raspberries and a dusting of powdered sugar for an elegant dessert.
Crepe filling: Spread onto warm crepes and fold into triangles. Serve with whipped cream and fresh mint for a French-inspired brunch.
Common Mistakes
- Adding cornstarch directly to hot liquid creates lumps that won’t dissolve
- Skipping the straining step leaves seeds that some find unpleasant in delicate cakes
- Overcooking makes the filling turn starchy and stiff instead of smooth and glossy
- Using bottled lemon juice instead of fresh results in flat, dull flavor
- Not cooling completely before using causes the filling to bleed into cake layers
What to Serve With Raspberry Cake Filling
Vanilla cake: The neutral sweetness of vanilla lets the bright raspberry flavor shine without competition. Add a simple buttercream on top for classic combination.
White chocolate: The creamy richness of white chocolate balances raspberry’s tartness perfectly. Use white chocolate buttercream or ganache for luxurious pairing.
Lemon cake: Citrus and raspberry create a bright, refreshing flavor profile ideal for spring and summer celebrations. The two fruits enhance each other beautifully.
Almond cake: The nutty, delicate flavor of almond cake complements raspberry without overwhelming it. Add almond buttercream for a triple-threat dessert.
Frequently Asked Questions
Can I use frozen raspberries?
Yes! Frozen berries work perfectly and often release liquid faster than fresh. No need to thaw them first; just add directly to the pan.
How do I make it thicker?
Simmer the filling for an additional 1 to 2 minutes after adding the cornstarch slurry. It will also thicken significantly as it cools.
Why is my filling runny?
It likely didn’t cook long enough after adding the slurry, or the cornstarch wasn’t fully dissolved. Reheat and simmer longer to fix.
Can I reduce the sugar?
Yes, but the filling will be much tarter. Start with 1/3 cup and taste after cooking; you can always add more sugar while it’s still warm.
How far ahead can I make this?
Make it up to 5 days in advance and keep refrigerated. The flavor actually improves after 24 hours as it develops more depth.
💬 Tried this recipe? Leave a comment and rating below!