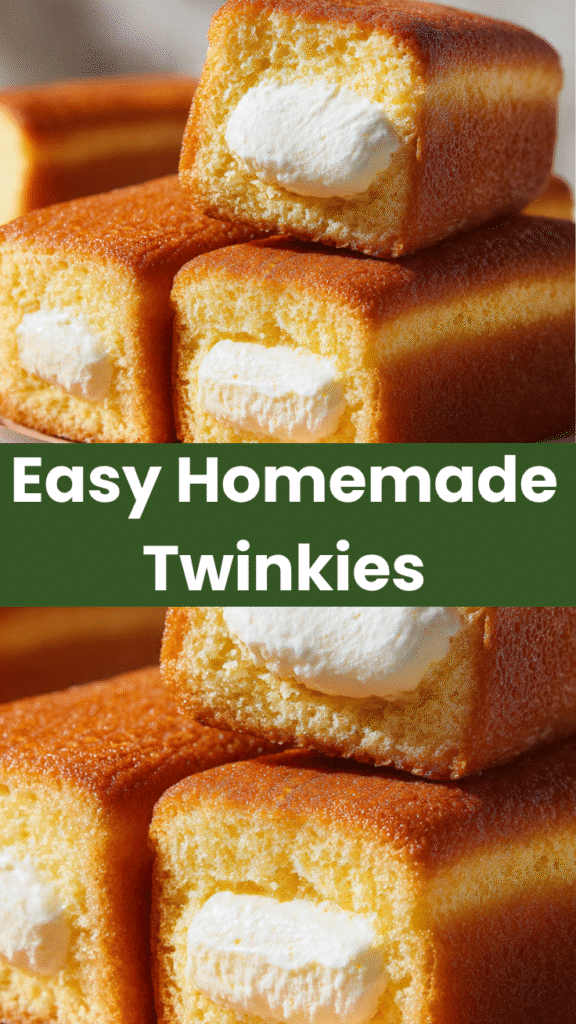
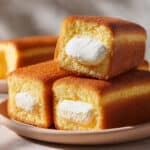
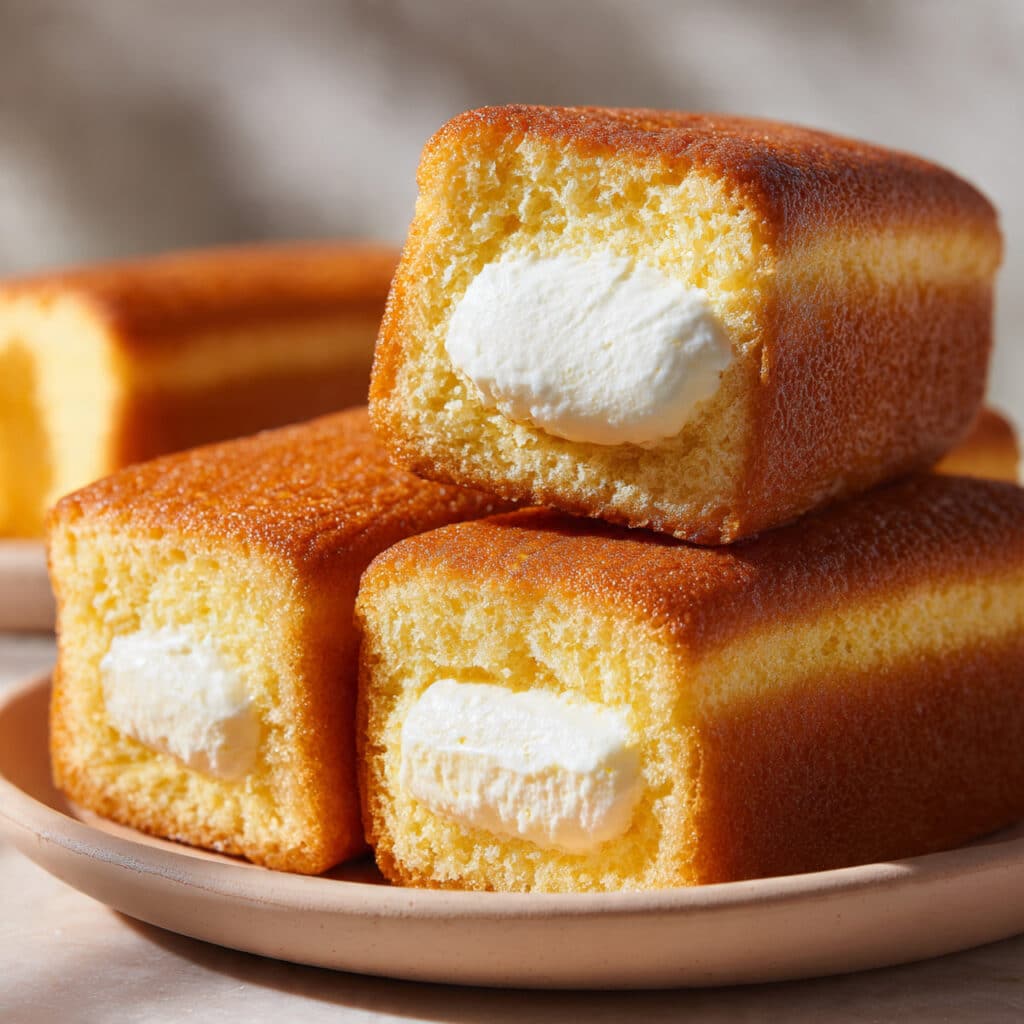
If you’ve ever craved the sweet, creamy goodness of Twinkies, you’re not alone! These iconic sponge cakes filled with creamy filling are a nostalgic treat that many of us remember from childhood. In this blog post, I’ll guide you through a simple and satisfying recipe that will have you enjoying the classic taste of Twinkies in no time.
Why You’ll Love This Recipe
- Delicious Taste: A perfect balance of sweet vanilla sponge cake and creamy filling that will satisfy your sweet tooth.
- Simple Ingredients: Made with everyday pantry staples, making it easy to whip up anytime.
- Family-Friendly: Perfect for kids and adults alike! A fun baking project to enjoy with the whole family.
- Customizable: Get creative with flavors and fillings to make them your own.
- Time-Saving: Ready to serve in less than an hour!
Equipment Needed
- Mixing bowls
- Electric mixer
- Twinkie mold or mini loaf pans
- Spatula
- Measuring cups and spoons
- Cooling rack
Twinkies
- Total Time: 45 minutes
- Yield: 10 twinkies 1x
Description
Homemade Twinkies feature soft vanilla sponge cakes filled with a light, creamy filling. You create a nostalgic dessert that delivers sweet flavor and fluffy texture in every bite.
Ingredients
1 cup all purpose flour
1 teaspoon baking powder
1/4 teaspoon salt
1/2 cup granulated sugar
1/4 cup unsalted butter softened
2 large eggs
1 teaspoon vanilla extract
1/2 cup milk
1 cup heavy whipping cream
2 tablespoons powdered sugar
1 teaspoon vanilla extract
Instructions
1. Preheat the oven to 350°F (175°C) and grease the molds.
2. Whisk flour, baking powder, and salt in a bowl.
3. Cream butter and sugar until light and fluffy.
4. Add eggs one at a time and mix well.
5. Stir in vanilla extract.
6. Add dry ingredients and milk alternately and mix until combined.
7. Pour batter into molds filling each about two thirds full.
8. Bake for 20 to 25 minutes until a toothpick comes out clean.
9. Cool completely on a rack.
10. Whip heavy cream and powdered sugar until stiff peaks form.
11. Mix in vanilla extract.
12. Fill the cooled cakes with cream using a piping bag.
13. Serve and enjoy.
Notes
Use room temperature ingredients for best results.
Do not overmix the batter.
Cool cakes completely before filling.
Use a piping bag for even filling.
Store in an airtight container for freshness.
- Prep Time: 20 minutes
- Cook Time: 25 minutes
- Category: Dessert
- Method: Baking
- Cuisine: American
Nutrition
- Serving Size: 1 twinkie
- Calories: 210
- Sugar: 16g
- Sodium: 90mg
- Fat: 11g
- Saturated Fat: 7g
- Unsaturated Fat: 3g
- Trans Fat: 0g
- Carbohydrates: 24g
- Fiber: 0g
- Protein: 3g
- Cholesterol: 55mg
Ingredients You’ll Need
- 1 cup all-purpose flour
- 1 teaspoon baking powder
- 1/4 teaspoon salt
- 1/2 cup granulated sugar
- 1/4 cup unsalted butter, softened
- 2 large eggs
- 1 teaspoon vanilla extract
- 1/2 cup milk
- 1 cup heavy whipping cream
- 2 tablespoons powdered sugar
- 1 teaspoon vanilla extract (for the filling)
Ingredient Notes
All-purpose flour: Provides the structure for the sponge cake. You can substitute with gluten-free flour for a gluten-free option.
Granulated sugar: Sweetens the cake and helps achieve that light, fluffy texture. Brown sugar can be used for a deeper flavor.
Heavy whipping cream: Essential for creating a rich and creamy filling. Make sure it’s cold for the best whipping results.
Instructions
Step 1: Prepare the Oven and Mold
Preheat your oven to 350°F (175°C) and lightly grease your Twinkie mold or mini loaf pans with butter or non-stick spray.
Step 2: Mix Dry Ingredients
In a mixing bowl, combine the all-purpose flour, baking powder, and salt. Whisk together until well combined and set aside.
Step 3: Cream Butter and Sugar
In another bowl, use an electric mixer to cream the softened butter and granulated sugar together until light and fluffy, about 3-4 minutes.
Step 4: Add Eggs and Vanilla
Beat in the eggs, one at a time, ensuring each is fully incorporated before adding the next. Add the vanilla extract and mix until combined.
Step 5: Combine Dry and Wet Ingredients
Gradually add the dry ingredient mixture to the wet ingredients, alternating with the milk. Mix until just combined, being careful not to overmix.
Step 6: Bake
Pour the batter into the prepared mold, filling each cavity about 2/3 full. Bake for 20-25 minutes, or until a toothpick inserted into the center comes out clean. Allow to cool for 5 minutes before transferring to a cooling rack.
Step 7: Prepare the Cream Filling
While the cakes cool, whip the heavy cream and powdered sugar together in a mixing bowl until stiff peaks form. Stir in the vanilla extract.
Step 8: Fill the Twinkies
Once the cakes are completely cool, use a piping bag to fill each Twinkie with the whipped cream filling. You can also cut a small slit in the side of each cake and spoon the filling in.
Pro Tips & Cooking Hacks
- Make sure all ingredients are at room temperature for the best mixing results.
- Don’t overmix the batter to keep the cakes light and fluffy.
- Use a toothpick to make small holes in the cakes before filling to ensure even distribution of the cream.
- For an extra kick, add a splash of almond extract to the cream filling.
Tips & Variations
Flavor Swaps: Experiment with different cake flavors by adding cocoa powder for chocolate Twinkies or lemon zest for a citrus twist.
Dietary Tweaks: Substitute dairy-free butter and plant-based milk for a dairy-free version, or use a sugar substitute for a low-sugar option.
Make-Ahead: These Twinkies can be made a day in advance and stored in an airtight container in the refrigerator.
Serving Suggestions
Serve your homemade Twinkies with a side of fresh berries or a scoop of vanilla ice cream for a delightful dessert experience. They also pair wonderfully with a cup of hot coffee or milk for a nostalgic snack.
Common Mistakes
- Don’t forget to preheat the oven; this ensures even baking.
- Avoid overfilling the molds to prevent overflow during baking.
- Make sure the cakes are completely cooled before filling to prevent the cream from melting.
What to Serve With Twinkies
These delightful treats can be enjoyed alone or paired with other desserts like brownies or cookies for a dessert platter. You can also serve them alongside a refreshing glass of milk or a cup of tea for a cozy snack time.
Frequently Asked Questions
Can I freeze homemade Twinkies?
Yes! You can freeze unfilled Twinkies in an airtight container for up to 3 months. Just let them thaw before filling.
How do I know when my Twinkies are done baking?
Insert a toothpick into the center; if it comes out clean or with a few crumbs, they are done baking.
Can I use a different filling?
Absolutely! Feel free to get creative with fillings like chocolate ganache, fruit preserves, or even peanut butter.
What can I do with leftover filling?
You can use leftover filling as a dip for fruits or spread it on toast for a sweet breakfast treat.
How should I store my Twinkies?
Store them in an airtight container at room temperature for up to 3 days or in the fridge for up to a week.
💬 Tried this recipe? Leave a comment and rating below!