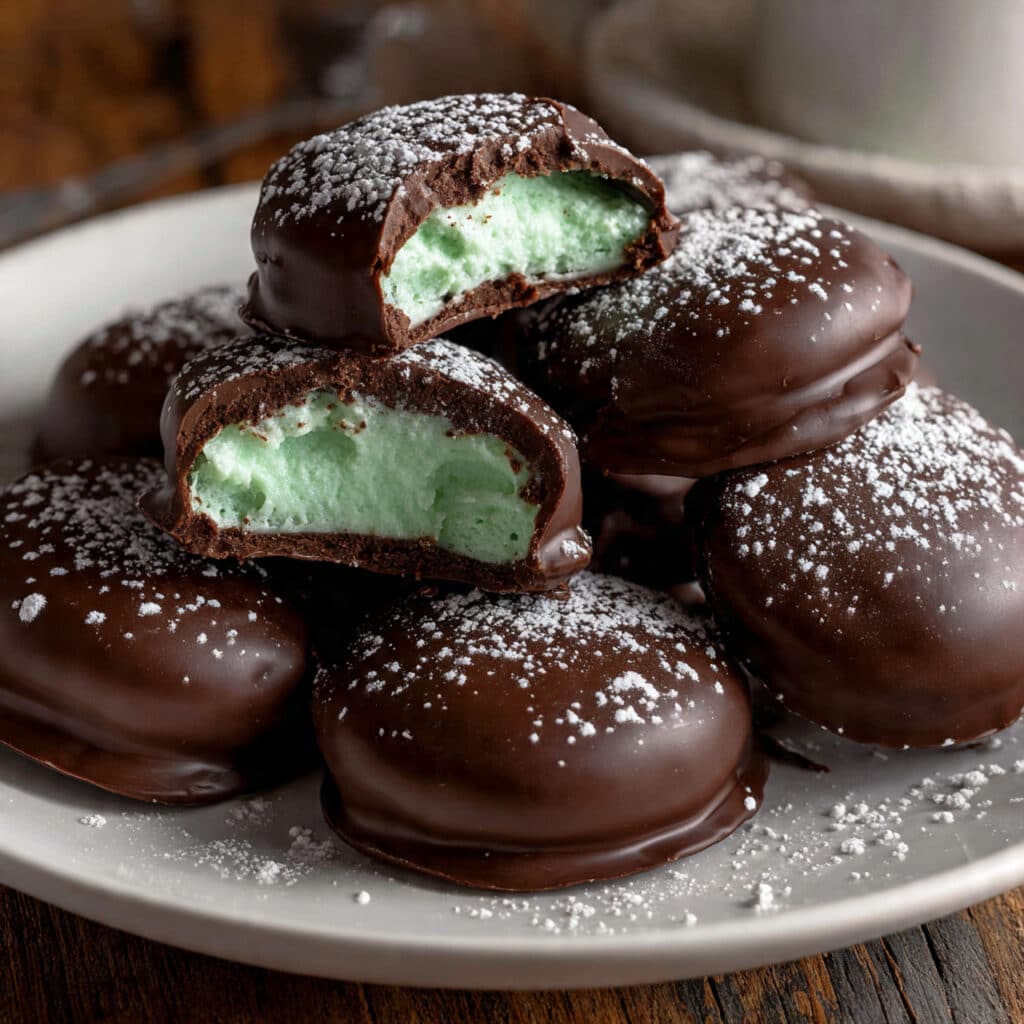
Chocolate Mint Patties are the homemade candy that makes you look like a baking superstar without requiring any fancy skills or equipment. These creamy mint centers get dipped in smooth chocolate for a treat that rivals anything you’d buy at the store. They are perfect for holiday cookie trays, gift giving, or stashing in the freezer for whenever a chocolate craving hits.

Why You’ll Love This Recipe
- Simple ingredients you probably already have
- No candy thermometer or special equipment needed
- Perfect for holiday gift boxes and cookie exchanges
- Freeze beautifully for make-ahead convenience
- Fun green color makes them festive for any occasion
Equipment Needed
- Medium mixing bowl
- Small round cookie cutter or glass
- Baking sheets
- Parchment paper or wax paper
- Dipping fork or regular fork
- Microwave-safe bowl

Chocolate Mint Patties
- Total Time: 1 hour 20 minutes
- Yield: 60 patties 1x
- Diet: Vegetarian
Description
These creamy mint centers get dipped in smooth chocolate for a treat that rivals anything you’d buy at the store. They come together with just a handful of pantry ingredients and are perfect for holiday cookie trays, gift giving, or stashing in the freezer.
Ingredients
⅓ cup light corn syrup
5 tablespoons unsalted butter, softened
1½ teaspoons mint extract
½ teaspoon salt
Green gel food coloring (start with 2-3 drops)
4 to 5 cups powdered sugar
10 oz chocolate candy coating (Ghirardelli Melting Wafers, Almond Bark, or CandiQuik)
Extra cocoa powder for dusting the pan
Instructions
1. Combine corn syrup, softened butter, mint extract, salt, and a couple drops of green food coloring in a medium bowl. Stir everything together until well blended and the color is evenly distributed throughout.
2. Stir in one cup of powdered sugar at a time until the mixture becomes too thick to stir with a spoon. Keep adding more powdered sugar and start kneading it with your hands until the mixture is smooth and no longer sticky.
3. Place the mint mixture between two sheets of parchment paper and roll it out to about ¼ inch thickness. Put the whole thing on a baking sheet and refrigerate for 60 to 90 minutes until firm.
4. Once chilled and firm, use a small round cookie cutter to cut out circles. Gather the scraps, re-roll them between parchment paper, and cut out more patties.
5. Melt the chocolate candy coating in a microwave-safe bowl according to package directions. Usually this means microwaving in 30-second bursts, stirring between each interval, until completely smooth.
6. Drop each mint patty into the melted chocolate and use a fork to flip it over until completely coated. Lift it out, tap the fork gently on the edge of the bowl to shake off excess chocolate, then slide it onto a parchment-lined baking sheet. Let the patties sit at room temperature until the chocolate sets completely.
Notes
Mint extract gives that classic minty fresh flavor, but if you find it tastes too much like toothpaste, swap it for peppermint extract instead.
For the chocolate coating, Ghirardelli Melting Wafers give the best flavor. Almond bark or CandiQuik work well too. If using chocolate chips, add 2-3 teaspoons of coconut oil to help them melt smoothly.
Keep your hands lightly dusted with powdered sugar to prevent sticking while kneading.
Work with half the mint mixture at a time, keeping the other half in the fridge.
Store in an airtight container at room temperature for up to one week, in the fridge for up to two weeks, or freeze for up to three months.
Change the filling color based on the holiday: pink or red for Valentine’s Day, white for winter, orange for Halloween.
- Prep Time: 20 minutes
- Cook Time: 0 minutes
- Category: Dessert, Candy
- Method: No Bake
- Cuisine: American
Nutrition
- Serving Size: 1 patty
- Calories: 72
- Sugar: 13g
- Sodium: 22mg
- Fat: 2g
- Saturated Fat: 2g
- Unsaturated Fat: 0g
- Trans Fat: 0g
- Carbohydrates: 13g
- Fiber: 0g
- Protein: 0g
- Cholesterol: 3mg
Ingredients You’ll Need
- ⅓ cup light corn syrup
- 5 tablespoons unsalted butter, softened
- 1½ teaspoons mint extract
- ½ teaspoon salt
- Green gel food coloring
- 4 to 5 cups powdered sugar
- 10 oz chocolate candy coating
- Extra cocoa powder for dusting the pan
Ingredient Notes
Mint extract gives these patties that classic minty fresh flavor, but if you find it tastes too much like toothpaste, swap it for peppermint extract instead. The peppermint has a brighter, sweeter taste that most people prefer. Either way works great.
For the chocolate coating, you have several good options. Ghirardelli Melting Wafers give the best flavor and smooth coating. Almond bark or CandiQuik work well too and are usually cheaper. If you want to use chocolate chips, add a couple teaspoons of coconut oil or shortening to help them melt smoothly.
The powdered sugar amount varies depending on humidity and how you measure. Start with 4 cups and keep adding until the mixture becomes too stiff to stir. Then you’ll knead in more by hand until it’s smooth and not sticky. Gel food coloring works better than liquid because it won’t make the mixture too wet.
Step-by-Step Instructions
Step 1: Mix the Base
Combine corn syrup, softened butter, mint extract, salt, and a couple drops of green food coloring in a medium bowl. Stir everything together until well blended and the color is evenly distributed throughout. Add more food coloring if you want a deeper green.
Step 2: Add Powdered Sugar
Stir in one cup of powdered sugar at a time until the mixture becomes too thick to stir with a spoon. This usually happens around 3 to 4 cups. Keep adding more powdered sugar and start kneading it with your hands until the mixture is smooth and no longer sticky.
Step 3: Roll and Chill
Place the mint mixture between two sheets of parchment paper and roll it out to about ¼ inch thickness. Put the whole thing on a baking sheet and refrigerate for 60 to 90 minutes until firm. Alternatively, you can roll the mixture into 1-inch balls, flatten them with your hand or a glass, and chill those instead.
Step 4: Cut Out Patties
Once chilled and firm, use a small round cookie cutter to cut out circles. Gather the scraps, re-roll them between parchment paper, and cut out more patties. Keep doing this until you’ve used all the mint mixture.
Step 5: Melt Chocolate
Melt the chocolate candy coating in a microwave-safe bowl according to package directions. Usually this means microwaving in 30-second bursts, stirring between each interval, until completely smooth. Make sure no lumps remain.
Step 6: Dip and Set
Drop each mint patty into the melted chocolate and use a fork to flip it over until completely coated. Lift it out, tap the fork gently on the edge of the bowl to shake off excess chocolate, then slide it onto a parchment-lined baking sheet. Let the patties sit at room temperature until the chocolate sets completely before storing.

Pro Tips & Cooking Hacks
- Keep your hands lightly dusted with powdered sugar to prevent sticking while kneading
- Work with half the mint mixture at a time, keeping the other half in the fridge
- Use a dipping fork or candy dipping tool for the neatest chocolate coating
- Tap the fork on the bowl edge several times to get rid of excess chocolate
- Add crushed peppermint candies on top before the chocolate sets for extra flair
Tips & Variations
Use dark chocolate candy coating instead of milk chocolate for a richer, less sweet version. You can also use white chocolate for a completely different look.
Change the filling color based on the holiday. Pink or red works great for Valentine’s Day, while keeping them white is perfect for a winter theme. Orange filling makes fun Halloween treats.
Drizzle melted white chocolate or contrasting dark chocolate over the tops in a zigzag pattern for a fancy bakery look. Do this while the base chocolate is still slightly soft so the drizzle sticks.
Serving Suggestions
These chocolate mint patties are perfect for holiday cookie trays alongside fudge, cookies, and other homemade candies. They add a pop of color and a refreshing mint flavor that balances sweeter treats.
Package them in small boxes or cellophane bags tied with ribbon for easy holiday gifts. Teachers, neighbors, and coworkers all appreciate homemade candy.
Serve them after dinner with coffee or hot chocolate for an easy dessert. One or two patties is the perfect sweet ending to a meal without being too heavy.
Common Mistakes
- Not chilling the mint centers long enough – they’ll fall apart when dipping
- Using too much food coloring – start with a little and add more as needed
- Not kneading in enough powdered sugar – the mixture will be too sticky
- Overheating the chocolate – this makes it seize up and become grainy
- Skipping the tap-off step – your patties will have thick, uneven chocolate coating
What to Serve With Chocolate Mint Patties
These patties are rich and sweet, so they pair perfectly with hot beverages. Serve them with coffee, hot chocolate, or peppermint tea for a cozy treat.
Add them to dessert boards with fresh berries, nuts, and other chocolates. The cool mint flavor provides a nice contrast to caramel or peanut butter candies.
Include them on ice cream sundae bars where guests can crumble them over vanilla or chocolate ice cream. They also make great garnishes for mint chocolate chip milkshakes.
Frequently Asked Questions
Can I use peppermint extract instead of mint?
Yes! Peppermint extract gives a brighter, sweeter flavor that many people prefer. Use the same amount.
How do I store these mint patties?
Store in an airtight container at room temperature for up to one week, in the fridge for up to two weeks, or freeze for up to three months.
Can I use chocolate chips instead of candy coating?
Yes, but add 2 to 3 teaspoons of coconut oil or shortening to help thin the chocolate so it coats smoothly.
Why is my mint filling sticky?
Keep kneading in more powdered sugar until the mixture is smooth and no longer sticks to your hands.
Do I have to use food coloring?
Not at all. The patties will taste exactly the same without it, but the green color makes them more festive and fun.
💬 Tried this recipe? Leave a comment and rating below!