This Chocolate Chip Pumpkin Bread became my family’s obsession after one rainy October morning when I threw together leftover canned pumpkin with some chocolate chips I found in the pantry. My teenage daughter took one bite and declared it “better than Starbucks” – high praise from a girl who lives on pumpkin spice everything! The house smelled so amazing that my husband came home from work asking what magical thing I’d been up to in the kitchen.
What makes this recipe special is how ridiculously moist it stays for days, thanks to a little orange juice trick my aunt taught me years ago. I’ve made this bread probably fifty times now, tweaking it until it’s absolutely perfect – not too sweet, perfectly spiced, with chocolate chips in every single bite.
❤️ Why You’ll Love This Recipe
In fact, my children squabble over the last slice of this bread, and it says a lot! It’s just the right amount of not-too-sweet good and somehow it’s even better on day two (that is, if it lasts that long).
The texture stays insane moist thanks to the pumpkin and that little orange juice secret, and the chocolate chips melt all around. I love that I can throw it together in one bowl without dragging out my stand mixer – perfect for those mornings when I want fresh bread but don’t want to spend forever cleaning up. Plus, my house smells like a pumpkin spice wonderland for hours after baking!
Print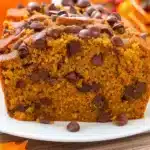
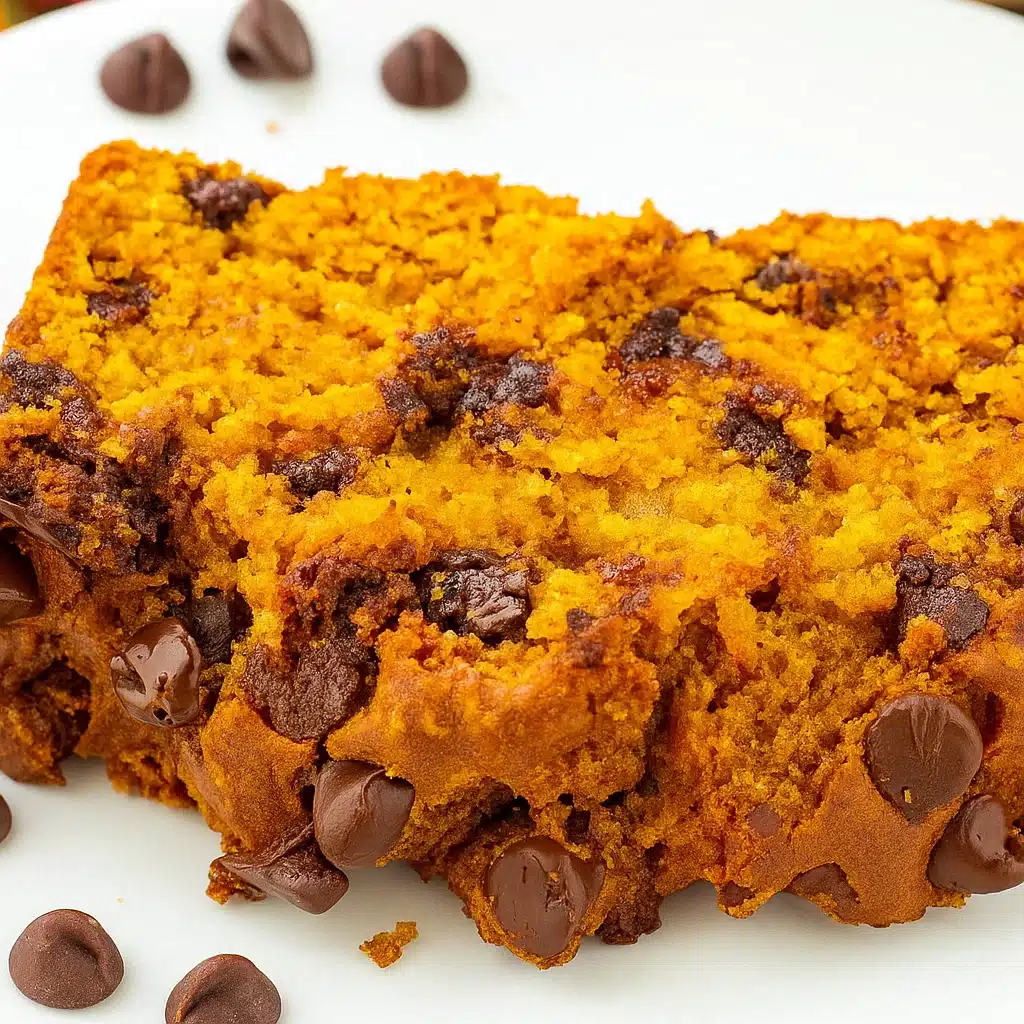
Chocolate Chip Pumpkin Bread
- Total Time: 1 hour 20 minutes
- Yield: 10–12 slices 1x
Description
This incredibly moist Chocolate Chip Pumpkin Bread combines warm fall spices with melty chocolate chips for the perfect autumn treat. Made in one bowl with simple ingredients, it’s ideal for breakfast, snacking, or sharing with friends.
Ingredients
Dry Ingredients:
-
- 1¾ cups all-purpose flour
-
- 1 tsp baking soda
-
- 2 tsp ground cinnamon
-
- ¼ tsp ground nutmeg
-
- ¼ tsp ground cloves
-
- ¼ tsp ground ginger (or use 2 tsp pumpkin pie spice instead of individual spices)
-
- ¾ tsp salt
Wet Ingredients:
-
- 2 large eggs
-
- ½ cup granulated sugar
-
- ¾ cup packed brown sugar
-
- 1½ cups pumpkin purée (canned or homemade—blot if watery)
-
- ½ cup vegetable oil (or melted coconut or canola oil)
-
- ¼ cup orange juice (or milk as an alternative)
-
- ⅔ cup semi-sweet chocolate chips (optional: sub with nuts, white chocolate, etc.)
Instructions
1. Get Everything Ready (5 minutes) First things first – preheat that oven to 350°F and grease your 9×5-inch loaf pan really well. I learned the hard way that skimping on the grease means half your beautiful bread stays stuck to the pan!
2. Mix Your Dry Stuff (3 minutes) Grab a medium bowl and whisk together all your dry ingredients – flour, baking soda, all those gorgeous spices, and salt. Make sure you get everything mixed evenly so every bite tastes the same.
3. Wet Ingredients Magic (5 minutes) In your big bowl, whisk together eggs, both sugars, pumpkin, oil, and that secret orange juice until it’s all smooth and combined. Don’t worry if it looks a little weird at first – pumpkin batter always does!
4. The Gentle Combination (3 minutes) Here’s where patience pays off – slowly add your dry ingredients to the wet stuff and stir just until you can’t see any more flour streaks. I cannot stress this enough: do NOT overmix! A few lumps are totally fine and actually better than tough bread.
5. Chocolate Chip Heaven (2 minutes) Fold in those chocolate chips gently. Pro tip from my many failed attempts: toss them in a tiny bit of flour first so they don’t all sink to the bottom while baking.
6. Into the Oven (60-65 minutes) Pour everything into your greased pan and slide it into the oven. After about 30 minutes, check if the top is getting too brown – if so, loosely cover with foil. You’ll know it’s done when a toothpick comes out with just a few moist crumbs clinging to it.
7. The Hardest Part – Waiting (30 minutes) Let this baby cool completely in the pan before you even think about slicing. I know it smells incredible and you want to dig in immediately, but warm bread will just fall apart into a crumbly mess.
Notes
Living in Colorado taught me about altitude baking the hard way – my first few attempts at this recipe were complete disasters until my neighbor clued me in. If you’re above 3,000 feet like I am, use only ¾ teaspoon of baking soda and add 2-3 extra tablespoons of flour. Saved my sanity!
I cannot stress enough how much the pan size matters. I tried making this in a smaller 8×4 pan once because it was all I had, and it overflowed everywhere. What a mess! Stick with the 9×5 inch size or you’ll be scraping batter off your oven floor like I was.
That salt measurement isn’t a typo, even though ¾ teaspoon seems like a lot. I tried cutting it in half once thinking I was being healthy, and the bread tasted flat and boring. The salt makes everything else taste better – don’t skip it!
- Prep Time: 15 minutes
- Cook Time: 60-65 minutes
- Category: Dessert, Breakfast, Snack
- Method: Baking
- Cuisine: American
Nutrition
- Serving Size: 1 slice (1/10 of loaf)
- Calories: 285
- Sugar: 24g
- Sodium: 245mg
- Fat: 9g
- Saturated Fat: 2g
- Unsaturated Fat: 6g
- Trans Fat: 0g
- Carbohydrates: 48g
- Fiber: 2g
- Protein: 4g
- Cholesterol: 35mg
📝 Ingredient List
Dry Ingredients:
- 1¾ cups all-purpose flour
- 1 tsp baking soda
- 2 tsp ground cinnamon
- ¼ tsp ground nutmeg
- ¼ tsp ground cloves
- ¼ tsp ground ginger (or use 2 tsp pumpkin pie spice instead of individual spices)
- ¾ tsp salt
Wet Ingredients:
- 2 large eggs
- ½ cup granulated sugar
- ¾ cup packed brown sugar
- 1½ cups pumpkin purée (canned or homemade—blot if watery)
- ½ cup vegetable oil (or melted coconut or canola oil)
- ¼ cup orange juice (or milk as an alternative)
- ⅔ cup semi-sweet chocolate chips (optional: sub with nuts, white chocolate, etc.)
🔍 Why These Ingredients Work
Okay, so here’s the deal with these ingredients – I learned most of this through years of kitchen disasters! The pumpkin purée is obviously the star, but I always use canned because fresh pumpkin can be way too watery (learned that the hard way). hat brown sugar will lend you those deep molasses flavors that just embrace the pumpkin flavor so well.
It was my aunt’s orange juice secret, and, to be honest, I thought she was nuts when she first told me about it. But it does contribute this little undernote of brightness that makes all the flavors pop without registering as citrusy. My biggest game-changer discovery was using oil instead of butter – this bread stays tender for literally days instead of getting dry and crumbly like butter-based recipes do.
Essential Tools and Equipment
You probably have everything you need already sitting in your kitchen. I use my old 9×5 loaf pan that’s seen better days – got it as a wedding gift fifteen years ago and it’s still going strong despite looking pretty beat up.
For mixing, just grab whatever bowls you have – one medium, one large. I use this old glass mixing bowl that my grandmother gave me because it is huge and nothing ever sticks to it. A plain old whisk works, but I also often use a fork if feeling lazy.
Measuring cups and spoons are obvious, and you’ll want a rubber spatula for folding in the chocolate chips. Oh, and keep some aluminum foil handy in case the top starts browning too fast – learned that one after making a few charcoal-topped loaves!
👩🍳 How To Make Chocolate Chip Pumpkin Bread
1. Get Everything Ready (5 minutes) First things first – preheat that oven to 350°F and grease your 9×5-inch loaf pan really well. I learned the hard way that skimping on the grease means half your beautiful bread stays stuck to the pan!
2. Mix Your Dry Stuff (3 minutes) Grab a medium bowl and whisk together all your dry ingredients – flour, baking soda, all those gorgeous spices, and salt. Make sure you get everything mixed evenly so every bite tastes the same.
3. Wet Ingredients Magic (5 minutes) In your big bowl, whisk together eggs, both sugars, pumpkin, oil, and that secret orange juice until it’s all smooth and combined. Don’t worry if it looks a little weird at first – pumpkin batter always does!
4. The Gentle Combination (3 minutes) Here’s where patience pays off – slowly add your dry ingredients to the wet stuff and stir just until you can’t see any more flour streaks. I cannot stress this enough: do NOT overmix! A few lumps are totally fine and actually better than tough bread.
5. Chocolate Chip Heaven (2 minutes) Fold in those chocolate chips gently. Pro tip from my many failed attempts: toss them in a tiny bit of flour first so they don’t all sink to the bottom while baking.
6. Into the Oven (60-65 minutes) Pour everything into your greased pan and slide it into the oven. After about 30 minutes, check if the top is getting too brown – if so, loosely cover with foil. You’ll know it’s done when a toothpick comes out with just a few moist crumbs clinging to it.
7. The Hardest Part – Waiting (30 minutes) Let this baby cool completely in the pan before you even think about slicing. I know it smells incredible and you want to dig in immediately, but warm bread will just fall apart into a crumbly mess.

Tips from Well-Known Chefs
You know what Ina Garten always says about vanilla extract making everything better? Well, she’s right, but here’s the thing – your spices matter just as much. I used to just buy the crappiest-smelling cinnamon at the grocery store, then my mom gave me some fancy-pants cinnamon from Williams Sonoma. Holy cow, what a difference!
Mary Berry makes me crazy at times with her perfectionism, but she is dead right about not opening the oven door too soon. I was (glancing) the whole time, and couldn’t figure out why my bread was caving in in the middle. Learned my lesson after ruining three loaves in a row!
❗ You Must Know
Listen, I’ve made some epic fails with this recipe over the years, so let me save you the heartache! Your eggs need to be room temperature – I learned this when my batter looked like cottage cheese because I used cold eggs straight from the fridge.
Here’s my personal secret that makes people think I’m some kind of baking genius: I always save about 2 tablespoons of chocolate chips to sprinkle on top before it goes in the oven. Makes it look like something straight out of a fancy bakery!
💡 Pro Tips & Cooking Hacks
After making this bread more times than I can count, here are my hard-won tips that’ll save you from the mistakes I’ve made:
If your pumpkin purée looks watery when you open the can, spread it on paper towels for about 10 minutes before using. I once made bread soup by skipping this step! Don’t have all those individual spices? Just use 2 teaspoons of pumpkin pie spice instead – works perfectly and saves you money.
That flour trick for chocolate chips I mentioned? Game changer. Just toss them in a tablespoon of flour before folding them in and they’ll stay distributed throughout instead of creating a chocolate chip graveyard at the bottom. And when it comes to slicing, use a sharp serrated knife with gentle sawing motions – clean the blade between cuts for pretty slices that don’t crumble.
🎨 Flavor Variations & Suggestions
My sister is obsessed with white chocolate and cranberries, so I swapped out the regular chocolate chips for white ones and threw in some dried cranberries – she literally cried when she tasted it. No joke, actual tears!
When my brother-in-law comes over (he’s allergic to chocolate), I make it with chopped walnuts instead. Still incredible, just different. My neighbor down the street does this crazy cream cheese swirl thing where she drops spoonfuls of sweetened cream cheese throughout the batter and swirls it with a knife before baking. I tried copying her technique but mine looked like a hot mess – hers comes out looking like art.
Last week I made a maple glaze version for my dad’s birthday because he’s obsessed with anything maple. Just whisked together some powdered sugar, real maple syrup, and a splash of milk. He ate three pieces and asked if I could make it again next weekend.
⏲️ Make-Ahead Options
This bread actually tastes better the day after I make it – all those flavors get cozy together overnight. I discovered this completely by accident when I made a loaf for my book club and forgot to bring it, so we had day-old bread instead. Everyone went crazy asking what I did differently!
Sometimes on Sunday nights I’ll mix up all the dry ingredients and store them in a big mason jar in my pantry. Then when I want fresh bread during the week, I just mix the wet stuff and combine everything. Takes maybe 10 minutes of actual work. I’ve also started making the wet ingredients the night before and keeping them in the fridge – saves me even more time in the morning.
The freezing thing was a total game-changer when I realized it. I now make two loaves at once, eat one fresh, and wrap the other one really well in plastic wrap and then foil. Three months later when I want pumpkin bread in the middle of winter, boom – tastes like I just baked it. Just let it thaw on the counter overnight.
Recipe Notes & Baker’s Tips
Living in Colorado taught me about altitude baking the hard way – my first few attempts at this recipe were complete disasters until my neighbor clued me in. If you’re above 3,000 feet like I am, use only ¾ teaspoon of baking soda and add 2-3 extra tablespoons of flour. Saved my sanity!
I cannot stress enough how much the pan size matters. I tried making this in a smaller 8×4 pan once because it was all I had, and it overflowed everywhere. What a mess! Stick with the 9×5 inch size or you’ll be scraping batter off your oven floor like I was.
That salt measurement isn’t a typo, even though ¾ teaspoon seems like a lot. I tried cutting it in half once thinking I was being healthy, and the bread tasted flat and boring. The salt makes everything else taste better – don’t skip it!
🍽️ Serving Suggestions
My favorite way to eat this is still warm from the oven (I know, I know, I said to let it cool completely, but sometimes I can’t help myself) with butter melting all over it and a big mug of coffee. My husband likes to toast day-old slices and eat them with his morning coffee while he reads the news.
My mom discovered that it’s amazing as a dessert when you warm it up slightly and put vanilla ice cream on top with caramel sauce drizzled over everything. She served it that way at her last dinner party and everyone assumed she’d ordered it from some fancy restaurant.
For brunch with friends, I’ll slice it up and arrange it on a pretty plate with some fresh berries and Greek yogurt. Looks all fancy but takes zero effort. Sometimes I’ll make chai tea instead of regular tea because the spices go so well together.
Sending you warm kitchens and the smell of cinnamon from my house to yours! Hope this recipe brings as much joy to your family as it has to mine.
🧊 How to Store Your Chocolate Chip Pumpkin Bread
I usually just cover mine with plastic wrap and leave it on the counter, where it stays good for about 4 days. Though honestly, it’s never lasted that long in my house – someone always finishes it off before then!
When I remember to put it in the fridge (which isn’t often), it keeps for about a week wrapped up tight. The cold makes it a little firmer, so I either let slices come back to room temperature or give them a quick 15-second zap in the microwave.
That freezer trick I mentioned earlier? Double wrap is key. First plastic wrap, then foil, and it’ll stay perfect for months. I learned this after finding a poorly wrapped loaf in my freezer that had turned into a brick of ice crystals. Such a waste!
⚠️ Allergy Information
Good news for my lactose-intolerant friends – this recipe is naturally dairy-free when you use vegetable oil! My cousin has terrible dairy issues and she can eat this without any problems.
For gluten-free folks, I’ve tried it with that Cup4Cup flour blend and it worked pretty well, though the texture was a bit different – more crumbly than the regular version. My friend with celiac disease said it was still delicious, just not quite as tender as the wheat version.
I haven’t had great luck with egg substitutes in this recipe. I tried those flax egg things once (2 tablespoons ground flaxseed mixed with 6 tablespoons water) and it came out really dense and weird. If you need egg-free, maybe try it, but don’t expect the same results.
❓ Questions I Get Asked A Lot
Q: Can I use fresh pumpkin instead of canned? A: Sure, but it’s way more work and honestly, I’ve never had better results than with canned. If you really want to use fresh, roast it first, puree it, then definitely blot it with paper towels because fresh pumpkin is usually much wetter than canned.
Q: Why does my pumpkin bread sink in the middle? A: Oh man, I’ve done this so many times! Usually it’s because I got impatient and opened the oven door too early, or I went crazy with the mixing. The batter should just barely come together – don’t beat the heck out of it like I used to do.
Q: Can I make this into muffins instead? A: Absolutely! I do this when I want individual portions for my kids’ lunch boxes. Just divide the batter among 12 muffin cups and bake at 350°F for about 18-22 minutes. They’re done when a toothpick comes out mostly clean.
Q: What’s the best way to measure pumpkin purée? A: I just pack it into the measuring cup like I would brown sugar – not super tight, but not loose either. If it looks really watery when I open the can, I spread it on paper towels first and let it sit for 10 minutes.
Q: Can I double this recipe? A: Yes, but use two separate 9×5 pans instead of trying to cram everything into one bigger pan. I learned this lesson when I tried to use a bigger pan and it took forever to bake through the middle. Two pans, same baking time, much better results.
I’m dying to hear how this turns out for you! Drop a comment below and let me know if you tried any of the variations or if your family loved it as much as mine does. Did your kids fight over the last slice too?
If you post photos on Instagram, tag me so I can see your beautiful loaves! Nothing makes me happier than seeing people actually make my recipes and enjoy them. Seriously, it makes my whole day.