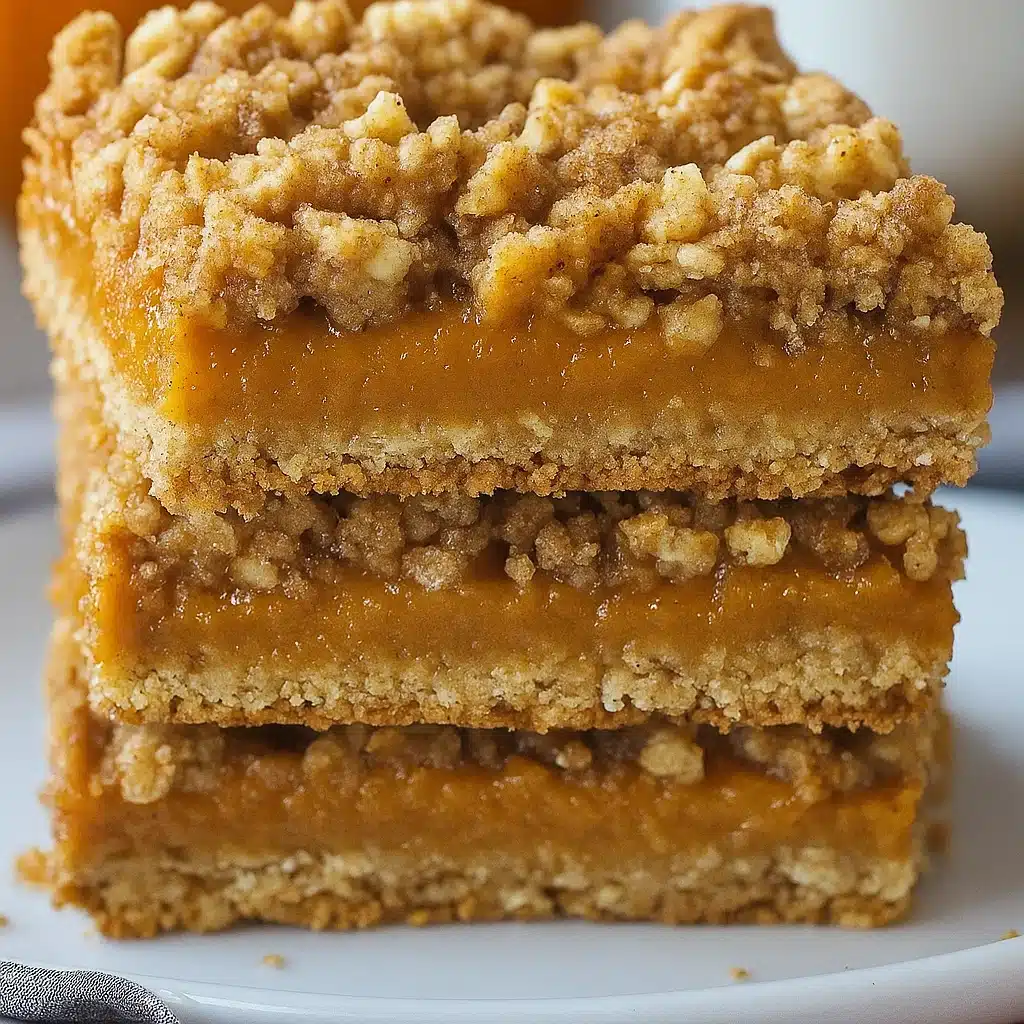
Pumpkin Pie Crumble Bars are everything we love about fall, all packed into one delicious bite. With their creamy spiced pumpkin filling, buttery crust, and golden oat crumble topping, they’re like pumpkin pie—but easier to make and even easier to share. Whether you’re hosting a cozy get-together or just want something sweet to go with your afternoon coffee, these bars are guaranteed to bring those warm, autumn vibes.
No joke, my teenage son who normally won’t touch anything with vegetables ate three pieces. The crumble part gets all crispy and buttery while the pumpkin stays creamy underneath.
❤️ Why You’ll Love This Recipe
Honestly, I’m obsessed with these bars. They taste like pumpkin pie had a baby with coffee cake – and I’m here for it. My husband actually asked me to make them again the next day, which never happens. They’re way easier than pie too since you just press everything into a pan instead of dealing with rolling pins and all that nonsense.
Print
Pumpkin Pie Crumble Bars
- Total Time: 1 hour
- Yield: 12 bars 1x
Description
Easy pumpkin pie crumble bars with a buttery cinnamon streusel crust and topping surrounding a creamy, spiced pumpkin filling. Perfect for fall gatherings and Thanksgiving dessert tables.
Ingredients
For the Streusel (Used as Crust and Topping):
- 1 cup granulated sugar
- 1 teaspoon baking powder
- ¼ teaspoon salt
- 3 cups all-purpose flour
- 1 teaspoon ground cinnamon
- 1 cup (2 sticks) unsalted butter, cold and cubed
- 1 large egg, lightly beaten
- 1 teaspoon vanilla extract
For the Pumpkin Filling:
- 3 cups 100% pumpkin purée
- 1 cup packed light brown sugar
- 2 large eggs
- 2 teaspoons vanilla extract
- 1 tablespoon pumpkin pie spice
Instructions
1. Get Your Pan Ready (5 minutes) Heat your oven to 375°F. Line a 9×13 pan with parchment paper but let some hang over the sides – you’ll thank me later when you’re trying to get them out. Spray it with cooking spray too.
2. Make the Crumble Stuff (8 minutes) Dump all your dry ingredients in a bowl and mix them up. Add the cold butter chunks and start mashing everything together with two knives or a pastry cutter. You want it to look like chunky breadcrumbs with some bigger pieces mixed in.
3. Press Down the Bottom (3 minutes) Take half of your crumble mixture and smoosh it into the bottom of your pan. Use a measuring cup to really pack it down hard – don’t be gentle here. You want it nice and compact.
4. Make the Pumpkin Part (5 minutes) Mix the pumpkin, brown sugar, eggs, vanilla, and spices in another bowl. Whisk it really well until there are no lumps. This is where having an electric mixer helps, but you can do it by hand if you’re feeling strong.
5. Put It All Together (2 minutes) Pour the pumpkin mixture over your pressed crust and spread it around evenly. Then sprinkle the rest of your crumble on top. Don’t press this part – just let it sit there looking messy and perfect.
6. Bake It (35-40 minutes) Stick it in the oven and wait. You’ll know it’s done when the top looks golden brown and the middle doesn’t wiggle when you jiggle the pan. The smell will make you crazy while you wait.
7. Cool Down Time (2+ hours) This is torture, but you have to let them cool completely, then put the whole thing in the fridge for at least 2 hours. I know it sucks to wait, but if you cut them too early, they’ll fall apart and look like a mess.
Notes
The key to perfect bars is patience – both in the preparation and the waiting! Don’t rush the chilling process, as it’s what gives you those clean, professional-looking cuts. If you’re in a hurry, you can speed up the cooling by placing the pan in the fridge after it reaches room temperature.
The streusel mixture might seem a bit dry at first, but it comes together beautifully once you add the egg and vanilla. If it still seems too crumbly, add a tablespoon of cold water.
- Prep Time: 20 minutes
- Cook Time: 40 minutes
- Category: Dessert
- Method: Baking
- Cuisine: American
Nutrition
- Serving Size: 1 bar
- Calories: 285
- Sugar: 28g
- Sodium: 125mg
- Fat: 16g
- Saturated Fat: 10g
- Unsaturated Fat: 5g
- Trans Fat: 0g
- Carbohydrates: 36g
- Fiber: 2g
- Cholesterol: 65mg
📝 Ingredient List
For the Streusel (Used as Crust and Topping):
- 1 cup granulated sugar
- 1 teaspoon baking powder
- ¼ teaspoon salt
- 3 cups all-purpose flour
- 1 teaspoon ground cinnamon
- 1 cup (2 sticks) unsalted butter, cold and cubed
- 1 large egg, lightly beaten
- 1 teaspoon vanilla extract
For the Pumpkin Filling:
- 3 cups 100% pumpkin purée
- 1 cup packed light brown sugar
- 2 large eggs
- 2 teaspoons vanilla extract
- 1 tablespoon pumpkin pie spice
Substitutions & Notes:
- Don’t have pumpkin pie spice? I just mix cinnamon, ginger, nutmeg, and cloves myself
- You can use dark brown sugar but it’ll be more molasses-y
- The butter HAS to be cold or you’ll get a weird texture
🔍 Why These Ingredients Work
So here’s the deal with these ingredients. The cold butter thing is super important – I found this out when I got impatient once and used softened butter. Total disaster. When cold butter melts in the oven, it creates these awesome little crispy pockets that make everything taste amazing.
The brown sugar is key because it gives you that molasses flavor that regular white sugar just can’t do. And get this – you use the exact same mixture for the bottom and the top, which means way less dishes to wash. My lazy side loves this about the recipe.
Essential Tools and Equipment
- 9×13-inch baking pan
- Parchment paper or foil
- Large mixing bowls
- Pastry cutter or two knives
- Whisk
- Measuring cups and spoons
👩🍳 How To Make Pumpkin Pie Crumble Bars
1. Get Your Pan Ready (5 minutes) Heat your oven to 375°F. Line a 9×13 pan with parchment paper but let some hang over the sides – you’ll thank me later when you’re trying to get them out. Spray it with cooking spray too.
2. Make the Crumble Stuff (8 minutes) Dump all your dry ingredients in a bowl and mix them up. Add the cold butter chunks and start mashing everything together with two knives or a pastry cutter. You want it to look like chunky breadcrumbs with some bigger pieces mixed in.
3. Press Down the Bottom (3 minutes) Take half of your crumble mixture and smoosh it into the bottom of your pan. Use a measuring cup to really pack it down hard – don’t be gentle here. You want it nice and compact.
4. Make the Pumpkin Part (5 minutes) Mix the pumpkin, brown sugar, eggs, vanilla, and spices in another bowl. Whisk it really well until there are no lumps. This is where having an electric mixer helps, but you can do it by hand if you’re feeling strong.
5. Put It All Together (2 minutes) Pour the pumpkin mixture over your pressed crust and spread it around evenly. Then sprinkle the rest of your crumble on top. Don’t press this part – just let it sit there looking messy and perfect.
6. Bake It (35-40 minutes) Stick it in the oven and wait. You’ll know it’s done when the top looks golden brown and the middle doesn’t wiggle when you jiggle the pan. The smell will make you crazy while you wait.
7. Cool Down Time (2+ hours) This is torture, but you have to let them cool completely, then put the whole thing in the fridge for at least 2 hours. I know it sucks to wait, but if you cut them too early, they’ll fall apart and look like a mess.
Tips from Well-Known Chefs
Ina Garten’s Tip: Let your eggs sit out for like 30 minutes before using them. Room temperature eggs mix way better and don’t make your filling all lumpy.
❗ You Must Know
DO NOT use pumpkin pie filling by accident. I did this once when I was rushing and grabbed the wrong can. The filling already has sugar and spices in it, so your bars will be disgustingly sweet and the texture gets all gooey. You want the plain pumpkin puree – just look for “100% pumpkin” on the label.
Something I always do: Add a tiny extra pinch of salt to the crumble mixture. My mom taught me this and it makes everything taste better. Don’t skip it.
💡 Pro Tips & Cooking Hacks
Keep your butter in the fridge until you absolutely need it. I actually stick my butter cubes back in the fridge while I’m measuring everything else. Room temperature butter makes the topping dense and weird instead of crumbly and awesome.
When you’re smooshing down the bottom crust, really go for it. I used to be all gentle and careful, but then the bottom would be too loose and fall apart. Now I press it down like I’m mad at it and it holds together perfectly.
Want clean slices? Run your knife under hot water and wipe it off between cuts. I saw this on some cooking show and it actually works. Also, seriously don’t skip the fridge time – I know you want to cut them right away, but they’ll be a crumbly mess if you do.
🎨 Flavor Variations & Suggestions
I’ve messed around with these bars so many times. My favorite thing to add is chopped pecans – maybe half a cup mixed into the crumble. It gives them this amazing crunch and makes them feel fancy enough for company.
Sometimes I’ll replace some of the brown sugar with maple syrup, which tastes incredible. My sister does this thing where she adds mini chocolate chips to the top layer and honestly, it’s dangerous. I can’t stop eating them when she brings them over.
If you need gluten-free, I’ve used the Cup4Cup flour blend and it works pretty well. The texture is a little different but still really good. Just make sure whatever blend you use has that gum stuff in it already.
⏲️ Make-Ahead Options
These are awesome for making ahead of time. I actually think they taste better the next day after everything has had time to hang out together in the fridge. You can make them up to 3 days early and they’ll still be perfect.
If you want to prep the crumble mixture ahead, you can keep it in the fridge for a couple days. Just let it come back to room temperature before you use it. I’ve even put the whole thing together and baked it the next day, though I wouldn’t wait longer than that.
For freezing, I cut them up first, then wrap each piece individually in plastic wrap. They’ll keep for months in the freezer and thaw out perfectly overnight in the fridge.
Recipe Notes & Baker’s Tips
The key to perfect bars is patience – both in the preparation and the waiting! Don’t rush the chilling process, as it’s what gives you those clean, professional-looking cuts. If you’re in a hurry, you can speed up the cooling by placing the pan in the fridge after it reaches room temperature.
The streusel mixture might seem a bit dry at first, but it comes together beautifully once you add the egg and vanilla. If it still seems too crumbly, add a tablespoon of cold water.
🍽️ Serving Suggestions
I usually serve these just as they are because they’re honestly perfect on their own. But when I want to get fancy for company, a dollop of fresh whipped cream on top is heavenly. My kids love them with a scoop of vanilla ice cream, especially when the bars are still slightly chilled from the fridge.
For parties, I like to cut them into smaller squares and dust them with a little powdered sugar – makes them look bakery-fancy. They’re great for potlucks because they travel well and you don’t need to worry about serving utensils like you do with regular pie.
These have become my go-to for fall gatherings, Thanksgiving dessert tables, and even weekend breakfast treats (don’t judge me). They’re also perfect for gift-giving – I wrap them in cellophane bags and my neighbors always ask when I’m making them again.
I really hope this recipe becomes a regular in your kitchen like it has in mine. There’s something so satisfying about making something from scratch that looks this good and tastes even better! 🍂
🧊 How to Store Your Pumpkin Pie Crumble Bars
Store these beauties covered in the refrigerator for up to 5 days – they actually taste better after a day or two as the flavors develop! They’re best served slightly chilled or at room temperature. Let them sit out for about 15 minutes before serving if you prefer them less cold.
For longer storage, wrap individual bars in plastic wrap and freeze for up to 3 months. Thaw overnight in the refrigerator before serving.
⚠️ Allergy Information
Contains: Gluten (flour), eggs, dairy (butter)
Substitutions:
- Gluten-Free: Use a 1:1 gluten-free flour blend
- Dairy-Free: Substitute cold vegan butter or coconut oil
- Egg-Free: Use flax eggs (1 tbsp ground flaxseed + 3 tbsp water per egg)
❓ Questions I Get Asked A Lot
Can I use fresh pumpkin instead of canned?
Absolutely! You’ll need about 2 pounds of sugar pumpkin. Roast, scoop, and purée until smooth. Make sure to drain excess moisture.
Why are my bars too crumbly?
This usually means the butter was too warm or the mixture was overworked. Keep butter cold and mix gently!
Can I make these in a different pan size?
Yes! Use an 8×8 pan for thicker bars (increase baking time by 10-15 minutes) or a larger pan for thinner bars (reduce baking time by 5-10 minutes).
How do I know when they’re done?
The top should be golden brown and the center should be set but still slightly jiggly. A toothpick inserted in the center should come out with just a few moist crumbs.
Can I double the recipe?
Absolutely! Use two 9×13 pans or one large sheet pan. Baking time may need to be adjusted.
💬 Tried this recipe? Leave a comment and rating below! I’d love to hear about your variations and how they turned out. Share your photos on social media and tag me – seeing your creations absolutely makes my day!