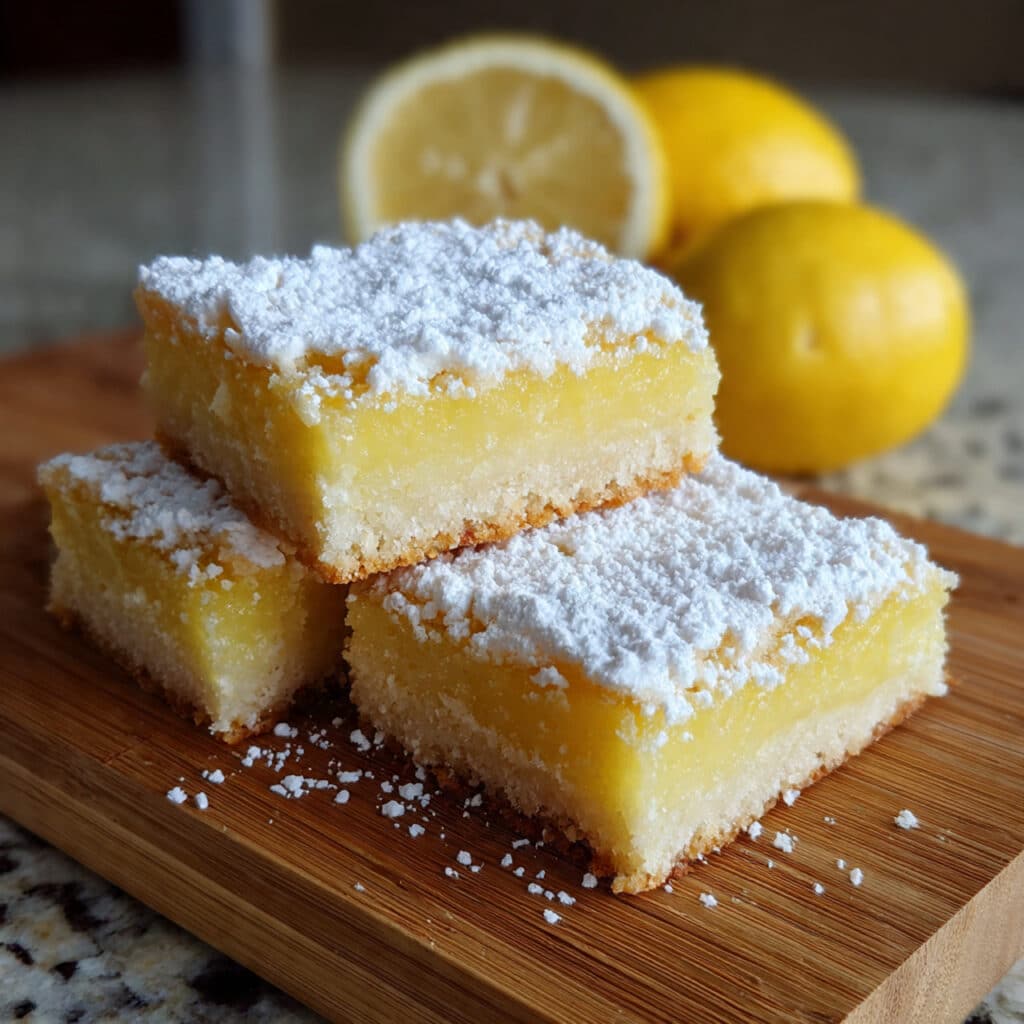
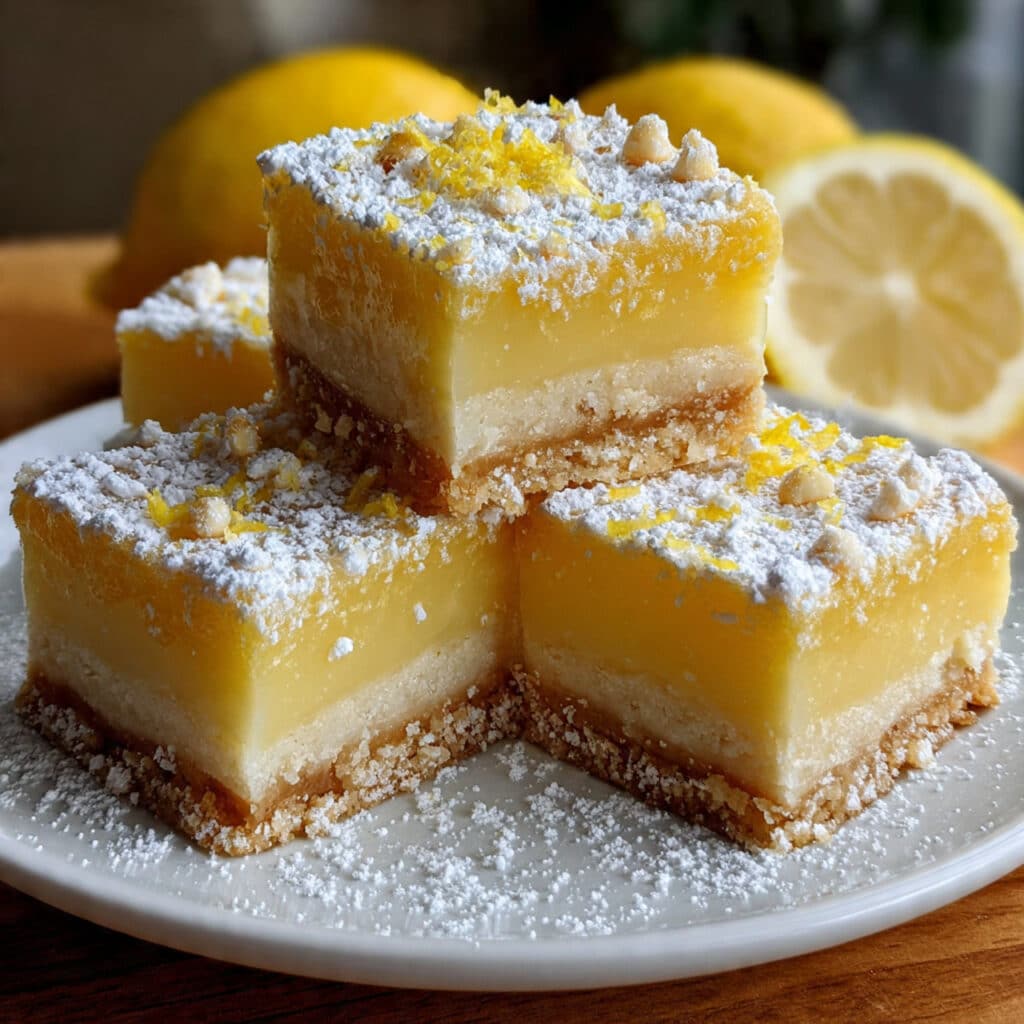
lemon bars are the ultimate crowd-pleaser for potlucks, summer BBQs, and holiday dessert tables across America. With a buttery shortbread crust and a silky-smooth lemon custard filling that strikes the perfect balance between tart and sweet, they’re impossible to resist.
I first fell in love with lemon bars at a church bake sale in Tennessee, where a sweet grandmother handed me a powdered-sugar-dusted square that melted in my mouth—I’ve been perfecting my own version ever since. Whether you’re feeding hungry kids after soccer practice or impressing guests at Easter brunch, this foolproof recipe delivers bakery-quality results every single time. Get ready for sunny citrus flavor in every bite!
Why You’ll Love This Recipe
- Beginner-friendly – No fancy techniques or pastry degree required! This recipe uses simple pantry staples and straightforward steps.
- Make-ahead magic – Perfect for busy schedules! These lemon bars actually taste better after chilling, so you can prep them a day ahead.
- Customizable sweetness – Adjust the sugar in the filling to make them more tart or sweeter based on your family’s taste.
- Portable and party-ready – Cut into neat squares that travel well to picnics, bake sales, and potlucks without falling apart.
- Fresh, real ingredients – Made with actual lemon juice and zest (no artificial flavoring here!), delivering authentic citrus brightness.
- Crowd-tested winner – Kids and adults alike devour these—the combination of buttery crust and tangy filling is universally loved.
Equipment Needed
- 9×13-inch baking pan
- Parchment paper
- Large mixing bowls (2)
- Whisk
- Measuring cups and spoons
- Pastry cutter, fork, or your clean hands
- Zester or microplane grater
- Citrus juicer (or handheld reamer)
- Oven mitts
- Wire cooling rack
- Sharp knife for cutting
- Fine-mesh sieve or sifter (for dusting powdered sugar)

Irresistible Lemon Bars Recipe
- Total Time: 2 hours 55 minutes
- Yield: One 9×13-inch pan 1x
Description
Classic homemade lemon bars with a buttery shortbread crust and tangy-sweet lemon custard filling. This easy recipe uses fresh lemon juice and simple pantry ingredients to create the perfect balance of tart and sweet. Topped with powdered sugar, these sunny treats are ideal for potlucks, holidays, and any time you crave bright citrus flavor!
Ingredients
For the Crust:
- 1 ¾ cups (220 g) all-purpose flour (can sub with 1:1 gluten-free flour blend)
- ½ cup (100 g) granulated sugar
- ½ teaspoon salt
- ¾ cup (1 ½ sticks / 170 g) unsalted butter, cold and cubed (salted butter works in a pinch—just omit the salt)
For the Lemon Filling:
- 4 large eggs, at room temperature
- 1 ½ cups (300 g) granulated sugar (reduce to 1 ¼ cups for extra-tart bars)
- ¼ cup (30 g) all-purpose flour
- 2 tablespoons lemon zest, from about 2 fresh lemons
- ⅔ cup (160 ml) fresh lemon juice, from about 3–4 lemons (bottled juice is okay but fresh is best!)
- Pinch of salt (optional, enhances flavor)
For Finishing:
- Powdered sugar (confectioners’ sugar), for dusting
Instructions
Preheat your oven to 350°F (175°C). Line a 9×13-inch baking pan with parchment paper, leaving a 2-inch overhang on two opposite sides—this creates handles for easy removal later. Lightly grease the parchment with butter or cooking spray to prevent sticking.
In a large mixing bowl, whisk together the flour, granulated sugar, and salt until evenly combined. This dry mixture forms the base of your buttery shortbread crust.
Add the cold, cubed butter to the flour mixture. Using a pastry cutter, fork, or your fingertips, work the butter into the dry ingredients until the mixture resembles coarse crumbs or wet sand. You should still see some pea-sized butter pieces.
Transfer the crumbly mixture to your prepared pan and press it firmly and evenly into the bottom using your hands or the bottom of a measuring cup. Bake for 15–18 minutes, until the edges are lightly golden brown. Remove from the oven but leave the oven on while you prepare the filling.
In a separate large bowl, whisk together the eggs, granulated sugar, and flour until completely smooth with no lumps.
Whisk in the fresh lemon zest and lemon juice until fully incorporated. The filling will be thin and pourable—this is perfect! Add a pinch of salt if desired for extra flavor depth.
Carefully pour the lemon filling evenly over the still-warm crust. The warmth helps the filling adhere and creates better texture. Use a spoon to spread gently if needed to reach all corners.
Return the pan to the oven and bake for 18–22 minutes. The filling is done when it’s set around the edges and barely jiggles in the center when you gently shake the pan. A toothpick inserted in the middle should come out mostly clean with just a few moist crumbs.
Let the lemon bars cool to room temperature on a wire rack (about 1 hour), then transfer to the refrigerator for at least 2 hours. This chilling step is crucial—it firms up the filling so the bars slice cleanly without falling apart.
Use the parchment paper overhang to lift the entire slab of lemon bars out of the pan onto a cutting board. Generously dust the top with powdered sugar using a fine-mesh sieve. Cut into 12–16 squares or rectangles using a sharp knife, wiping the blade clean between cuts for neat edges.
Notes
- Strain your filling: For ultra-smooth lemon bars, pour the filling through a fine-mesh strainer before adding it to the crust to remove any egg bits or zest chunks.
- Check doneness carefully: The filling will continue setting as it cools, so don’t overbake! A slight jiggle in the center is okay—it’ll firm up in the fridge.
- Clean cuts every time: Wipe your knife with a damp cloth between each cut to get picture-perfect squares without dragged filling.
- Wait to dust: Only add powdered sugar right before serving—it can absorb moisture and disappear if added too early.
- Avoid soggy crust: Pour the filling onto the warm (not hot) crust immediately after making it. Letting the crust cool completely can create a barrier.
- Prep Time: 15 minutes
- Cook Time: 40 minutes + Chill Time: 2 hours
- Category: Dessert
- Method: Baking
- Cuisine: American
Nutrition
- Serving Size: 1 bar
- Calories: 215
- Sugar: 24g
- Sodium: 95 mg
- Fat: 9g
- Saturated Fat: 5g
- Unsaturated Fat: 3g
- Trans Fat: 0g
- Carbohydrates: 32 g
- Fiber: 0.5g
- Protein: 3g
- Cholesterol: 70mg
Ingredients You’ll Need
For the Crust:
- 1 ¾ cups (220 g) all-purpose flour (can sub with 1:1 gluten-free flour blend)
- ½ cup (100 g) granulated sugar
- ½ teaspoon salt
- ¾ cup (1 ½ sticks / 170 g) unsalted butter, cold and cubed (salted butter works in a pinch—just omit the salt)
For the Lemon Filling:
- 4 large eggs, at room temperature
- 1 ½ cups (300 g) granulated sugar (reduce to 1 ¼ cups for extra-tart bars)
- ¼ cup (30 g) all-purpose flour
- 2 tablespoons lemon zest, from about 2 fresh lemons
- ⅔ cup (160 ml) fresh lemon juice, from about 3–4 lemons (bottled juice is okay but fresh is best!)
- Pinch of salt (optional, enhances flavor)
For Finishing:
- Powdered sugar (confectioners’ sugar), for dusting
Ingredient Notes
- Butter temperature matters: Cold butter is key for a crumbly, tender shortbread crust. Cut it into cubes and keep it chilled until you’re ready to mix.
- Fresh vs. bottled lemon juice: Fresh-squeezed lemon juice gives the brightest, most vibrant flavor. Bottled lemon juice works in a pinch but can taste slightly flat or artificial.
- Lemon zest is magic: Don’t skip it! The zest contains aromatic oils that add incredible depth. Just zest the yellow part—avoid the bitter white pith underneath.
- Room temperature eggs: They blend more smoothly into the filling. If you forget to take them out early, place whole eggs in warm water for 5 minutes.
- Sugar swaps: You can use organic cane sugar instead of granulated. Avoid brown sugar or coconut sugar as they’ll alter the color and flavor profile.
- Gluten-free option: Swap all-purpose flour with a 1:1 gluten-free baking blend (like King Arthur or Bob’s Red Mill) in both the crust and filling.
- Parchment paper hack: Lining your pan with parchment that overhangs makes lifting and cutting the bars super easy—don’t skip this step!
Step-by-Step Instructions
Step 1: Preheat and Prep Your Pan
Preheat your oven to 350°F (175°C). Line a 9×13-inch baking pan with parchment paper, leaving a 2-inch overhang on two opposite sides—this creates handles for easy removal later. Lightly grease the parchment with butter or cooking spray to prevent sticking.
Step 2: Mix the Crust Ingredients
In a large mixing bowl, whisk together the flour, granulated sugar, and salt until evenly combined. This dry mixture forms the base of your buttery shortbread crust.
Step 3: Cut in the Cold Butter
Add the cold, cubed butter to the flour mixture. Using a pastry cutter, fork, or your fingertips, work the butter into the dry ingredients until the mixture resembles coarse crumbs or wet sand. You should still see some pea-sized butter pieces.
Step 4: Press and Bake the Crust
Transfer the crumbly mixture to your prepared pan and press it firmly and evenly into the bottom using your hands or the bottom of a measuring cup. Bake for 15–18 minutes, until the edges are lightly golden brown. Remove from the oven but leave the oven on while you prepare the filling.
Step 5: Whisk Together the Filling Base
In a separate large bowl, whisk together the eggs, granulated sugar, and flour until completely smooth with no lumps.
Step 6: Add Lemon Zest and Juice
Whisk in the fresh lemon zest and lemon juice until fully incorporated. The filling will be thin and pourable—this is perfect! Add a pinch of salt if desired for extra flavor depth.
Step 7: Pour Filling Over Warm Crust
Carefully pour the lemon filling evenly over the still-warm crust. The warmth helps the filling adhere and creates better texture. Use a spoon to spread gently if needed to reach all corners.
Step 8: Bake Until Set
Return the pan to the oven and bake for 18–22 minutes. The filling is done when it’s set around the edges and barely jiggles in the center when you gently shake the pan. A toothpick inserted in the middle should come out mostly clean with just a few moist crumbs.
Step 9: Cool Completely
Let the lemon bars cool to room temperature on a wire rack (about 1 hour), then transfer to the refrigerator for at least 2 hours. This chilling step is crucial—it firms up the filling so the bars slice cleanly without falling apart.
Step 10: Lift, Dust, and Cut
Use the parchment paper overhang to lift the entire slab of lemon bars out of the pan onto a cutting board. Generously dust the top with powdered sugar using a fine-mesh sieve. Cut into 12–16 squares or rectangles using a sharp knife, wiping the blade clean between cuts for neat edges.
Pro Tips & Cooking Hacks
- Cold butter = flaky crust: Don’t let your butter soften! Cold butter creates those delicious crumbly pockets in the shortbread base.
- Zest before juicing: Always zest your lemons before cutting and juicing them—it’s nearly impossible to zest a halved lemon!
- Strain your filling: For ultra-smooth lemon bars, pour the filling through a fine-mesh strainer before adding it to the crust to remove any egg bits or zest chunks.
- Check doneness carefully: The filling will continue setting as it cools, so don’t overbake! A slight jiggle in the center is okay—it’ll firm up in the fridge.
- Clean cuts every time: Wipe your knife with a damp cloth between each cut to get picture-perfect squares without dragged filling.
- Wait to dust: Only add powdered sugar right before serving—it can absorb moisture and disappear if added too early.
- Avoid soggy crust: Pour the filling onto the warm (not hot) crust immediately after making it. Letting the crust cool completely can create a barrier.
- Double the recipe: These disappear fast! This recipe doubles perfectly—just use two 9×13 pans or one large sheet pan and adjust baking time by 3–5 minutes.
- Meyer lemon upgrade: Swap regular lemons for Meyer lemons for a sweeter, more floral flavor that’s absolutely divine.
Tips & Variations
Storage:
- Store lemon bars in an airtight container in the refrigerator for up to 5 days. Layer parchment paper between stacked bars to prevent sticking.
- For longer storage, freeze un-dusted bars in a freezer-safe container for up to 3 months. Thaw in the fridge overnight and dust with powdered sugar before serving.
Make-Ahead:
- These are perfect make-ahead desserts! Bake them 1–2 days in advance and keep chilled. The flavors actually meld and improve over time.
- You can also prep the crust and freeze it unbaked for up to 1 month. Bake from frozen, adding 3–5 extra minutes.
Flavor Variations:
- Lime bars: Substitute lime zest and juice for a tropical twist—Key limes work beautifully!
- Orange bars: Use orange zest and juice for a sweeter, mellower citrus flavor.
- Raspberry lemon: Add ½ cup fresh raspberries scattered over the crust before pouring the filling.
- Lavender lemon: Steep 1 tablespoon culinary lavender in the warm lemon juice for 10 minutes, then strain before adding to filling.
Dietary Modifications:
- Gluten-free: Use certified gluten-free 1:1 flour in both crust and filling.
- Dairy-free: Replace butter with vegan butter or coconut oil (chilled solid) for the crust.
- Lower sugar: Reduce filling sugar to 1 cup for a more intensely tart result.
Serving Suggestions
Lemon bars shine brightest at spring and summer gatherings—think Easter brunches, Mother’s Day celebrations, Fourth of July picnics, and backyard graduation parties. Serve them alongside fresh berries (strawberries and blueberries are perfect), a dollop of whipped cream, or a scoop of vanilla ice cream for an extra-special treat. They pair beautifully with hot coffee, iced tea, or sparkling lemonade.
For an elegant presentation, arrange the bars on a white serving platter and garnish with fresh mint leaves and thin lemon slices. If you’re hosting a dessert buffet, set out these lemon bars next to brownies and cookies for variety—the bright yellow color and tangy flavor provide a refreshing contrast to chocolate-heavy sweets.
Common Mistakes
- Cutting bars too soon: The filling needs at least 2 hours of chilling to set properly. Cutting warm bars results in a gooey mess that won’t hold its shape.
- Overbaking the crust: A pale golden crust is perfect—if it’s dark brown, it’ll taste bitter and dry. Watch closely during those last few minutes!
- Using bottled lemon juice exclusively: Bottled juice lacks the bright, fresh flavor that makes these bars special. Always use fresh lemons when possible.
- Skipping the parchment paper: Without parchment overhang, you’ll struggle to remove the bars cleanly and may end up with crumbled edges.
- Undermixing the filling: Whisk thoroughly until no streaks of egg whites remain—lumpy filling creates uneven texture.
- Not sifting powdered sugar: Clumpy powdered sugar looks messy. Use a sifter or fine-mesh strainer for an even, professional-looking dusting.
- Adding too much flour to filling: Measure carefully! Too much flour makes the filling thick and cakey instead of silky and custard-like.
What to Serve With Lemon Bars
These tangy-sweet treats are incredibly versatile for American gatherings. Serve them as the refreshing finale to a heavy barbecue spread featuring pulled pork, coleslaw, and cornbread—the citrus cuts through rich, smoky flavors beautifully.
They’re also perfect for afternoon tea parties alongside cucumber sandwiches, scones, and fresh fruit salad.
For casual get-togethers, set out a dessert table with lemon bars, chocolate chip cookies, and brownies so guests can sample a variety. Pair with cold beverages like sweet tea, lemonade, or even a citrus-forward white wine (Sauvignon Blanc works wonderfully) for adult gatherings.
Frequently Asked Questions
Can I use bottled lemon juice instead of fresh?
Yes, you can use bottled lemon juice in a pinch, but fresh-squeezed juice delivers significantly brighter, more vibrant flavor. Fresh lemons also provide the essential zest that bottled juice cannot replicate. If you must use bottled, add an extra tablespoon of zest to boost the citrus aroma.
How do I know when the lemon bars are done baking?
The filling should be set around the edges and only slightly jiggly in the very center when you gently shake the pan. A toothpick inserted 1 inch from the edge should come out clean, while the center may have a few moist crumbs. Remember, the filling continues to set as it cools and chills, so slight underbaking is better than overbaking, which creates a rubbery texture.
Why is my crust crumbly and falling apart?
The crust needs enough butter to bind together—make sure you’re using the full ¾ cup and working it thoroughly into the flour mixture until it resembles wet sand. Also, press the crust firmly and evenly into the pan; loose, lightly packed crust won’t hold together after baking. If your butter was too warm when mixing, the crust may also be greasy and crumbly.
Can I make lemon bars ahead of time for a party?
Absolutely! Lemon bars are ideal make-ahead desserts. Bake them 1–2 days in advance, let them cool and chill completely, then store covered in the refrigerator. Wait to dust with powdered sugar until 1–2 hours before serving to keep it looking fresh. You can also freeze them (without powdered sugar) for up to 3 months.
My lemon bars turned out runny—what went wrong?
Runny filling usually means they weren’t baked long enough or weren’t chilled sufficiently. Make sure to bake until the filling is set (not jiggly) and then refrigerate for at least 2 full hours before cutting. Also double-check that you used the correct amount of flour in the filling—it helps thicken the custard. If you accidentally added too much lemon juice, that can also create a runny consistency.
💬 Tried this recipe? Leave a comment and rating below! Did you add your own twist? Share your variations