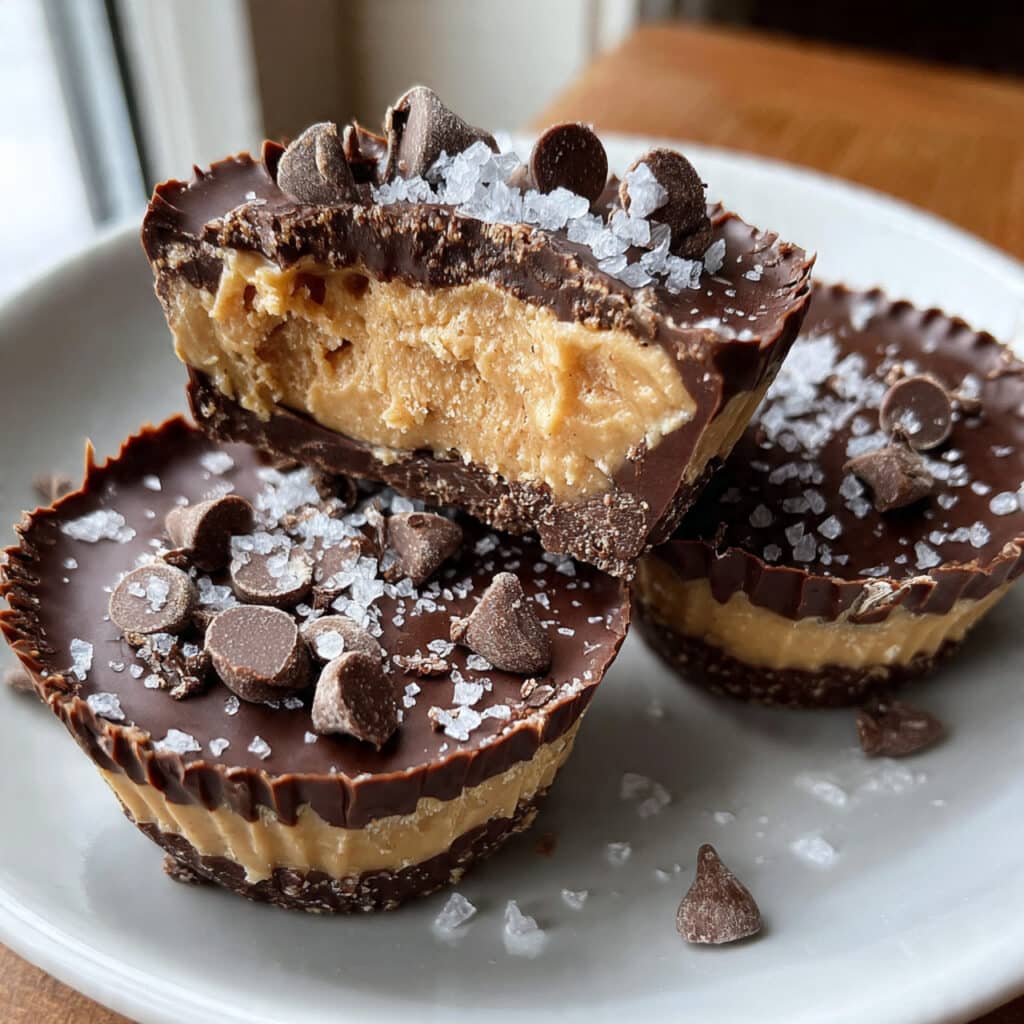
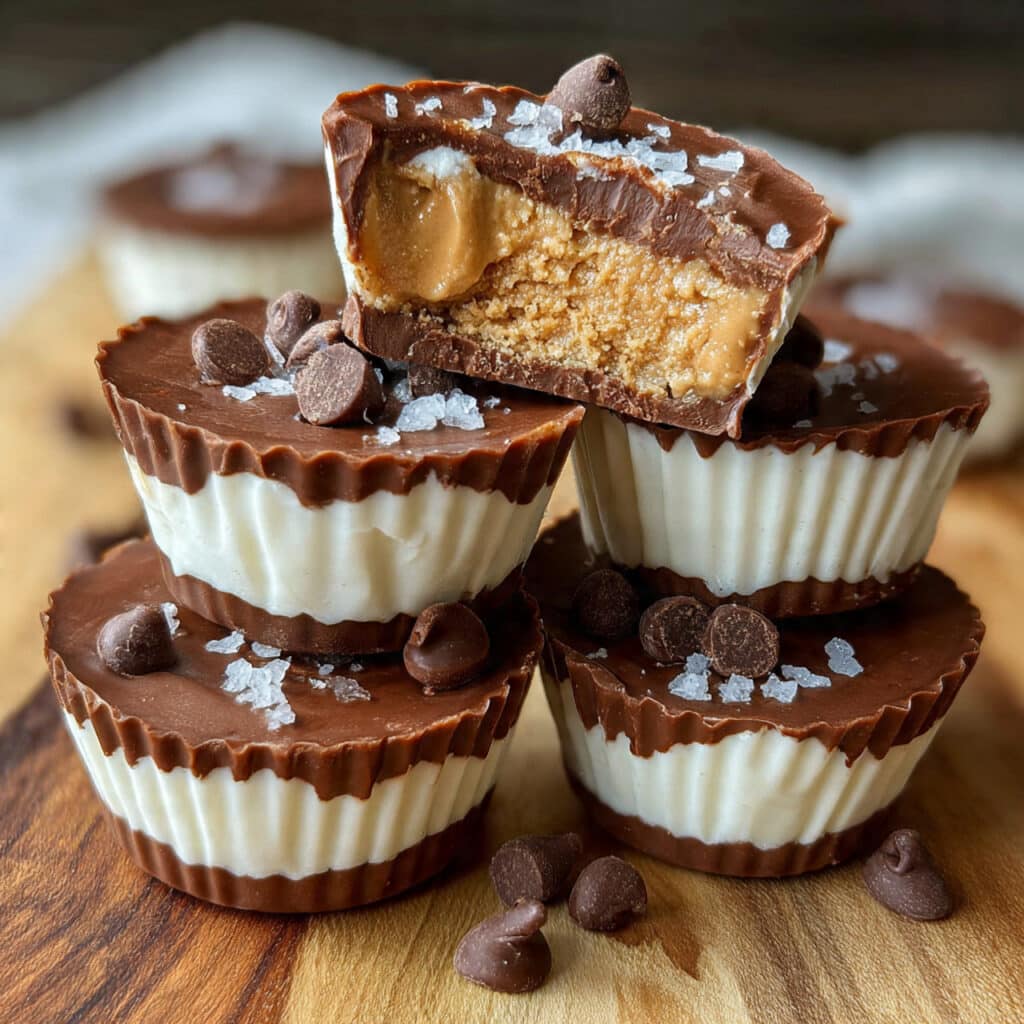
Greek yogurt peanut butter frozen cups are the perfect high-protein snack that tastes like you’re eating Reese’s peanut butter cups for breakfast! These perfectly portioned frozen treats are creamy, satisfying, and made with wholesome ingredients you can feel good about.
I started making these for my kids’ after-school snacks, but honestly, I eat more of them than they do—they’re that addictive! With just 15 minutes of prep and a handful of pantry staples, you’ll have a batch of grab-and-go treats that’ll keep you satisfied between meals without any guilt.
Why You’ll Love This Recipe
- Portion Controlled – No more eating the entire container! These cups give you built-in portion control.
- High Protein – Packed with protein from Greek yogurt and peanut butter to keep you full for hours.
- Tastes Like Dessert – Seriously tastes like peanut butter cups, but it’s actually good for you!
- Meal Prep Friendly – Make a big batch and have healthy snacks ready all week long.
- Kid Approved – My picky eaters devour these, and they have no idea they’re eating yogurt!
Equipment Needed
- 12-cup muffin tin (or silicone muffin cups)
- Paper or silicone muffin liners
- Large mixing bowl
- Whisk
- Small microwave-safe bowl
- Spoon or small ice cream scoop

Greek Yogurt Peanut Butter Frozen Cups
- Total Time: 4 hours 15 minutes
- Yield: 10–12 cups 1x
Description
High-protein Greek yogurt peanut butter frozen cups that taste like healthy Reese’s cups! Made with creamy Greek yogurt, peanut butter, and topped with chocolate. Perfect for meal prep and portion control!
Ingredients
For the Peanut Butter Yogurt Filling:
-
- 2 cups full-fat Greek yogurt (or 2% Greek yogurt)
-
- 1/2 cup creamy peanut butter (natural or regular)
-
- 3–4 tablespoons honey or maple syrup
-
- 1 teaspoon vanilla extract
-
- Pinch of sea salt
-
- 2–3 tablespoons vanilla protein powder (optional)
For the Chocolate Shell:
-
- 1 cup chocolate chips (6 oz)
-
- 2 tablespoons coconut oil
Instructions
Line a 12-cup muffin tin with paper liners or silicone cups. I actually prefer silicone muffin cups because the frozen treats pop out super easily and they’re reusable!
In a large bowl, whisk together Greek yogurt, peanut butter, 3 tablespoons honey, vanilla extract, sea salt, and protein powder if using. Whisk until completely smooth and creamy with no lumps. Taste and add the extra tablespoon of honey if you want it sweete
Spoon or scoop the yogurt mixture into the prepared muffin cups, filling each about 3/4 full. You want to leave a little room at the top for the chocolate shell!
Place the muffin tin in the freezer and freeze for at least 4 hours, or overnight for best results. They need to be completely frozen solid before adding the chocolate, or the chocolate won’t set properly!
Once your cups are frozen solid, combine chocolate chips and coconut oil in a microwave-safe bowl. Microwave in 30-second intervals, stirring between each one, until completely smooth and melted. Let cool for 2-3 minutes so it’s not scalding hot.
Remove cups from the muffin tin (silicone cups make this so easy!). Working quickly, dip the top of each frozen cup into the melted chocolate or spoon chocolate over the tops. The chocolate will harden almost immediately on contact with the frozen yogurt
Return the chocolate-topped cups to the freezer for at least 15-20 minutes to let that chocolate shell fully set. Once set, transfer to a freezer bag or airtight container. They’ll keep for up to 3 months! Let sit at room temperature for 2-3 minutes before eating for the creamiest texture.
Notes
Perfect Chocolate Dipping: Work with 3-4 cups at a time, keeping the rest in the freezer so they stay frozen solid while you work.
No Time for Chocolate Shell? Fold mini chocolate chips directly into the yogurt mixture and skip the topping step entirely!
Make Them Mini: Use a mini muffin tin for bite-sized treats that are perfect for portion control or kids’ lunchboxes.
Prevent Sticking: If using paper liners, let cups sit out 2-3 minutes before trying to peel off the paper.
- Prep Time: 15 minutes
- Cook Time: Freeze Time: 4 hours
- Category: Dessert
- Method: Freezing
- Cuisine: American
Nutrition
- Calories: 165
- Sugar: 13g
- Sodium: 90mg
- Fat: 10g
- Saturated Fat: 4g
- Unsaturated Fat: 5g
- Trans Fat: 0g
- Carbohydrates: 15g
- Fiber: 1.5g
- Protein: 7g
- Cholesterol: 8mg
Ingredients You’ll Need
For the Peanut Butter Yogurt Filling:
- 2 cups full-fat Greek yogurt (or 2% Greek yogurt)
- 1/2 cup creamy peanut butter (natural or regular)
- 3-4 tablespoons honey or maple syrup
- 1 teaspoon vanilla extract
- Pinch of sea salt
- 2-3 tablespoons vanilla protein powder (optional)
For the Chocolate Shell:
- 1 cup chocolate chips (6 oz)
- 2 tablespoons coconut oil
Ingredient Notes
- Greek Yogurt: Use full-fat or 2% for the creamiest texture! Low-fat or fat-free yogurt will freeze icy instead of creamy. The fat content is crucial for that smooth, ice cream-like consistency.
- Peanut Butter: Creamy peanut butter works best for smooth texture, but crunchy would add fun texture! Any nut butter works—try almond, cashew, or sunflower seed butter for nut-free. Natural peanut butter gives the best flavor.
- Sweetener: Start with 3 tablespoons and taste before freezing. The amount needed depends on how sweet your yogurt and protein powder are. Remember, freezing dulls sweetness slightly.
- Protein Powder: Totally optional but adds great flavor and helps the cups hold their shape better! Use vanilla, chocolate, or even salted caramel flavor.
- Chocolate: Semi-sweet, milk, or dark chocolate chips all work. The coconut oil helps the chocolate set up with that satisfying “crack” when you bite in!
Step-by-Step Instructions
Step 1: Prep Your Muffin Tin
Line a 12-cup muffin tin with paper liners or silicone cups. I actually prefer silicone muffin cups because the frozen treats pop out super easily and they’re reusable!
Step 2: Make the Peanut Butter Yogurt Mixture
In a large bowl, whisk together Greek yogurt, peanut butter, 3 tablespoons honey, vanilla extract, sea salt, and protein powder if using. Whisk until completely smooth and creamy with no lumps. Taste and add the extra tablespoon of honey if you want it sweete
Step 3: Fill the Cups
Spoon or scoop the yogurt mixture into the prepared muffin cups, filling each about 3/4 full. You want to leave a little room at the top for the chocolate shell!
Step 4: Freeze Until Solid
Place the muffin tin in the freezer and freeze for at least 4 hours, or overnight for best results. They need to be completely frozen solid before adding the chocolate, or the chocolate won’t set properly!
Step 5: Make the Chocolate Shell
Once your cups are frozen solid, combine chocolate chips and coconut oil in a microwave-safe bowl. Microwave in 30-second intervals, stirring between each one, until completely smooth and melted. Let cool for 2-3 minutes so it’s not scalding hot.
Step 6: Add the Chocolate Topping
Remove cups from the muffin tin (silicone cups make this so easy!). Working quickly, dip the top of each frozen cup into the melted chocolate or spoon chocolate over the tops. The chocolate will harden almost immediately on contact with the frozen yogurt
Step 7: Final Freeze and Store
Return the chocolate-topped cups to the freezer for at least 15-20 minutes to let that chocolate shell fully set. Once set, transfer to a freezer bag or airtight container. They’ll keep for up to 3 months! Let sit at room temperature for 2-3 minutes before eating for the creamiest texture.
Pro Tips & Cooking Hacks
- Perfect Chocolate Dipping: Work with 3-4 cups at a time, keeping the rest in the freezer so they stay frozen solid while you work.
- No Time for Chocolate Shell? Fold mini chocolate chips directly into the yogurt mixture and skip the topping step entirely!
- Make Them Mini: Use a mini muffin tin for bite-sized treats that are perfect for portion control or kids’ lunchboxes.
- Prevent Sticking: If using paper liners, let cups sit out 2-3 minutes before trying to peel off the paper.
- Uniform Size: Use a small ice cream scoop to portion the yogurt mixture evenly into each cup.
Tips & Variations
Storage: Keep frozen cups in an airtight container or freezer bag for up to 3 months. Let them sit at room temperature for 2-3 minutes before eating for the perfect creamy texture—straight from the freezer they’ll be rock hard!
Make It Dairy-Free: Use coconut yogurt (the thick, creamy kind like CocoJune) and dairy-free chocolate chips. They turn out just as delicious as the regular version!
Flavor Variations: Try chocolate Greek yogurt with chocolate protein powder for double chocolate cups, add 1/2 teaspoon cinnamon for snickerdoodle vibes, fold in chopped strawberries for strawberry peanut butter cups, or use almond butter and add sliced almonds on top before the chocolate for almond joy cups!
Serving Suggestions
These frozen cups are perfect for afternoon snacks, post-workout fuel, or a healthier dessert option after dinner. I love packing them in my kids’ lunchboxes with an ice pack—they stay frozen until lunchtime and the kids feel like they’re getting a special treat!
Let them sit at room temperature for 2-3 minutes before eating so they’re creamy, not rock-hard. They’re also amazing crumbled over a smoothie bowl, broken into chunks for a protein-packed sundae topping, or enjoyed alongside fresh berries and a cup of coffee for a satisfying breakfast.
Common Mistakes
- Using low-fat yogurt: This creates icy cups instead of creamy ones. Always use full-fat or 2% Greek yogurt!
- Adding chocolate before cups are frozen solid: The chocolate will just slide off or sink in. Make sure they’re completely frozen first!
- Chocolate too hot: Let the melted chocolate cool for 2-3 minutes before dipping, or it might melt the yogurt.
- Eating them straight from freezer: Give them 2-3 minutes at room temperature first for the best creamy texture!
What to Serve With Greek Yogurt Peanut Butter Frozen Cups
These cups are delicious on their own, but they pair wonderfully with fresh fruit like sliced strawberries, banana coins, or apple slices spread with extra peanut butter. For a more substantial snack, serve alongside a handful of nuts or trail mix for added crunch and healthy fats.
They’re also perfect as part of a protein-packed breakfast alongside scrambled eggs and whole grain toast, or as a post-workout recovery snack with a protein shake. My teenagers love grabbing one after practice with a glass of milk for quick refueling!
Frequently Asked Questions
Can I use low-fat Greek yogurt?
I really don’t recommend it! Low-fat yogurt has more water content and will freeze icy instead of creamy. The fat in full-fat or 2% yogurt is what creates that smooth, ice cream-like texture.
Do I have to add the chocolate shell?
Nope! The chocolate is delicious but totally optional. You can fold chocolate chips into the yogurt mixture instead, or just enjoy them plain. They’re still delicious without the chocolate!
Can I skip the protein powder?
Absolutely! Greek yogurt already has plenty of protein (around 15-20g per cup), so you’ll still get a high-protein snack without the powder. It just adds extra flavor and helps them hold their shape a bit better.
Why is my chocolate sliding off?
This usually means your cups weren’t completely frozen solid before dipping. Make sure they’re frozen for at least 4 hours before adding the chocolate. Also, work quickly and keep extras in the freezer while you’re working!
How many cups does this recipe make?
This makes 10-12 regular-sized muffin cups, or about 24 mini cups if using a mini muffin tin. The exact number depends on how full you fill each cup!
💬 Tried this recipe? Leave a comment and rating below! I’d love to hear what flavor combinations you tried or if you made any fun variations!