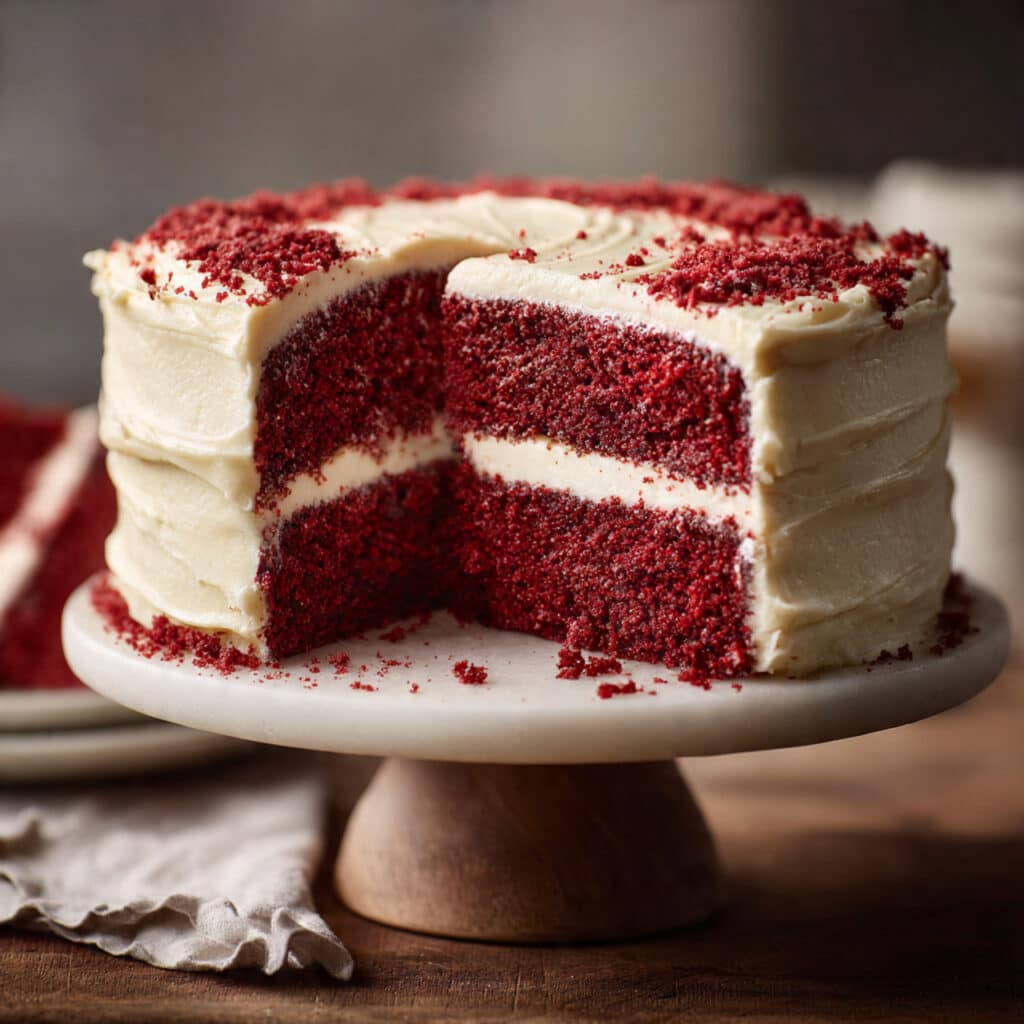
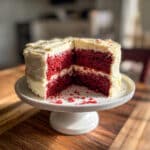
Red Velvet Birthday Cake with Cream Cheese Frosting is the showstopper dessert that turns any celebration into an unforgettable event. This stunning three-layer cake features the most tender, velvety crumb you’ve ever tasted, with just a hint of cocoa and that signature tangy flavor that makes red velvet so special.
Wrapped in clouds of smooth, tangy cream cheese frosting, this cake looks as gorgeous as it tastes with its vibrant red layers peeking through white frosting. Whether you’re celebrating a milestone birthday, anniversary, or just want to make someone feel extra special, this cake delivers bakery-quality results right from your home kitchen.
Why You’ll Love This Recipe
- Moist, tender layers that stay soft for days
- Foolproof recipe that works every single time
- Stunning presentation perfect for special occasions
- Rich cream cheese frosting that’s not too sweet
- Can be made a day ahead for stress-free party prep
Equipment Needed
- Three 8-inch round cake pans
- Parchment paper rounds
- Large mixing bowls
- Electric mixer (stand or hand)
- Rubber spatula
- Wire cooling racks
- Cake turntable (optional but helpful)
- Offset spatula for frosting
- Serrated knife for leveling
Classic Red Velvet Birthday Cake with Cream Cheese Frosting
- Total Time: 150 minutes
- Yield: 12 servings 1x
Description
Classic Red Velvet Birthday Cake with Cream Cheese Frosting creates show-stopping celebration centerpiece with its vibrant red layers and fluffy white frosting. This traditional Southern favorite features tender, moist cake with subtle cocoa flavor perfectly balanced by tangy cream cheese frosting.
Ingredients
-
- 2 cups granulated sugar
-
- ½ cup neutral oil
-
- ½ cup unsalted butter, melted and cooled
-
- 3 large eggs, room temperature
-
- 2 tsp vanilla extract
-
- 1 cup buttermilk, room temperature
-
- 1 tsp distilled white vinegar
-
- 1–1½ tbsp red gel food coloring
-
- 2 tbsp Dutch-process cocoa powder
-
- ½ cup boiling water
-
- 2½ cups all-purpose flour
-
- 2 tbsp cornstarch
-
- 1 tsp baking soda
-
- 1 tsp baking powder
-
- ½ tsp fine salt
For the Cream Cheese Frosting:
-
- 12 oz cream cheese, cold
-
- ¾ cup unsalted butter, cool room temperature
-
- 2 tsp vanilla extract
-
- Pinch fine salt
-
- 3–3½ cups powdered sugar
Instructions
Preheat your oven to 350°F and prepare three 8-inch round cake pans by greasing them thoroughly, lining the bottoms with parchment rounds, then greasing again.
In a large bowl, whisk together the sugar, oil, and melted butter until the mixture becomes glossy and slightly thickened. Add eggs one at a time, whisking well after each addition until fully incorporated.
Stir in the vanilla, then whisk in the buttermilk, vinegar, and red food coloring until the mixture is vibrant and smooth.
In a small bowl, whisk the cocoa powder with the boiling water until completely smooth with no lumps remaining. This “blooming” process awakens the cocoa’s flavor compounds and ensures even distribution throughout your batter. Stir this chocolate mixture into your wet ingredients until evenly combined.
In a separate bowl, sift together the flour, cornstarch, baking soda, baking powder, and salt. Gently fold the dry ingredients into the wet mixture in two additions, stirring just until no streaks of flour remain.
Divide the batter evenly among your three prepared pans, using a kitchen scale for precision if you have one. Bake for 23-25 minutes, rotating the pans halfway through, until the centers spring back when lightly touched and a toothpick comes out with moist crumbs.
Cool in pans for 10 minutes, then turn out onto wire racks to cool completely before frosting.
Beat the cream cheese until smooth, then add butter and beat until creamy. Mix in vanilla and salt, then gradually beat in powdered sugar until light and fluffy. Level your cake layers if needed by trimming any domed tops with a serrated knife.
Place the first layer on a cake stand, spread with frosting, repeat with remaining layers, then apply a thin crumb coat. Chill for 15-20 minutes before applying the final frosting layer.
Notes
Use gel food coloring for vibrant color without making batter too thin. Room temperature ingredients create smoothest, most even cake texture. Don’t skip crumb coat step – it seals in crumbs for professional-looking final frosting. Make sure frosting ingredients are fully softened but not melted for best consistency. Cake layers can be baked day ahead, wrapped tightly, and refrigerated. Frosted cake keeps refrigerated for up to 5 days. Bring to room temperature 30 minutes before serving. Freeze unfrosted layers wrapped in plastic and foil for up to 3 months. Add cake between layers like fresh berries or chocolate ganache for extra wow factor.
- Prep Time: 25
- Cook Time: 32 minutes
- Category: Desserts
- Method: Baking
- Cuisine: American
Nutrition
- Serving Size: 1 slice
- Calories: 625
- Sugar: 72g
- Sodium: 420mg
- Fat: 31g
- Saturated Fat: 16g
- Unsaturated Fat: 13g
- Trans Fat: 0g
- Carbohydrates: 84g
- Fiber: 1g
- Protein: 6g
- Cholesterol: 95mg
Ingredients You’ll Need
- 2 cups granulated sugar
- ½ cup neutral oil
- ½ cup unsalted butter, melted and cooled
- 3 large eggs, room temperature
- 2 tsp vanilla extract
- 1 cup buttermilk, room temperature
- 1 tsp distilled white vinegar
- 1-1½ tbsp red gel food coloring
- 2 tbsp Dutch-process cocoa powder
- ½ cup boiling water
- 2½ cups all-purpose flour
- 2 tbsp cornstarch
- 1 tsp baking soda
- 1 tsp baking powder
- ½ tsp fine salt
For the Cream Cheese Frosting:
- 12 oz cream cheese, cold
- ¾ cup unsalted butter, cool room temperature
- 2 tsp vanilla extract
- Pinch fine salt
- 3-3½ cups powdered sugar
Ingredient Notes
The combination of oil and melted butter creates the perfect texture – oil keeps the cake moist while butter adds rich flavor. Using both ensures your cake stays tender even when refrigerated, unlike cakes made with butter alone which can become firm when chilled.
Blooming the cocoa powder in boiling water is a game-changer that intensifies the chocolate flavor and helps distribute the red color evenly throughout the batter. This simple step takes just a minute but makes a noticeable difference in both taste and appearance. The cornstarch addition mimics cake flour’s tenderness while maintaining structure.
Step-by-Step Instructions
Step 1: Prepare Pans and Preheat Oven
Preheat your oven to 350°F and prepare three 8-inch round cake pans by greasing them thoroughly, lining the bottoms with parchment rounds, then greasing again.
Step 2: Create the Wet Base
In a large bowl, whisk together the sugar, oil, and melted butter until the mixture becomes glossy and slightly thickened. Add eggs one at a time, whisking well after each addition until fully incorporated.
Stir in the vanilla, then whisk in the buttermilk, vinegar, and red food coloring until the mixture is vibrant and smooth.
Step 3: Bloom the Cocoa
In a small bowl, whisk the cocoa powder with the boiling water until completely smooth with no lumps remaining. This “blooming” process awakens the cocoa’s flavor compounds and ensures even distribution throughout your batter. Stir this chocolate mixture into your wet ingredients until evenly combined.
Step 4: Add Dry Ingredients
In a separate bowl, sift together the flour, cornstarch, baking soda, baking powder, and salt. Gently fold the dry ingredients into the wet mixture in two additions, stirring just until no streaks of flour remain.
Step 5: Bake and Cool
Divide the batter evenly among your three prepared pans, using a kitchen scale for precision if you have one. Bake for 23-25 minutes, rotating the pans halfway through, until the centers spring back when lightly touched and a toothpick comes out with moist crumbs.
Cool in pans for 10 minutes, then turn out onto wire racks to cool completely before frosting.
Step 6: Make Frosting and Assemble
Beat the cream cheese until smooth, then add butter and beat until creamy. Mix in vanilla and salt, then gradually beat in powdered sugar until light and fluffy. Level your cake layers if needed by trimming any domed tops with a serrated knife.
Place the first layer on a cake stand, spread with frosting, repeat with remaining layers, then apply a thin crumb coat. Chill for 15-20 minutes before applying the final frosting layer.

Pro Tips & Cooking Hacks
- Room temperature ingredients mix more easily and create better texture
- Weigh your cake pans to ensure even layers
- Don’t open the oven door during the first 20 minutes of baking
- Use a warm, dry knife for clean slices through frosted cake
- Chill the crumb-coated cake before final frosting for professional results
Tips & Variations
This cake keeps beautifully in the refrigerator for up to 4 days when covered. Let it sit at room temperature for 30-45 minutes before serving for the best flavor and texture. The cake layers can be baked ahead and frozen for up to 2 months – wrap tightly in plastic wrap and foil before freezing.
For a fun twist, add raspberry jam between the layers for extra fruity flavor, or fold mini chocolate chips into the batter. You can also make this as cupcakes by filling liners two-thirds full and baking for 18-20 minutes at 350°F.
Serving Suggestions
This cake is stunning on its own, but you can make it even more special by decorating with fresh berries, chocolate shavings, or edible flowers on top. Serve slices with a scoop of vanilla ice cream or whipped cream for an extra-indulgent dessert. For birthday celebrations, add candles and surround the base with coordinating sprinkles or cake crumbs.
Common Mistakes
- Using cold ingredients – leads to lumpy batter and uneven texture
- Overbaking the layers – results in dry cake instead of moist crumb
- Frosting warm cake – causes frosting to melt and slide off
- Overmixing the batter – creates tough, dense cake instead of tender
- Skipping the crumb coat – makes final frosting messy with visible crumbs
What to Serve With Classic Red Velvet Birthday Cake
This cake pairs wonderfully with fresh strawberries, vanilla ice cream, or a glass of cold milk. For a complete birthday spread, serve alongside other party favorites like cheese and crackers, fresh fruit, and savory appetizers to balance the sweetness.
Frequently Asked Questions
Can I make this cake in different pan sizes?
Yes! For two 9-inch layers, increase baking time by 5-7 minutes. For a 9×13 sheet cake, bake for 30-35 minutes.
Why do I need both oil and butter?
Oil keeps the cake moist while butter adds flavor. This combination ensures the cake stays tender even when refrigerated.
How do I get bright red color?
Use gel food coloring rather than liquid – it’s more concentrated and produces vibrant color without thinning the batter.
Can I use natural cocoa instead of Dutch-process?
Yes, though the color may be slightly darker. The flavor will still be delicious.
How far ahead can I make this?
Bake layers 2 days ahead and refrigerate wrapped, or freeze for up to 2 months. Frost the day before serving.
💬 Tried this recipe? Leave a comment and rating below!