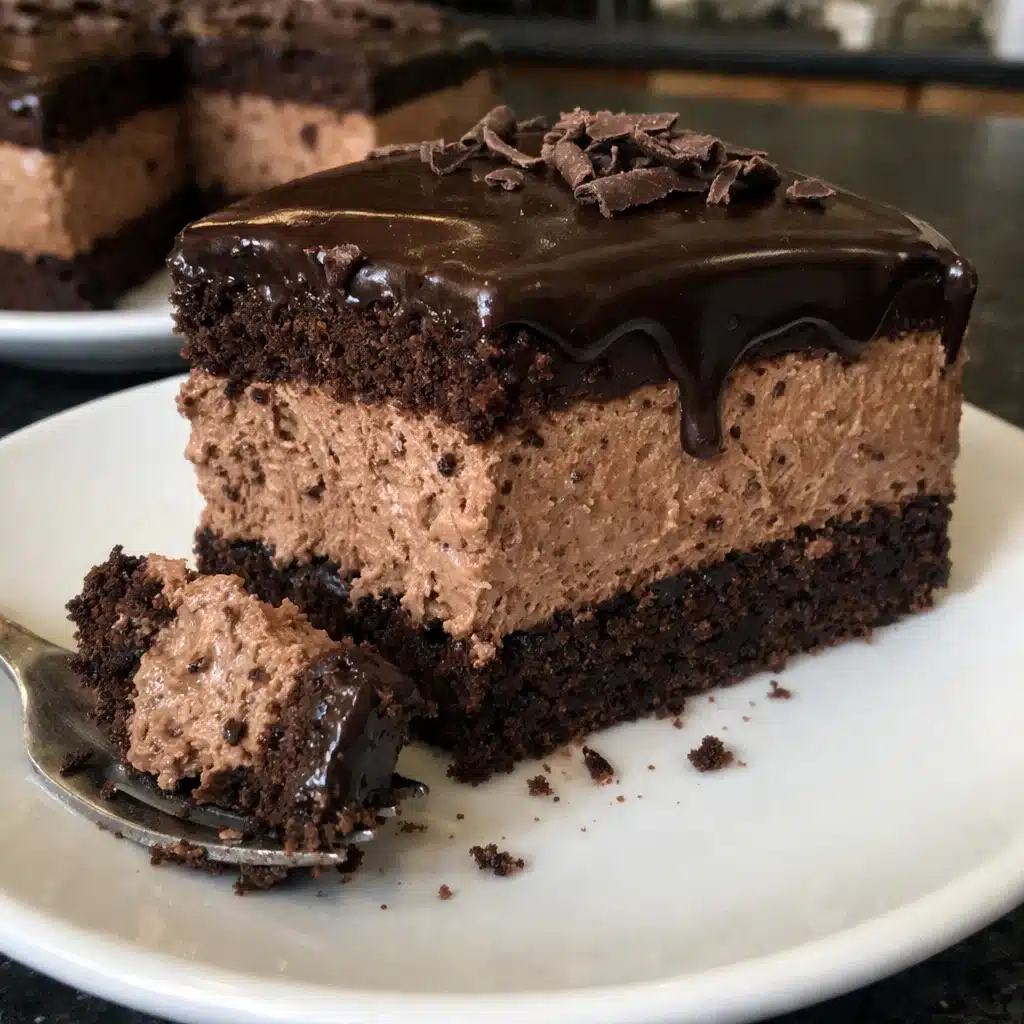
Chocolate mousse filling transforms ordinary layer cakes into bakery-worthy creations with silky, whipped chocolate that holds its shape between layers and pipes like frosting. This simple four-ingredient recipe delivers rich chocolate flavor with an airy texture that melts on your tongue without weighing down your cake.
Using real chocolate instead of cocoa powder creates natural firmness that sets beautifully when chilled, eliminating the need for gelatin or complicated stabilizers. Whether you’re filling a birthday cake, spreading it into cupcakes, or spooning it into dessert cups, this chocolate mousse brings professional elegance to home baking with minimal effort and maximum flavor.
Why You’ll Love This Recipe
- Just 4 ingredients create restaurant-quality chocolate mousse
- Sets firm enough for clean cake slicing but stays soft and creamy
- No gelatin, eggs, or tempering required for foolproof results
- Works as filling, frosting, or standalone dessert in serving glasses
- Rich chocolate flavor that isn’t overly sweet or heavy
Equipment Needed
- Double boiler or heatproof bowl with saucepan
- Electric mixer or whisk
- Large mixing bowl (chilled if possible)
- Rubber spatula
- Sharp knife for chopping chocolate

Chocolate Mousse Filling
- Total Time: 1 hour 20 minutes (includes chilling)
Description
This chocolate mousse filling uses just 4 ingredients to create airy, rich chocolate cream that sets beautifully between cake layers and pipes like frosting.
Ingredients
-
- 7 oz (200g) semi-sweet chocolate (55-65% cocoa), chopped
-
- 1 cup (240ml) heavy whipping cream, cold
-
- 2 tablespoons powdered sugar (adjust to taste)
-
- 1 teaspoon pure vanilla extract
-
- Pinch of salt (optional, only if using unsalted chocolate)
Instructions
Place the chopped chocolate in a heatproof bowl and melt gently over a double boiler, stirring until smooth and completely melted. Alternatively, microwave in 20-second intervals, stirring between bursts until fully melted. Set aside and allow to cool to room temperature but still pourable
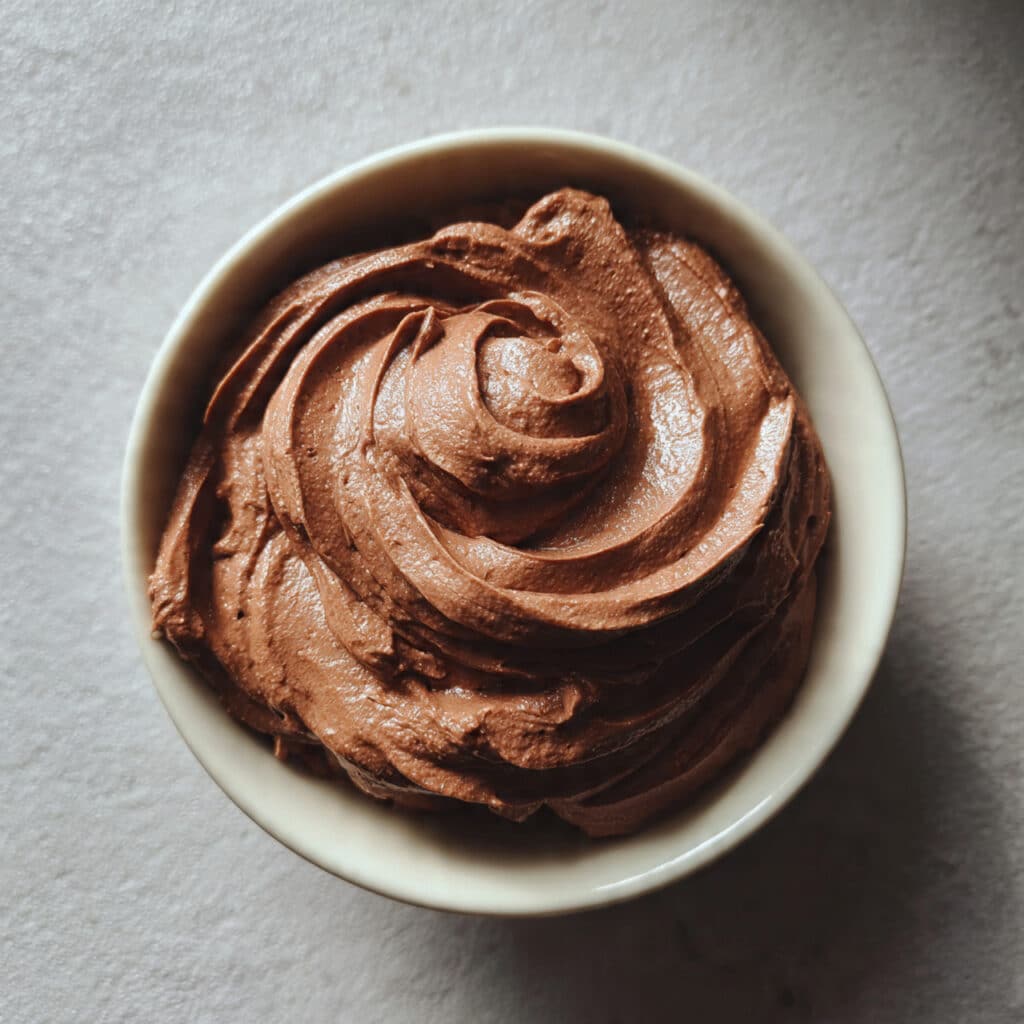
In a large chilled bowl, whip the cold heavy cream with powdered sugar and vanilla using a hand mixer or stand mixer fitted with the whisk attachment. Continue whipping until soft peaks form; the cream should hold its shape but remain smooth and slightly droopy.
Once the chocolate has cooled to room temperature but remains pourable, add one spoonful of whipped cream to the chocolate and stir gently to loosen the texture.
Then fold in the remaining whipped cream in 2 to 3 additions using a rubber spatula, mixing carefully to maintain volume and airiness. Fold until the mousse is smooth and evenly colored with no visible streaks remaining.
Transfer the mousse to a bowl or directly into your prepared cake layers. For clean slicing, chill the mousse for 30 to 60 minutes before using it in cakes or tarts.
Notes
Brown butter continues cooking in hot pan; transfer immediately to stop the process
Use a metal bowl for whipping cream as it holds chill better than plastic or glass
Chop chocolate into small, even pieces to ensure gentle, uniform melting
Clean the spatua between folds to prevent streaking and ensure smooth texture
Taste before chilling; some chocolates need extra sweetness depending on cocoa percentage
For firmer mousse suitable for piping, use 200ml cream instead of 240ml
- Prep Time: 20 minutes
- Cook Time: 0 minutes
- Category: Cake Filling
- Method: No-bake
Nutrition
- Calories: 172
- Sugar: 12g
- Sodium: 19mg
- Fat: 12g
- Saturated Fat: 8g
- Unsaturated Fat: 4g
- Trans Fat: 0g
- Carbohydrates: 13g
- Fiber: 0.6g
- Protein: 2g
- Cholesterol: 28mg
Ingredients You’ll Need
- 7 oz (200g) semi-sweet chocolate (55-65% cocoa), chopped
- 1 cup (240ml) heavy whipping cream, cold
- 2 tablespoons powdered sugar (adjust to taste)
- 1 teaspoon pure vanilla extract
- Pinch of salt (optional, only if using unsalted chocolate)
Ingredient Notes
Semi-sweet chocolate between 55% and 65% cocoa provides the perfect balance of flavor and texture. Darker chocolate stiffens too much when chilled while lower percentages taste flat.
Choose a chocolate you enjoy eating straight as its flavor will be prominent. Heavy whipping cream is essential; lower-fat creams won’t whip properly or hold structure. Make sure it’s cold straight from the fridge for best results.
Powdered sugar dissolves instantly and gives a smoother finish than granulated while adding just enough sweetness without overwhelming the chocolate.
Pure vanilla extract deepens the chocolate flavor with aromatic complexity. The optional pinch of salt is worth adding if using unsalted chocolate or wanting more intense flavor contrast.
Step-by-Step Instructions
Melt the Chocolate
Place the chopped chocolate in a heatproof bowl and melt gently over a double boiler, stirring until smooth and completely melted. Alternatively, microwave in 20-second intervals, stirring between bursts until fully melted. Set aside and allow to cool to room temperature but still pourable
Whip the Cream
In a large chilled bowl, whip the cold heavy cream with powdered sugar and vanilla using a hand mixer or stand mixer fitted with the whisk attachment. Continue whipping until soft peaks form; the cream should hold its shape but remain smooth and slightly droopy.
Combine Chocolate and Cream
Once the chocolate has cooled to room temperature but remains pourable, add one spoonful of whipped cream to the chocolate and stir gently to loosen the texture.
Then fold in the remaining whipped cream in 2 to 3 additions using a rubber spatula, mixing carefully to maintain volume and airiness. Fold until the mousse is smooth and evenly colored with no visible streaks remaining.
Chill Until Set
Transfer the mousse to a bowl or directly into your prepared cake layers. For clean slicing, chill the mousse for 30 to 60 minutes before using it in cakes or tarts.
Pro Tips & Cooking Hacks
- Brown butter continues cooking in hot pan; transfer immediately to stop the process
- Use a metal bowl for whipping cream as it holds chill better than plastic or glass
- Chop chocolate into small, even pieces to ensure gentle, uniform melting
- Clean the spatula between folds to prevent streaking and ensure smooth texture
- Taste before chilling; some chocolates need extra sweetness depending on cocoa percentage
- For firmer mousse suitable for piping, use 200ml cream instead of 240ml
Tips & Variations
Storage: This mousse stays fresh in the fridge for up to 2 days in an airtight container. Do not freeze as texture becomes uneven and grainy. For layer cakes, use the same day for best texture and presentation.
Mocha version: Add 2 tablespoons instant espresso powder to the melted chocolate for sophisticated coffee-chocolate flavor that adults especially love.
Milk chocolate mousse: Use 100g milk chocolate plus 100g semi-sweet for a sweeter, creamier finish. Reduce whipped cream to 3/4 cup and chill longer for proper setting.
Tangy twist: Add 1 tablespoon sour cream to the whipped cream before mixing for a subtle tang that balances the rich chocolate beautifully.
Serving Suggestions
Layer cake filling: Spread between chocolate cake rounds with fresh raspberries for a classic French combination. The tartness of berries cuts through rich chocolate perfectly.
Cupcake centers: Pipe into cupcake centers using a large round tip, then top with ganache or buttercream. Each bite reveals a creamy chocolate surprise.
Mousse cups: Spoon into serving glasses and layer with crushed cookies, whipped cream, and chocolate shavings for an elegant individual dessert.
Trifle layer: Use as one layer in a chocolate trifle with chocolate sponge cake, whipped cream, and cherries for a show-stopping dessert.
Common Mistakes
- Adding whipped cream to warm chocolate causes it to deflate and become grainy
- Overwhipping the cream creates stiff, grainy mousse instead of silky texture
- Using low-quality chocolate produces dull flavor and poor texture when set
- Folding too aggressively deflates the mousse and removes airiness
- Not chilling long enough results in mousse that’s too soft for clean slicing
What to Serve With Chocolate Mousse Filling
Vanilla cake: The neutral flavor lets the rich chocolate mousse be the star while providing textural contrast. Add a simple vanilla buttercream on top for classic elegance.
Fresh berries: Raspberries, strawberries, or blackberries add brightness and cut through the richness with their natural acidity. The fruit freshness balances the chocolate beautifully.
Espresso: Serve small portions alongside strong coffee or espresso for an Italian-inspired dessert experience. The bitterness of coffee enhances chocolate’s complexity.
Salted caramel: Drizzle with homemade or store-bought salted caramel sauce for a sweet-salty contrast that makes the chocolate taste even more intense.
Frequently Asked Questions
Can I use milk chocolate instead?
Yes, but reduce the cream to 3/4 cup and increase powdered sugar to 3 tablespoons. Milk chocolate is sweeter and softer, requiring less cream for proper texture.
Why did my mousse turn grainy?
The cream was likely overwhipped or the chocolate was too warm when combined. Start fresh with new cream and ensure chocolate is completely cooled but still fluid.
How do I fix mousse that won’t set?
Chill it longer or fold in a few tablespoons of additional whipped cream. The mousse will firm up more as the chocolate solidifies in the refrigerator.
Can I make this ahead?
Yes, but it’s best used within 24 hours for optimal texture. After 48 hours it loses some smoothness and flavor intensity.
What if I don’t have heavy cream?
Heavy cream is essential for this recipe. Whipping cream might work but results won’t be as stable or rich. Avoid half-and-half or milk as they won’t whip.
💬 Tried this recipe? Leave a comment and rating below!