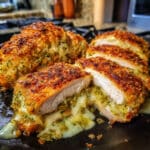
Dill Pickle Parmesan Chicken is the ultimate weeknight dinner that brings together everything American families love: crispy breaded chicken with a tangy pickle twist and savory Parmesan cheese.
I first made this recipe on a busy Tuesday when I had leftover pickle juice in the fridge, and it instantly became our go-to comfort meal. The crunchy pickle coating delivers that addictive salty-sour flavor while keeping the chicken incredibly juicy inside. Trust me, even picky eaters who claim they don’t like pickles will be asking for seconds!

Why You’ll Love This Recipe
- Quick prep time – Just 10 minutes of hands-on work, perfect for busy weeknights
- Kid-approved flavor – The tangy pickle taste is mild and delicious, not overpowering
- Budget-friendly – Uses simple pantry staples and affordable chicken breasts
- Incredibly juicy – The pickle juice marinade keeps the chicken tender and moist
- Crispy without frying – Oven-baked for a healthier version with all the crunch
- Leftover magic – Tastes amazing cold in sandwiches or salads the next day
- Conversation starter – Your guests will be fascinated by this creative recipe twist
Equipment Needed
- Shallow dish or large resealable bag (for marinating)
- Rimmed baking sheet
- Parchment paper or cooking spray
- 2 shallow bowls (for coating stations)
- Whisk
- Food processor or rolling pin and plastic bag (for crushing pickles)
- Meat thermometer
- Paper towels
- Measuring cups and spoons
Dill Pickle Parmesan Chicken
- Total Time: 35 minutes (active time) + marinating
- Yield: 4 chicken breasts 1x
Description
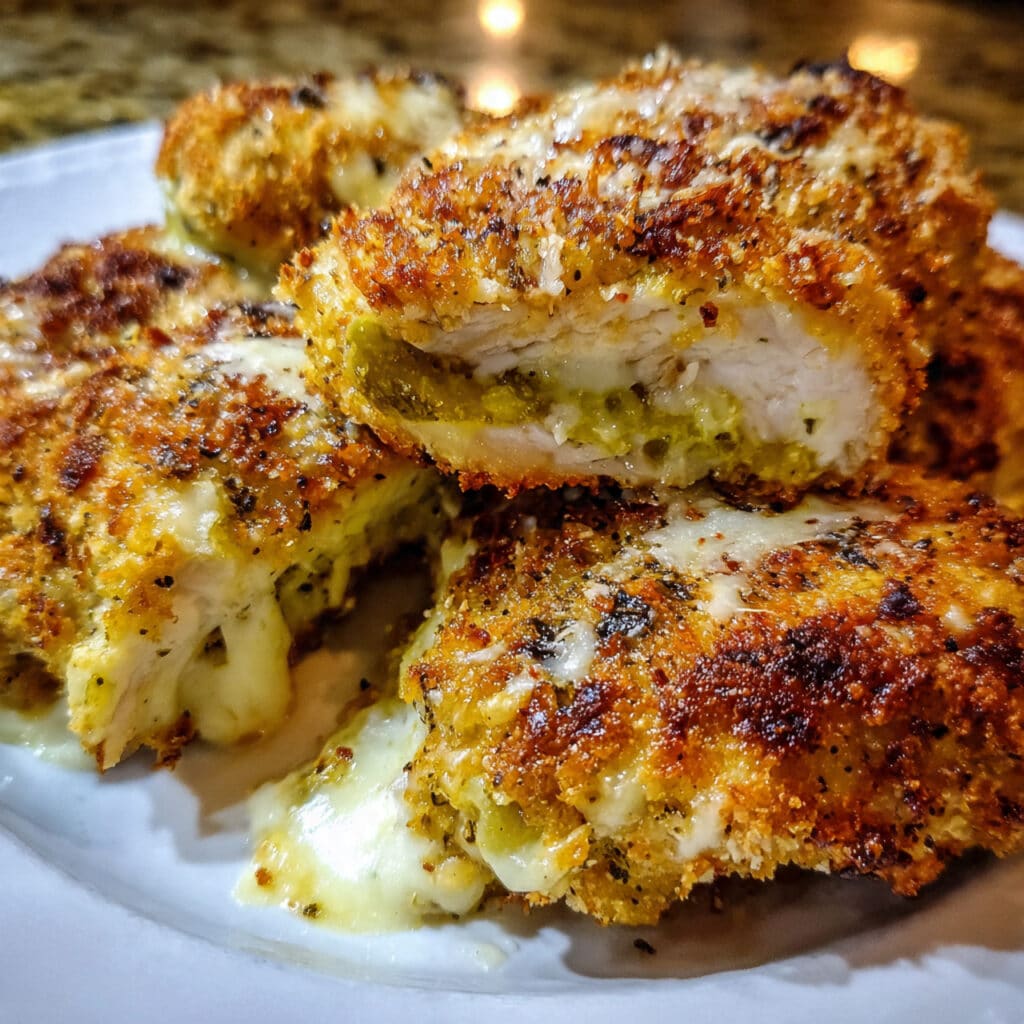
Crispy, tangy Dill Pickle Parmesan Chicken is an easy weeknight dinner that combines juicy chicken breasts marinated in pickle juice with a crunchy coating of crushed pickles and Parmesan cheese. This oven-baked recipe delivers all the crunch without deep frying, and the unique pickle flavor will have your family asking for it again and again. Ready in under 45 minutes with simple ingredients!
Ingredients
Chicken & Coating:
- 4 boneless, skinless chicken breasts (about 1.5–2 lbs total)
- 1 cup dill pickle juice (from a jar of dill pickles)
- 2 large eggs
- 1 cup mayonnaise (or Greek yogurt for lighter option)
- 1 tablespoon Dijon mustard
- 1½–2 cups crushed dill pickle chips, finely crushed (food processor or bag + rolling pin)
- ¼–½ cup grated Parmesan cheese (freshly grated recommended)
- 1–2 teaspoons garlic powder
- ½–1 teaspoon black pepper
- Salt, to taste
- Optional: 1 teaspoon dried dill or parsley
For Serving:
- Extra dill pickle slices
- Fresh lemon wedges
- Optional: ranch dressing or extra mayo
Instructions
Place chicken breasts in a shallow dish or resealable bag. Pour dill pickle juice over the chicken, turning to coat all sides evenly. Refrigerate for 30 minutes to 2 hours for maximum tangy flavor .
Preheat your oven to 425°F (220°C). Line a rimmed baking sheet with parchment paper or lightly grease it with cooking spray to prevent sticking and ensure easy cleanup.
In a shallow bowl, whisk together eggs, mayonnaise (or Greek yogurt), and Dijon mustard until completely smooth. In a second shallow bowl, combine crushed dill pickle chips, Parmesan cheese, garlic powder, black pepper, and optional dried dill or parsley. Mix the dry ingredients thoroughly so the coating is evenly distributed.
Remove chicken from pickle juice and pat lightly dry with paper towels (you want them damp, not dripping wet). Dip each chicken breast into the egg-mayo mixture first, coating completely and letting excess drip off. Press firmly into the pickle-chip and Parmesan mixture, making sure the exterior is well coated on all sides with a thick, even layer.
Place the coated chicken breasts on the prepared baking sheet, spacing them at least 1 inch apart. Bake for 18–24 minutes, until the chicken is cooked through (internal temperature reaches 165°F / 74°C) and the coating is golden brown and crispy.
For extra crispiness and a gorgeous golden finish, switch your oven to broil for the last 2–3 minutes of cooking. Keep a very close eye on it so the coating doesn’t burn—it can go from perfect to charred quickly! Let rest for 3–5 minutes before serving to allow juices to redistribute.
Notes
- No soggy coating: Pat the chicken AND pickles dry before coating—moisture is the enemy of crispiness
- Double coating method: For an ultra-thick crust, dip in egg mixture, coat with pickles, then repeat the process once more
- Leftover pickle juice: Freeze it in ice cube trays for future marinades or use it in salad dressings and potato salad
- Avoid overcrowding: Leave space between chicken pieces on the baking sheet so hot air circulates for even crisping
- Test doneness properly: Always use a meat thermometer inserted into the thickest part—guessing can lead to dry or undercooked chicken
- Coating won’t stick?: Make sure your egg-mayo mixture is thick enough; add more mayo if it’s too thin and runny
- Save prep time: Crush pickles the night before and store in an airtight container in the fridge
- Prep Time: 15 minutes
- Cook Time: 20 minutes
- Category: Main Dish
- Method: Baking, Oven-Baked
- Cuisine: American
Nutrition
- Calories: 425
- Sugar: 2g
- Sodium: 980mg
- Fat: 26g
- Saturated Fat: 6g
- Unsaturated Fat: 18g
- Trans Fat: 0g
- Carbohydrates: 8g
- Fiber: 1g
- Protein: 40g
- Cholesterol: 195mg
Ingredients You’ll Need
Chicken & Coating:
- 4 boneless, skinless chicken breasts (about 1.5–2 lbs total)
- 1 cup dill pickle juice (from a jar of dill pickles)
- 2 large eggs
- 1 cup mayonnaise (or Greek yogurt for lighter option)
- 1 tablespoon Dijon mustard
- 1½–2 cups crushed dill pickle chips, finely crushed (food processor or bag + rolling pin)
- ¼–½ cup grated Parmesan cheese (freshly grated recommended)
- 1–2 teaspoons garlic powder
- ½–1 teaspoon black pepper
- Salt, to taste
- Optional: 1 teaspoon dried dill or parsley
For Serving:
- Extra dill pickle slices
- Fresh lemon wedges
- Optional: ranch dressing or extra mayo
Ingredient Notes
- Pickle Juice: Don’t throw it away! The brine from your pickle jar is perfect for marinating. Dill pickle juice works best, but bread and butter pickle juice creates a sweeter version.
- Chicken Breasts: If yours are thick (more than 1 inch), pound them to even thickness or butterfly them for consistent cooking. You can substitute chicken thighs for juicier, more forgiving results.
- Crushed Pickles: Pat your pickle chips dry before crushing to prevent a soggy coating. The finer you crush them, the better they’ll adhere to the chicken.
- Mayonnaise vs. Greek Yogurt: Mayo gives richer flavor and helps the coating stick better, but Greek yogurt works great for a lighter, tangier version with extra protein.
- Parmesan Cheese: Freshly grated Parmesan melts better and has more flavor than pre-grated. Avoid the shelf-stable canned variety for best results.
- Pickle Chip Varieties: Dill pickle chips are classic, but try kosher dill, garlic dill, or even spicy pickles for different flavor profiles.
Step-by-Step Instructions
Step 1: Marinate the Chicken
Place chicken breasts in a shallow dish or resealable bag. Pour dill pickle juice over the chicken, turning to coat all sides evenly. Refrigerate for 30 minutes to 2 hours for maximum tangy flavor .
Step 2: Preheat & Prep
Preheat your oven to 425°F (220°C). Line a rimmed baking sheet with parchment paper or lightly grease it with cooking spray to prevent sticking and ensure easy cleanup.
Step 3: Set Up Coating Stations
In a shallow bowl, whisk together eggs, mayonnaise (or Greek yogurt), and Dijon mustard until completely smooth. In a second shallow bowl, combine crushed dill pickle chips, Parmesan cheese, garlic powder, black pepper, and optional dried dill or parsley. Mix the dry ingredients thoroughly so the coating is evenly distributed.
Step 4: Coat the Chicken
Remove chicken from pickle juice and pat lightly dry with paper towels (you want them damp, not dripping wet). Dip each chicken breast into the egg-mayo mixture first, coating completely and letting excess drip off. Press firmly into the pickle-chip and Parmesan mixture, making sure the exterior is well coated on all sides with a thick, even layer.
Step 5: Bake
Place the coated chicken breasts on the prepared baking sheet, spacing them at least 1 inch apart. Bake for 18–24 minutes, until the chicken is cooked through (internal temperature reaches 165°F / 74°C) and the coating is golden brown and crispy.
Step 6: Broil (Optional Finish)
For extra crispiness and a gorgeous golden finish, switch your oven to broil for the last 2–3 minutes of cooking. Keep a very close eye on it so the coating doesn’t burn—it can go from perfect to charred quickly! Let rest for 3–5 minutes before serving to allow juices to redistribute.
Pro Tips & Cooking Hacks
- Make it extra crispy: Spray the coated chicken lightly with cooking spray before baking—the oil helps the crust get golden and crunchy
- Even cooking trick: Pound chicken breasts to an even ¾-inch thickness so they cook uniformly and stay juicy
- No soggy coating: Pat the chicken AND pickles dry before coating—moisture is the enemy of crispiness
- Double coating method: For an ultra-thick crust, dip in egg mixture, coat with pickles, then repeat the process once more
- Leftover pickle juice: Freeze it in ice cube trays for future marinades or use it in salad dressings and potato salad
- Avoid overcrowding: Leave space between chicken pieces on the baking sheet so hot air circulates for even crisping
- Test doneness properly: Always use a meat thermometer inserted into the thickest part—guessing can lead to dry or undercooked chicken
- Coating won’t stick?: Make sure your egg-mayo mixture is thick enough; add more mayo if it’s too thin and runny
- Save prep time: Crush pickles the night before and store in an airtight container in the fridge
- Biggest mistake to avoid: Don’t skip the marinating step if you have time—it’s what makes this chicken incredibly tender and flavorful
Tips & Variations
Storage & Make-Ahead:
- Store leftover chicken in an airtight container in the refrigerator for up to 3 days
- Reheat in a 350°F oven for 10–12 minutes to maintain crispiness (microwave makes it soggy)
- Freeze coated, unbaked chicken for up to 2 months; bake from frozen at 400°F for 30–35 minutes
- The pickle juice marinade can be done up to 24 hours in advance
- Prepare your coating stations in advance and store in separate containers in the fridge
Recipe Variations:
- Spicy Pickle Chicken: Add cayenne pepper or use spicy pickle chips for heat
- Air Fryer Version: Cook at 375°F for 15–18 minutes, flipping halfway through
- Gluten-Free: This recipe is naturally gluten-free when you verify your pickles and Parmesan don’t contain additives
- Low-Carb/Keto: Use full-fat mayo and extra Parmesan instead of increasing pickle chips
- Buffalo Pickle Chicken: Mix 2 tablespoons of Frank’s RedHot into the egg-mayo mixture
- Ranch Pickle Chicken: Add 2 tablespoons ranch seasoning mix to the dry coating
- Chicken Tenders: Cut chicken into strips and reduce baking time to 12–15 minutes—perfect for kids
Serving Suggestions
Serve your Dill Pickle Parmesan Chicken with classic American sides like creamy coleslaw, crispy French fries, or buttery mashed potatoes for the ultimate comfort food dinner. The tangy chicken pairs beautifully with cooling sides like cucumber salad, mac and cheese, or roasted vegetables. For a lighter meal, slice the chicken and serve it over a fresh garden salad with ranch dressing, or make gourmet sandwiches with lettuce, tomato, and extra pickles on toasted brioche buns.
Don’t forget the garnishes! Fresh lemon wedges add a bright citrus note that complements the pickle flavor, while extra dill pickle slices on the side let pickle lovers indulge. A drizzle of ranch dressing or garlic aioli takes this dish over the top.
Common Mistakes
- Coating falls off during baking: Pat chicken too dry or didn’t press the coating firmly enough—leave chicken slightly damp and really press that crust on
- Dry, overcooked chicken: Baked too long or at too low a temperature—use a meat thermometer and stop at exactly 165°F
- Soggy, not crispy coating: Pickles were too wet or chicken was crowded on the pan—always pat pickles dry and leave space between pieces
- Bland flavor: Skipped the marinade or didn’t season the coating enough—the pickle juice marinade is crucial for maximum flavor
- Uneven coating: Didn’t set up proper coating stations or rushed the process—take your time with the dredging process for best results
- Burned exterior, raw interior: Oven temperature too high or chicken too thick—pound to even thickness and verify oven temperature with a thermometer
- Coating slides off when cutting: Didn’t let chicken rest after baking—always rest 3–5 minutes before slicing to let the coating set
What to Serve With Dill Pickle Parmesan Chicken
This crispy, tangy chicken is incredibly versatile and pairs well with both classic comfort sides and lighter, fresher options. For a true American family dinner, serve it alongside creamy mac and cheese, buttery corn on the cob, or crispy sweet potato fries. The pickle flavor also complements Southern-style sides like coleslaw, baked beans, or cornbread beautifully.
For a lighter, more balanced meal, pair it with roasted asparagus, garlic green beans, or a simple mixed greens salad with ranch dressing. Carb lovers will appreciate it with buttery egg noodles, garlic mashed potatoes, or cheesy rice pilaf—the creamy sides balance the tangy chicken perfectly.
Frequently Asked Questions
Can I use chicken thighs instead of breasts?
Yes! Boneless, skinless chicken thighs work wonderfully and are more forgiving since they’re harder to overcook. They’ll need about the same cooking time (18–22 minutes at 425°F), but use a meat thermometer to confirm they reach 165°F. Thighs have more fat, so they’ll be extra juicy and flavorful with the pickle coating.
Do I have to marinate the chicken in pickle juice?
While marinating isn’t absolutely required, it makes a significant difference in both flavor and juiciness. Even a quick 30-minute soak will enhance the tangy taste and help tenderize the chicken. If you’re really pressed for time, you can skip it, but I highly recommend marinating for at least an hour if possible for the best results.
Can I make this ahead of time?
Absolutely! You can marinate the chicken up to 24 hours in advance, and even coat the chicken a few hours ahead—just keep it covered in the refrigerator until ready to bake. For the crispiest results, bake right before serving. You can also freeze the coated, unbaked chicken for up to 2 months; bake directly from frozen, adding about 10 extra minutes to the cooking time.
How do I reheat leftovers without losing the crispiness?
The key is using your oven, not the microwave. Preheat your oven to 350°F, place the chicken on a wire rack over a baking sheet, and reheat for 10–12 minutes until warmed through. The wire rack allows air to circulate underneath, keeping the coating crispy. You can also use an air fryer at 350°F for 5–7 minutes for excellent results.
What can I substitute for mayonnaise?
Greek yogurt is the best substitute and creates a lighter, tangier version with extra protein and fewer calories. You can also use sour cream for a similar consistency. If you need a dairy-free option, try vegan mayo or a mixture of Dijon mustard and olive oil (though the coating may not stick quite as well). Avoid using low-fat mayo as it tends to be watery and won’t help the coating adhere properly.
💬 Tried this recipe? Leave a comment and rating below! I’d love to hear how your Dill Pickle Parmesan Chicken turned out and any creative variations you tried