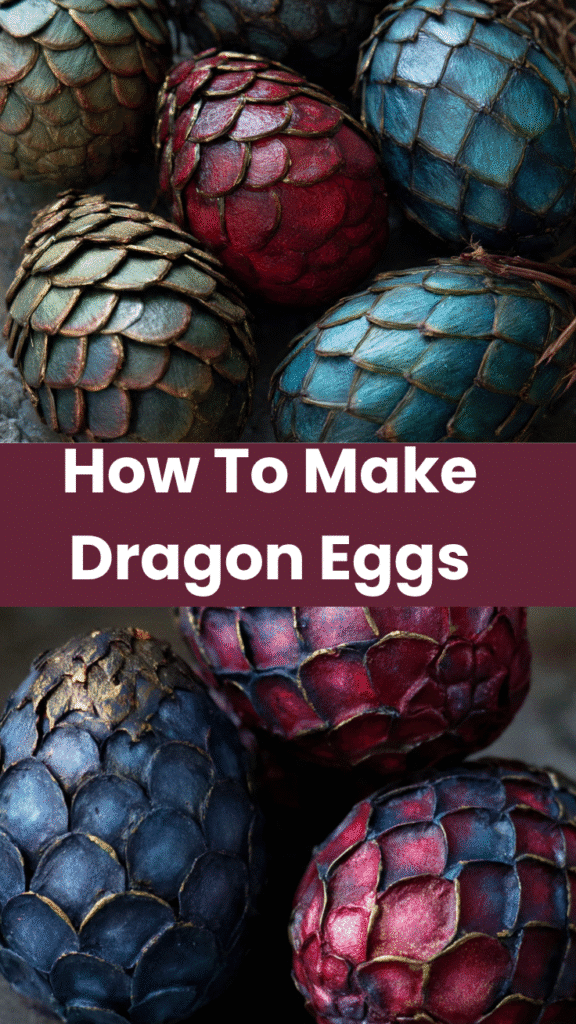
DIY Dragon Eggs bring fantasy to life right in your living room. This simple craft project transforms basic foam eggs into mystical treasures worthy of any dragon tamer or fantasy enthusiast. Kids and adults alike get hooked on making these shimmering beauties.
Why You’ll Love This Recipe
- Simple supplies you can grab at any craft store
- Endless creativity with colors and textures
- Perfect for cosplay accessories and décor
- Kid-friendly with adult supervision
- Makes unique handmade gifts for fantasy fans
Equipment Needed
- Low-temperature hot glue gun
- Paintbrushes (various sizes)
- Paper towels or newspaper for workspace
- Small dish for paint mixing
- Moss wreath or nest for display (optional)
DIY Dragon Eggs
- Total Time: 2 hours 30 minutes
- Yield: 4 eggs 1x
Description
Create mystical dragon eggs using foam eggs, hot glue, and metallic paint. These enchanted treasures make perfect Renaissance Faire accessories, fantasy décor, or handmade gifts. Simple supplies deliver maximum magic with shimmering, textured results.
Ingredients
Foam eggs (Styrofoam, 4-6 inches)
Hot glue sticks
Low-temperature hot glue gun
Acrylic paint (metallic colors recommended)
Glitter or Stickles glitter glue
Nuvo 3D dimensional paint (optional)
Clear sealer spray (optional)
Moss wreath or nest for display (optional)
Instructions
1. Use low-temp glue gun to apply scales, swirls, or layered lines directly onto foam egg. Create reptilian texture in small sections.
2. Wait at least 30 minutes for all glue to cool and harden completely before painting.
3. Paint entire egg with base color in thin layers. Let first coat dry 20 minutes, then apply second coat for full coverage.
4. Dry-brush complementary color over raised glue textures using very little paint on brush. Lightly sweep over high points to create depth.
5. Apply glitter, Stickles, or dimensional paint to highlight areas. Focus on scale edges and swirls. Let dry completely before displaying.
Notes
Low-temperature glue guns protect Styrofoam from melting. Regular hot glue creates dents instead of texture.
Metallic acrylic paints create the most magical effect. Emerald, sapphire, purple, bronze, and gold give authentic fantasy look.
Layer two complementary colors for dimensional depth and shimmer.
Spray with clear sealer to protect paint and add shine.
Make multiple eggs in different sizes for a clutch display.
Display in moss wreaths or twig nests for woodland fantasy setting.
- Prep Time: 30 minutes
- Cook Time: 2 hours
- Category: Craft
- Method: No-Bake
- Cuisine: American
Ingredients You’ll Need
- Foam eggs (Styrofoam, 4-6 inches)
- Hot glue sticks
- Acrylic paint (metallic colors work best)
- Glitter or Stickles glitter glue
- Nuvo 3D dimensional paint (optional)
- Clear sealer spray (optional)
Ingredient Notes
Low-temperature glue guns are essential for this project. Regular hot glue melts Styrofoam eggs and creates dents instead of beautiful texture. The lower temperature still bonds well but protects your foam base.
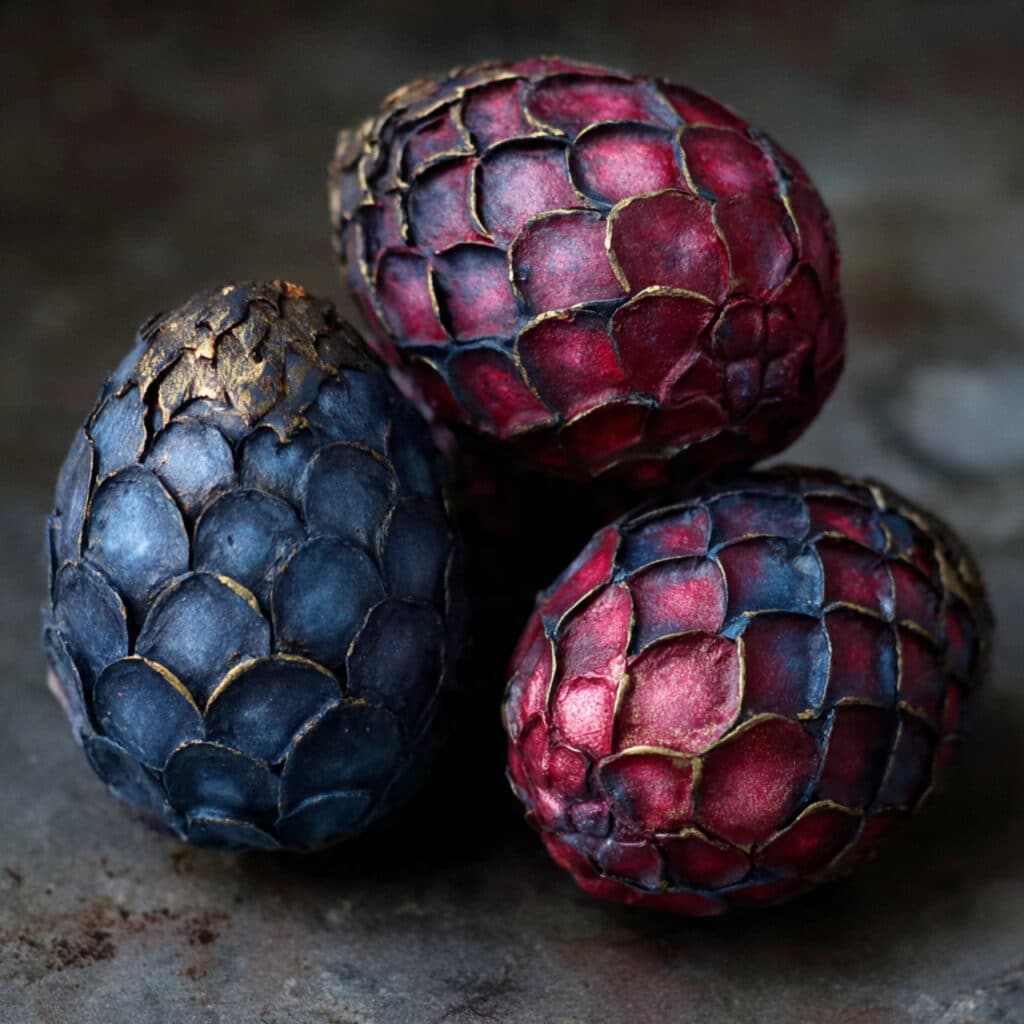
Metallic acrylic paints create the most magical dragon egg effect. Emerald green, sapphire blue, deep purple, bronze, and antique gold give that authentic fantasy look. Layer two complementary colors for dimensional depth and shimmer.
Stickles glitter glue or Nuvo 3D paint adds the perfect finishing sparkle. These products create raised, dimensional details that catch light beautifully and make your eggs look truly enchanted.
Step-by-Step Instructions
Step 1: Create Dragon Scale Texture
Using your low-temp glue gun, apply scales, swirls, or layered lines directly onto the foam egg. Work in small sections, creating whatever pattern feels magical and reptilian to you. There’s no wrong way to add texture here.
Step 2: Let Glue Cool Completely
Wait at least 30 minutes for all glue to harden before painting. Touch the glue gently to make sure it’s completely cool and firm. Painting too soon smears the texture and ruins your design.
Step 3: Apply Base Paint Coat
Paint the entire egg with your chosen base color, working in thin layers for best coverage. Let the first coat dry for 20 minutes, then apply a second coat. Multiple thin coats give better color than one thick coat.
Step 4: Add Accent Colors
Dry-brush a complementary color over the raised glue textures to create depth. Use very little paint on your brush and lightly sweep over high points. This technique makes scales pop and adds realistic dimension.
Step 5: Add Sparkle and Details
Apply glitter, Stickles, or dimensional paint to highlight areas and create magical shimmer. Focus on scale edges, swirls, or random spots for an organic sparkle. Let dry completely before displaying your finished dragon egg.

Pro Tips & Cooking Hacks
- Create asymmetrical texture for more realistic dragon eggs
- Mix paint colors directly on the egg for watercolor effects
- Use toothpicks to hold eggs while painting to avoid fingerprints
- Spray with clear sealer to protect paint and add shine
- Make multiple eggs in different sizes for a clutch display
Tips & Variations
Create ice dragon eggs using white and blue tones with silver glitter. Add crystalline textures with the glue gun and frost-like dry brushing for a frozen fantasy effect. These look stunning displayed on white fur or snow-like batting.
Make fire dragon eggs with red, orange, and gold layers creating a molten lava appearance. Add black dry brushing for char marks and ember-like glitter spots. These dramatic eggs perfect for Game of Thrones themed displays.
Try galaxy dragon eggs with deep purple base, splattered with pink, blue, and white paint dots for a cosmic look. Add holographic glitter for that otherworldly sparkle that catches every angle of light.
Serving Suggestions
Display your dragon eggs in moss wreaths or nests made from twigs and greenery. Tuck them into the soft material, add faux flowers or feathers for extra flair. This creates a natural woodland setting perfect for fantasy décor.
Carry them in costume satchels for Renaissance Faires or cosplay events. Attach small leather pouches to your belt and tuck eggs inside for an authentic dragon keeper accessory. People will stop you constantly to ask where you got them.
Common Mistakes
- Using regular hot glue melts foam and creates ugly dents
- Applying paint before glue cools smears your texture work
- Too much paint at once causes drips and uneven coverage
- Skipping the sealer means paint chips off with handling
- Making all eggs identical looks less natural than varied sizes
What to Serve With DIY Dragon Eggs
Pair with other fantasy crafts like wizard wands, fairy houses, or costume accessories for a complete magical crafting day. This works great for themed birthday parties where kids rotate through different craft stations.
Create a full fantasy display with your eggs as centerpieces surrounded by LED candles, crystals, and figurines. This makes an impressive bookshelf or mantel arrangement that sparks conversation and imagination.
Frequently Asked Questions
Can I use a regular hot glue gun?
No, regular temperature glue melts Styrofoam eggs. You must use a low-temperature glue gun designed for delicate materials or your eggs will have melted spots.
How long does this project take?
Each egg takes about 2-3 hours total including drying time between coats. The actual hands-on work is only 30-45 minutes spread across those hours.
Can kids do this craft alone?
Kids over 10 can handle this with supervision for the hot glue gun. Younger children can paint and add glitter while adults handle the gluing portion.
Where can I buy foam eggs?
Craft stores like Michaels, Hobby Lobby, and Joann’s carry Styrofoam eggs year-round. They’re especially plentiful around Easter season in various sizes.
How do I store finished eggs?
Wrap each egg individually in tissue paper and store in a sturdy box. The foam is lightweight but fragile, so protect them from crushing or the paint will chip.
💬 Tried this recipe? Leave a comment and rating below!