Refrigerator pickled vegetables saved my dinner party last month when I realized I had zero appetizers ready. I scooped up whatever random veggies were hanging out in my crisper drawer, packed them into jars with some seasonings, and boom: immediately beloved party fare for which people were begging me for the recipe. Now my kids raid these jars of pickles as though they were candy, and I have to admit, I don’t mind in the leas.
There’s the thing about pickled veges, they are ridiculously simple to make and make any bland vegetable exciting. No fancy equipment is necessary, no boiling water baths or other complex techniques; just dump everything in jars and let your fridge take it from there.. I’ve been making these for three years now, and they’ve never failed me once.
❤️ Why You’ll Love This Recipe
Look, I’m not gonna sugarcoat it—these pickles are addictive. Last week I caught my husband eating them straight from the jar at 10 PM, and I totally understood why. They’re crunchy, tangy, and ready in 24 hours (though I’ve definitely snuck tastes after just 30 minutes). No canning skills needed, and they last forever in your fridge. Plus you can throw in whatever veggies you have lying around.
Print
Refrigerator Pickled Vegetables
- Total Time: 40 minutes
- Yield: 2–3 quart jars 1x
Description
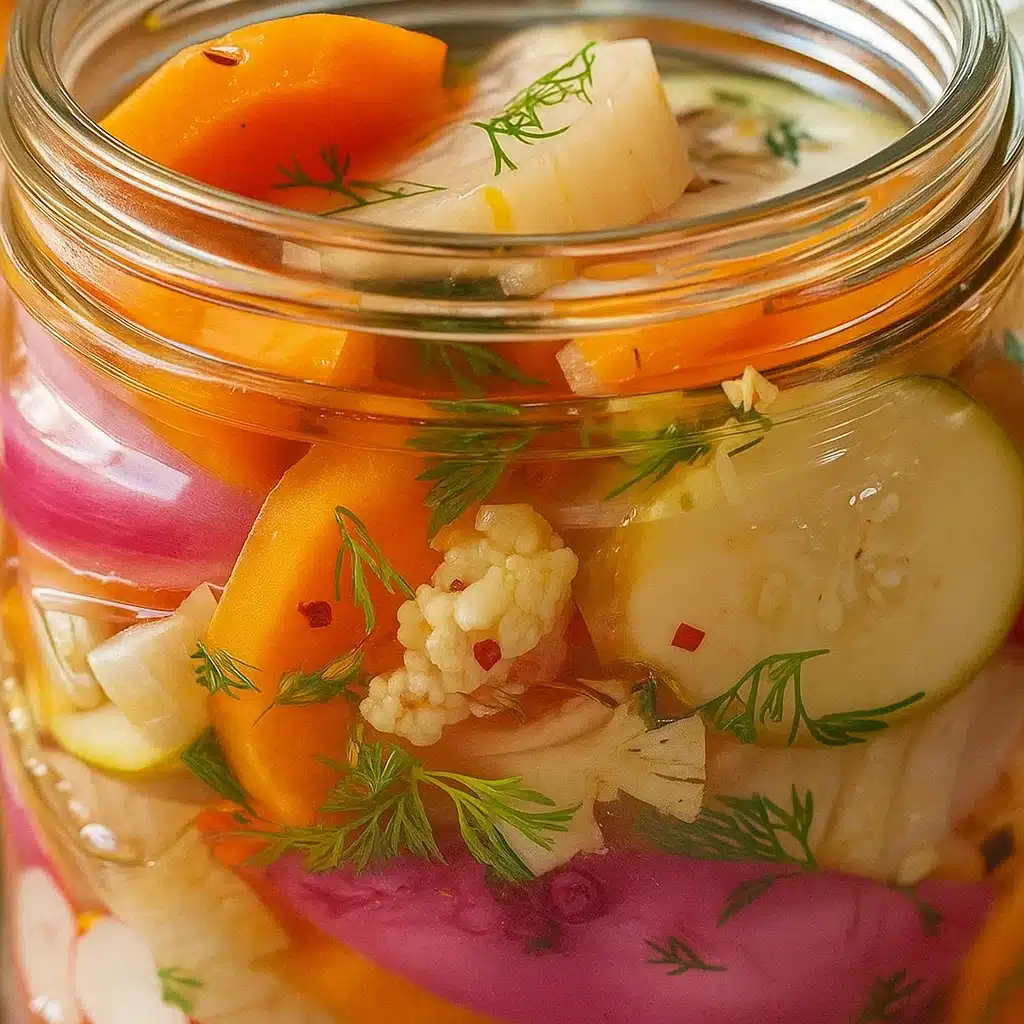
Homemade refrigerator pickled vegetables with no canning required! This easy recipe transforms fresh vegetables into flavorful pickles in just 24 hours.
Ingredients
For the Vegetables (2 lbs mixed):
-
- Cauliflower head, chopped into florets
-
- Green beans, ends trimmed off
-
- 3–4 carrots, sliced however you want
-
- 4–5 small cucumbers, sliced
-
- Red bell pepper, cut in strips
-
- Sweet onion, sliced thin
-
- Whatever else looks good: asparagus, radishes, beets
For the Flavor Stuff:
-
- 6–8 dill sprigs (fresh, not dried)
-
- 6–8 garlic cloves, peeled
-
- 2 tsp celery seeds
-
- 2 tsp coriander seeds
-
- 2 tsp mustard seeds
-
- 2 tsp black peppercorns
-
- 1–2 hot peppers if you want heat
For the Brine:
-
- 2 cups white vinegar
-
- 4 cups water
-
- ¼ cup sugar
-
- 2 tablespoons kosher salt
Instructions
Step 1: Prep Your Vegetables (15 minutes) Chop everything up how you like to eat it. I do carrots in coins because they’re perfect for snacking, but strips work great for sandwiches. Make sure everything’s completely dry—wet veggies make watery pickles, and nobody wants that.
Step 2: Pack Those Jars (10 minutes) Start with dill at the bottom of each jar, then toss in your garlic and spices. Don’t overthink the amounts—I eyeball about half a teaspoon of each spice per jar. Pack your veggies in tight but don’t crush them. If you want heat, now’s when you add that jalapeño.
Step 3: Make the Brine (10 minutes) Boil water with the garlic cloves for 5 minutes first—this step is crucial for mellow garlic flavor. Add everything else, boil until the salt and sugar disappear, then kill the heat. The brine should taste like pickle juice you’d actually want to drink.
Step 4: Pour and Wait Pour that hot brine over your veggies, leaving some room at the top. The hot liquid does something magical—it slightly softens the veggies while keeping them crisp. Let them cool completely before you lid them up.
Step 5: Patience (Sort Of) Into the fridge they go. You can totally sneak a taste after a few hours, but they’re legit ready after overnight chilling. The flavors keep getting better for days.
Notes
Don’t stress about perfection with this recipe. Missing a spice? Use what you have. Want more tang? Add more vinegar. Prefer it sweeter? More sugar. I’ve messed up these ratios so many times and they still turn out great. The vegetables will tell you what they need—if they taste bland after a day, your brine was too weak. If they’re too salty, add some water. It’s very forgiving.
- Category: Condiment
- Method: Quick Pickling
- Cuisine: American
Nutrition
- Serving Size: ½ cup
- Calories: 25 per serving
- Sugar: 4g
- Sodium: 480mg
- Fat: 0g
- Saturated Fat: 0g
- Trans Fat: 0g
- Carbohydrates: 6g
- Fiber: 322g
- Protein: 1g
- Cholesterol: 0mg
📝 Ingredient List
For the Vegetables (2 lbs mixed):
- Cauliflower head, chopped into florets
- Green beans, ends trimmed off
- 3-4 carrots, sliced however you want
- 4-5 small cucumbers, sliced
- Red bell pepper, cut in strips
- Sweet onion, sliced thin
- Whatever else looks good: asparagus, radishes, beets
For the Flavor Stuff:
- 6-8 dill sprigs (fresh, not dried)
- 6-8 garlic cloves, peeled
- 2 tsp celery seeds
- 2 tsp coriander seeds
- 2 tsp mustard seeds
- 2 tsp black peppercorns
- 1-2 hot peppers if you want heat
For the Brine:
- 2 cups white vinegar
- 4 cups water
- ¼ cup sugar
- 2 tablespoons kosher salt
🔍 Why These Ingredients Work
It’s, um, okay, let me break it down for you. White vinegar is your friend here, clean and sharp and not messing with the colors of the veg as the apple cider vinegar does. The sugar and salt combo is what makes these pickles actually edible instead of face-puckeringly sour. Those whole spices? They’re doing the heavy lifting flavor-wise. I learned this the hard way when I tried using pre-ground spices once—total flavor flop. Fresh dill and garlic are non-negotiable in my book. They make everything taste like proper pickles instead of sad vegetables swimming in vinegar.
Essential Tools and Equipment
You probably have everything already: clean mason jars, a pot for the brine, and a sharp knife. That’s it. I use quart jars because they fit more, but pint jars work too. Don’t overthink this part.
👩🍳 How To Make Refrigerator Pickled Vegetables
Step 1: Prep Your Vegetables (15 minutes) Chop everything up how you like to eat it. I do carrots in coins because they’re perfect for snacking, but strips work great for sandwiches. Make sure everything’s completely dry—wet veggies make watery pickles, and nobody wants that.
Step 2: Pack Those Jars (10 minutes) Start with dill at the bottom of each jar, then toss in your garlic and spices. Don’t overthink the amounts—I eyeball about half a teaspoon of each spice per jar. Pack your veggies in tight but don’t crush them. If you want heat, now’s when you add that jalapeño.
Step 3: Make the Brine (10 minutes) Boil water with the garlic cloves for 5 minutes first—this step is crucial for mellow garlic flavor. Add everything else, boil until the salt and sugar disappear, then kill the heat. The brine should taste like pickle juice you’d actually want to drink.
Step 4: Pour and Wait Pour that hot brine over your veggies, leaving some room at the top. The hot liquid does something magical—it slightly softens the veggies while keeping them crisp. Let them cool completely before you lid them up.
Step 5: Patience (Sort Of) Into the fridge they go. You can totally sneak a taste after a few hours, but they’re legit ready after overnight chilling. The flavors keep getting better for days.
When the garden’s overflowing and you need a quick way to preserve all those fresh veggies, my Refrigerator Pickled Vegetables are a crisp, tangy solution—no canning required. If you like a little extra kick, my Sweet Heat Pickles add a spicy-sweet twist that’s perfect for snacking or topping sandwiches. And for true heat lovers, Candied Jalapenos bring bold flavor with just the right amount of bite. However you pickle it, summer’s best flavors are only a jar away.
Tips from Well-Known Chefs
My friend Sarah who runs a local restaurant taught me this: don’t pack the jars like you’re moving house. The brine needs to get around each piece or you’ll have bland spots. She’s right—I used to cram everything in there and wonder why some pieces had zero flavor.
❗ You Must Know
DO NOT skip the room temperature cooling step. I know you’re impatient (I am too), but hot jars going straight into the fridge can crack, and nobody has time for that mess. Also, always use distilled white vinegar with 5% acidity—it’s on the label. My personal secret? I let those jars sit out for almost 2 hours before refrigerating. The veggies soak up more flavor this way, and it makes a noticeable difference.
💡 Pro Tips & Cooking Hacks
Here’s what I’ve learned from making hundreds of jars: Ice bath your cut veggies for 10 minutes if you want maximum crunch. Toast your spices in a dry pan for 30 seconds—game changer for flavor. Put dense stuff like carrots at the bottom, lighter things like onions on top. Never use table salt because it makes everything cloudy and tastes weird. And here’s my lazy hack: I make double brine and freeze half in ice cube trays. Future me always thanks past me for this.
🎨 Flavor Variations & Suggestions
I’m very easily bored so I mess with these recipes all the time. For a Mediterranean vibe, I add oregano, lemon zest and a few olives. If I’m going after an Asian flavor profile, I use rice vinegar and give it a grating or two of fresh ginger. Smoky heat is in smoked paprika and chipotle peppers. My garden fresh version has basil, cherry tomatoes, and a splash of balsamic. And when I want sweet heat, I up the sugar and add pineapple chunks with jalapeños—sounds weird but trust me on this one.
⏲️ Make-Ahead Options
This is meal prep heaven, honestly. I make six jars every Sunday and we eat them all week. They’re good after 8 hours, but day three is when they hit their stride—all those flavors finally get acquainted. When I’m running low, I just shove more veggies into the leftover brine. It’s like a pickle subscription that never ends, and way cheaper than anything you’ll buy at the store.
Recipe Notes & Baker’s Tips
Don’t stress about perfection with this recipe. Missing a spice? Use what you have. Want more tang? Add more vinegar. Prefer it sweeter? More sugar. I’ve messed up these ratios so many times and they still turn out great. The vegetables will tell you what they need—if they taste bland after a day, your brine was too weak. If they’re too salty, add some water. It’s very forgiving.
🍽️ Serving Suggestions
These go on everything in my house. BBQ? Check. Sandwiches? Obviously. Charcuterie boards? They’re the star of the show. I chop them up for potato salad, throw them in grain bowls, and yeah, eat them straight from the jar while standing in front of the open fridge. No judgment here.
🧊 How to Store Your Refrigerator Pickled Vegetables
Keep them in the fridge for a month, easy. They actually get better with age—more pickly, more flavorful. Don’t heat them up, they’re perfect cold. And listen, when the vegetables are gone, save that brine! I use it for salad dressing, chicken marinade, or just pour it over fresh veggies for round two. Waste nothing, pickle everything.
I hope these are your new fridge staples — mine would be awfully dull without them. It feels good to open your refrigerator to a row of jewel-toned pickle jars that you made. Happy pickling! 🥒✨
⚠️ Allergy Information
These are naturally gluten-free and vegan, which is great. The only thing to watch for is if you’re sensitive to vinegar—some people get heartburn. There’s sugar in the brine, but you can swap it for honey or maple syrup if that’s your thing. The salt content is pretty standard for pickles.
❓Questions I Get Asked A Lot
Can I use different types of vinegar?
Sure can. Apple cider vinegar makes them taste more complex, rice vinegar is milder. I’ve tried red wine vinegar with beets and it was amazing. Just stick with something that’s 5% acidity.
Do I need to sterilize the jars?
Nope. These live in your fridge, not your pantry. Just make sure they’re clean and dry. I run mine through the dishwasher but that’s probably overkill.
How do I know if they’ve gone bad?
Trust your nose. If they smell funky, look cloudy, or have any fuzz growing, toss them. Mine have never gone bad in a month, but I usually eat them way before that.
Can I reuse the brine?
Absolutely. I do it all the time. Just heat it up again before pouring over fresh veggies. I’ve reused the same brine three times before it got too weak.
Why aren’t my pickles crunchy?
Probably used soft vegetables to start with. Grocery store cucumbers that have been sitting around for weeks won’t magically get crispy. Start with firm, fresh stuff and you’ll be fine.
💬 Drop a comment if you try this recipe! I want to hear about your weird vegetable combinations and any disasters (we’ve all been there). Send me photos of your pickle jars—I collect them like trophies.