Homemade marshmallow cream is about to change your dessert game forever! This fluffy, sweet, cloud-like frosting tastes exactly like marshmallow fluff but without all the preservatives and high fructose corn syrup you find in the jarred stuff.
I started making this when my daughter requested s’mores cupcakes for her birthday, and now I can’t imagine going back to store-bought—it’s just that good! With only 4 ingredients and 15 minutes, you’ll have a pipeable, toastable frosting that elevates everything from cupcakes to pies to hot chocolate.

Why You’ll Love This Recipe
- Better Than Store-Bought – No weird ingredients, just pure marshmallow goodness!
- Surprisingly Simple – Easier than you think, and no candy thermometer required.
- Perfect for Piping – Unlike jarred fluff, this holds its shape beautifully on cupcakes.
- Toastable – Torch it for that authentic campfire marshmallow flavor!
- So Versatile – Use it anywhere you’d use marshmallow fluff, but way better.
Equipment Needed
- Double boiler (or heatproof bowl that fits over a saucepan)
- Whisk
- Hand mixer or stand mixer with whisk attachment
- Instant-read thermometer (helpful but optional)
- Kitchen torch (optional, for toasting)
- Piping bag with large round tip (like Ateco #808)

Homemade Marshmallow Cream
- Total Time: 15 minutes
Description
Fluffy homemade marshmallow cream made with just 4 simple ingredients! This easy meringue frosting is perfect for piping, toasting, and topping all your favorite desserts. So much better than store-bought!
Ingredients
-
- 4 large egg whites (from fresh eggs, not carton)
-
- 1 cup granulated sugar
-
- 1/2 teaspoon cream of tartar
-
- 1 teaspoon pure vanilla extract
Instructions
Fill a medium saucepan with about 2 inches of water and bring to a simmer over medium heat. Place your heatproof bowl on top, making sure the bottom doesn’t touch the water.
Add egg whites, sugar, and cream of tartar to the bowl. Whisk constantly—seriously, don’t stop whisking!—for about 4 minutes. You’ll notice the mixture goes from thick and tacky to thin and frothy.
Remove the bowl from heat (no need to let it cool down first!). Stir in the vanilla extract, then transfer everything to your stand mixer or use a hand mixer. Fit the mixer with the whisk attachment.
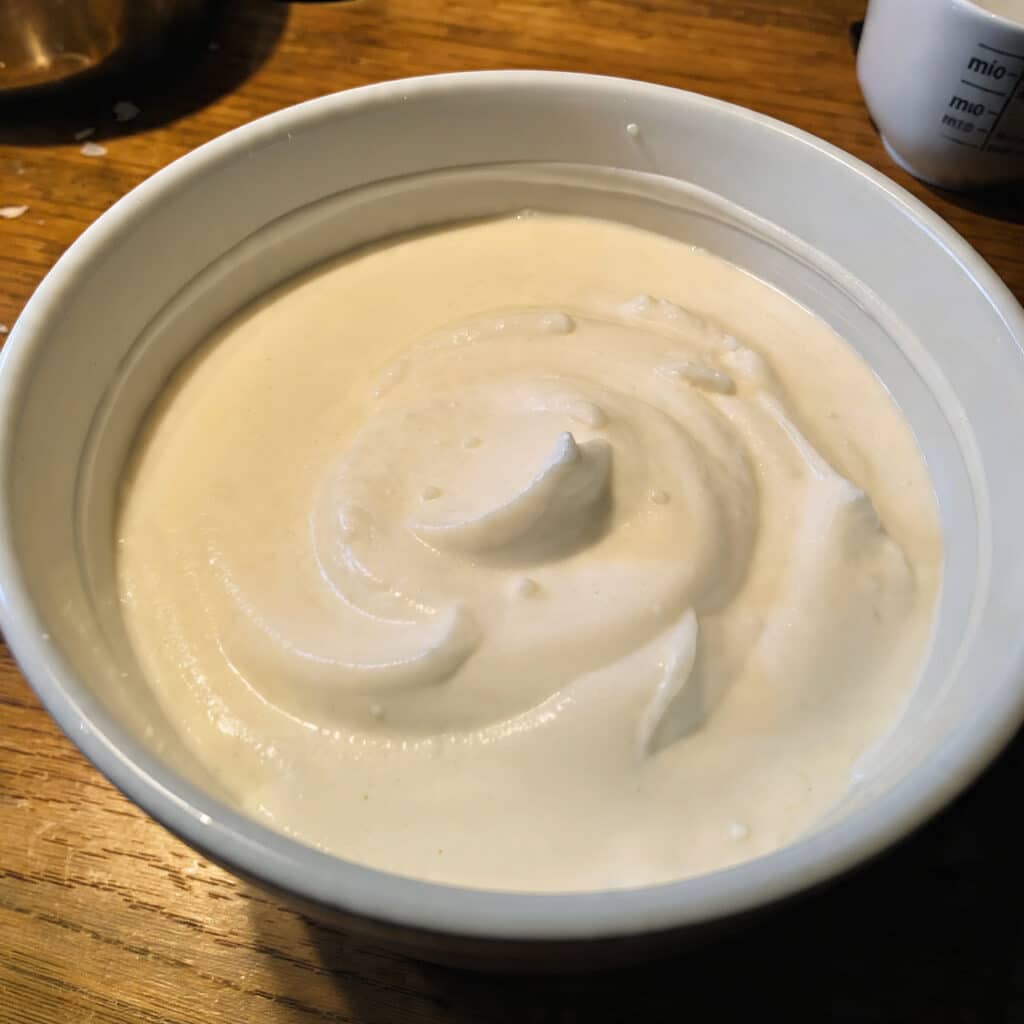
Beat on high speed for about 5 minutes. This is the magical part—watch as the mixture transforms from a thin liquid into this gorgeous, fluffy, voluminous cloud! You’ll know it’s ready when it forms stiff, glossy peaks that stand straight up when you lift the beater.
This marshmallow cream is best used right away while it’s at peak fluffiness! Pipe it onto cupcakes, spread it on cake, dollop it on pie, or toast it with a kitchen torch for that authentic s’mores experience.
Notes
Bowl Must Be Grease-Free: Even a tiny bit of grease prevents egg whites from whipping. Make sure your bowl and beaters are squeaky clean!
Separate Eggs Cold: Eggs separate much easier when cold, but they whip better at room temperature. Separate them cold, then let sit 30 minutes.
Scale the Recipe: Easy to halve, 1.5x, or double! Smaller batches whip faster; larger batches take a bit longer.
Perfect Piping: Use a large round tip for beautiful swirls. This doesn’t hold intricate shapes, but makes gorgeous clouds!
- Prep Time: 10 minutes
- Cook Time: 5 minutes
- Category: Dessert
- Method: Whipping
- Cuisine: American
Nutrition
- Calories: 35
- Sugar: 8g
- Sodium: 15mg
- Fat: 0g
- Saturated Fat: 0g
- Unsaturated Fat: 0g
- Trans Fat: 0g
- Carbohydrates: 8g
- Fiber: 0g
- Protein: 1g
- Cholesterol: 0mg
Ingredients You’ll Need
- 4 large egg whites (from fresh eggs, not carton)
- 1 cup granulated sugar
- 1/2 teaspoon cream of tartar
- 1 teaspoon pure vanilla extract
Ingredient Notes
- Egg Whites: Fresh egg whites work SO much better than carton egg whites! They whip higher and hold their peaks longer. Separate eggs while cold (it’s easier!), then let whites come to room temperature before using. Save those yolks for custard, ice cream, or lemon curd!
- Sugar: Regular granulated white sugar only—don’t use powdered sugar or brown sugar. The granulated sugar dissolves into the egg whites and provides structure.
- Cream of Tartar: This is essential! It stabilizes the egg whites and helps them hold those gorgeous stiff peaks. Don’t substitute lemon juice here—cream of tartar is what you need.
- Vanilla Extract: Use pure vanilla extract, not imitation. It makes a noticeable difference in flavor!
Step-by-Step Instructions
Step 1: Set Up Your Double Boiler
Fill a medium saucepan with about 2 inches of water and bring to a simmer over medium heat. Place your heatproof bowl on top, making sure the bottom doesn’t touch the water.
Step 2: Heat the Egg White Mixture
Add egg whites, sugar, and cream of tartar to the bowl. Whisk constantly—seriously, don’t stop whisking!—for about 4 minutes. You’ll notice the mixture goes from thick and tacky to thin and frothy.
Step 3: Add Vanilla and Start Whipping
Remove the bowl from heat (no need to let it cool down first!). Stir in the vanilla extract, then transfer everything to your stand mixer or use a hand mixer. Fit the mixer with the whisk attachment.
Step 4: Beat to Stiff Peaks
Beat on high speed for about 5 minutes. This is the magical part—watch as the mixture transforms from a thin liquid into this gorgeous, fluffy, voluminous cloud! You’ll know it’s ready when it forms stiff, glossy peaks that stand straight up when you lift the beater.
Step 5: Use Immediately
This marshmallow cream is best used right away while it’s at peak fluffiness! Pipe it onto cupcakes, spread it on cake, dollop it on pie, or toast it with a kitchen torch for that authentic s’mores experience.
Pro Tips & Cooking Hacks
- Bowl Must Be Grease-Free: Even a tiny bit of grease prevents egg whites from whipping. Make sure your bowl and beaters are squeaky clean!
- Separate Eggs Cold: Eggs separate much easier when cold, but they whip better at room temperature. Separate them cold, then let sit 30 minutes.
- Scale the Recipe: Easy to halve, 1.5x, or double! Smaller batches whip faster; larger batches take a bit longer.
- Perfect Piping: Use a large round tip for beautiful swirls. This doesn’t hold intricate shapes, but makes gorgeous clouds!
- Toasting Tip: Keep your kitchen torch moving constantly to prevent burning. Go for golden brown, not black!
Tips & Variations
Storage: Cover and refrigerate for up to 2 days, though it’s truly best used fresh. Desserts topped with this can sit at room temperature for 6-8 hours before you need to refrigerate them. After that, the topping will start to weep.
Flavor Variations: Replace vanilla with peppermint extract for holiday treats, add 1/2 teaspoon almond extract for an almond version, or use coconut extract for tropical vibes. For chocolate marshmallow, gently fold in 2 tablespoons melted and cooled chocolate at the very end.
Re-Whipping: If you refrigerate it and it loses volume, you can re-whip it briefly to restore some fluffiness, though it won’t be quite as perfect as fresh.
Serving Suggestions
This marshmallow cream is absolutely heavenly on chocolate cupcakes, pumpkin pie (instead of whipped cream!), or spread between graham crackers for instant s’mores. Swirl it into hot chocolate, spread it on brownies and torch it, or use it to frost a layer cake for a showstopping dessert.
It’s also the perfect topping for banana cream pie, as a filling for whoopie pies, sandwiched between chocolate cookies, or piped onto sweet potato pie for Thanksgiving. For a fun breakfast treat, spread it on waffles or pancakes and give it a quick toast with the kitchen torch!
Common Mistakes
- Using carton egg whites: Fresh eggs really do make a difference! They whip higher and hold peaks longer.
- Skipping cream of tartar: This isn’t optional—it’s what stabilizes the egg whites and helps them hold their structure.
- Greasy bowl or beaters: Even a trace of grease will prevent the egg whites from whipping properly. Make sure everything is spotless!
- Not beating long enough: It takes a full 5 minutes of high-speed beating to get those stiff, glossy peaks. Don’t rush it!
- Trying to freeze it: The texture changes significantly when frozen. It’s best to make this fresh when you need it.
What to Serve With Homemade Marshmallow Cream
This marshmallow cream pairs beautifully with rich chocolate desserts like devil’s food cake, brownies, or chocolate pudding. The sweet, fluffy topping balances the deep chocolate flavor perfectly. It’s also wonderful with fruit-based desserts like lemon bars, key lime pie, or fresh strawberry shortcake.
For a fun dessert board, set out the marshmallow cream with graham crackers, chocolate squares, fresh fruit, pretzels, and cookies for a build-your-own s’mores station. Kids and adults alike go crazy for this interactive dessert experience!
Frequently Asked Questions
Can I use carton egg whites?
Technically yes, but I really don’t recommend it. Fresh egg whites whip so much better and create a more stable meringue. It’s worth the extra minute to separate fresh eggs!
What do I do with the leftover egg yolks?
Make ice cream, custard, lemon curd, homemade mayo, or hollandaise sauce! You can also freeze egg yolks for up to 3 months—just whisk in a pinch of salt or sugar first.
Can I make this ahead of time?
It really is best used fresh within a few hours. You can refrigerate it for up to 2 days, but it will lose some volume. Since it only takes 15 minutes to make, I recommend making it fresh when you need it!
Why didn’t my meringue form stiff peaks?
A few possibilities: your bowl had grease (even a tiny bit prevents peaks), you didn’t beat it long enough, or there was yolk mixed in with the whites. Make sure everything is clean and try again!
How is this different from store-bought marshmallow fluff?
It tastes fresher, has no preservatives or corn syrup, and most importantly—it’s stable enough to pipe! Store-bought fluff is too runny to hold piped shapes. Plus, when you torch this, it tastes exactly like campfire marshmallows!
💬 Tried this recipe? Leave a comment and rating below! I’d love to know what you topped with your homemade marshmallow cream and whether you torched it!