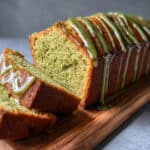
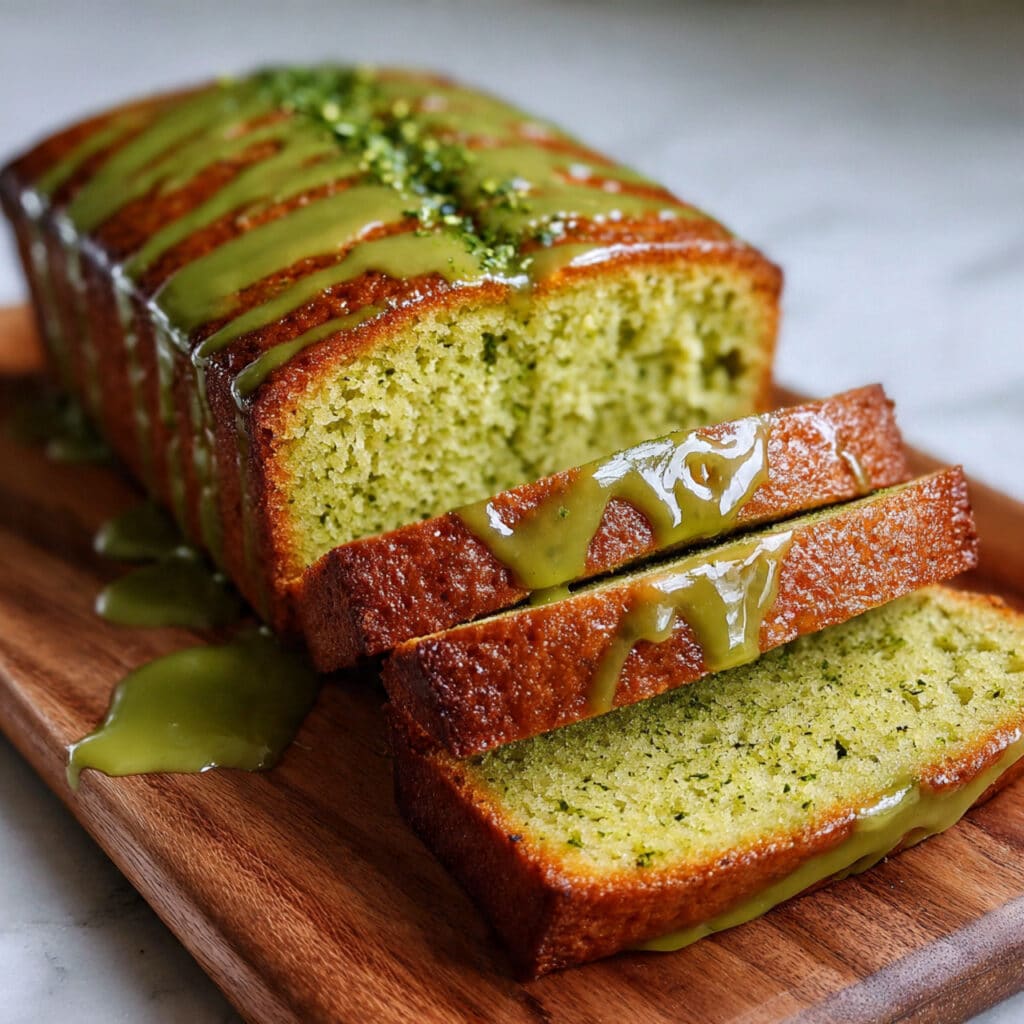
Matcha Pound Cake is the stunning fusion dessert that brings Japanese tea ceremony elegance to classic American baking, and trust me, it’s about to become your secret weapon for impressing guests. This isn’t your average pound cake—it’s a vibrant green, butter-rich masterpiece with earthy matcha flavor balanced by sweet vanilla notes that’ll have everyone asking for the recipe.
I stumbled upon matcha baking during a trip to a Japanese bakery in San Francisco, and after one bite of their matcha loaf, I was determined to recreate that perfect balance of bitter and sweet at home. Now this gorgeous cake is my go-to for spring brunches, afternoon tea parties, and any time I want to serve something both beautiful and delicious.

Why You’ll Love This Recipe
This Matcha Pound Cake delivers Instagram-worthy results with surprisingly simple ingredients you can find at most grocery stores or online. The earthy, slightly bitter matcha powder creates a sophisticated flavor profile that’s not overly sweet, making it perfect for Americans who want to explore Japanese flavors without diving too deep into unfamiliar territory.
Unlike fussy layered cakes, this single-loaf wonder comes together in one bowl using the classic creaming method, and the optional matcha glaze adds an extra pop of green tea flavor and visual appeal.
It’s naturally impressive enough for special occasions yet easy enough for weekend baking, and the vibrant green color makes it a showstopper at St. Patrick’s Day celebrations, spring gatherings, or Mother’s Day brunches.
Equipment Needed
- 9×5-inch loaf pan
- Parchment paper or cooking spray and flour for pan prep
- Large mixing bowl
- Medium mixing bowl
- Electric hand mixer or stand mixer
- Fine-mesh sieve or flour sifter (essential for matcha!)
- Whisk
- Rubber spatula
- Measuring cups and spoons
- Wire cooling rack
- Small bowl (for glaze)
- Toothpick or cake tester
- Optional: offset spatula for glazing
Matcha Pound Cake
- Total Time: 90 minutes
- Yield: 1 loaf (9×5-inch) 1x
Description
Vibrant Matcha Pound Cake with earthy green tea flavor and buttery, moist crumb. This easy Japanese-inspired loaf cake uses culinary-grade matcha powder and optional matcha glaze for a stunning dessert that’s perfect for tea time, brunch, or spring celebrations.
Ingredients
For the Dry Ingredients:
- 2 cups all-purpose flour
- 2–3 tablespoons matcha powder (culinary-grade green tea powder; start with 2 tablespoons for mild flavor, 3 for intense)
- 1 teaspoon baking powder
- ¼ teaspoon salt
For the Wet Ingredients:
- 1 cup unsalted butter, room temperature (2 sticks; can substitute salted butter but omit added salt)
- 1¼ cups granulated sugar
- 3 large eggs, room temperature
- 1 teaspoon pure vanilla extract
- ½ cup whole milk or 2% milk, room temperature
- 1 tablespoon fresh lemon juice, optional (brightens matcha flavor and adds subtle tang)
For the Matcha Glaze (Optional):
- 1 cup powdered sugar (confectioners’ sugar)
- 1–2 teaspoons matcha powder
- 1–2 tablespoons milk (for consistency)
- Drop of vanilla extract, optional
Instructions
Preheat your oven to 350°F (175°C)—standard baking temperature for this cake. Grease your 9×5-inch loaf pan generously with butter or cooking spray, then dust with flour, tapping out excess. For easiest removal, line the pan with parchment paper
In a medium bowl, whisk together 2 cups all-purpose flour, 2–3 tablespoons matcha powder (sifted!), 1 teaspoon baking powder, and ¼ teaspoon salt. Sifting the matcha is absolutely essential—it’s naturally clumpy and won’t distribute evenly otherwise
In a large bowl using an electric mixer on medium-high speed, beat the room-temperature butter and granulated sugar for 3–4 minutes until the mixture is light, fluffy, and pale in color. This creaming process incorporates air that gives your pound cake its tender, fine crumb, so don’t skimp on time.
Add the eggs one at a time, beating well for about 30 seconds after each addition to ensure proper emulsification. After all eggs are incorporated, mix in the vanilla extract and optional lemon juice, beating just until combined.
Add the dry mixture to the butter mixture in three additions, alternating with the milk in two additions, following this pattern: dry → milk → dry → milk → dry. Mix on low speed after each addition just until the flour disappears—you should still see a few streaks before the final addition. Stop mixing as soon as the batter comes together and looks silky; overmixing develops gluten and creates a dense, tough cake.
Pour the batter into your prepared loaf pan and smooth the top with a rubber spatula, creating a slight valley down the center (this helps the cake rise evenly). Bake for 50–60 minutes, checking at 50 minutes by inserting a toothpick into the center—it should come out clean or with just a few moist crumbs. If the top browns too quickly, tent loosely with aluminum foil during the last 10–15 minutes of baking.
Let the cake cool in the pan for 15 minutes to set—removing it too early can cause it to break apart. Run a butter knife around the edges, then lift out using parchment handles or invert onto a wire rack. Cool completely before glazing, at least 1–2 hours, or the glaze will melt and absorb into the cake rather than setting on top.
In a small bowl, whisk together 1 cup powdered sugar and 1–2 teaspoons sifted matcha powder. Add milk 1 tablespoon at a time, whisking until you reach a thick but pourable consistency—it should slowly drip off a spoon. Once the cake is completely cool, drizzle the glaze over the top, letting it cascade naturally down the sides. Let the glaze set for 15–20 minutes before slicing.
Notes
- Don’t overbake: Matcha pound cake is best when slightly moist. Check at 50 minutes and pull it when a toothpick has a few moist crumbs—overbaking creates dry, crumbly texture.
- Preserve the green color: Add 1 tablespoon lemon juice to prevent oxidation that turns matcha brownish. Bake as soon as batter is mixed—letting it sit allows color to fade.
- Test your matcha first: Not sure about your matcha quality? Mix ½ teaspoon with hot water. It should taste grassy-sweet, not bitter or hay-like, and be vibrant green, not brownish.
- Prevent cracking: Create a shallow valley down the center of the batter before baking to encourage even rising. Lower oven temperature to 325°F if your oven runs hot.
- Prep Time: 15 minutes
- Cook Time: 1 hour
- Category: Dessert
- Method: Baking
- Cuisine: Japanese-Inspired
Nutrition
- Serving Size: 1 slice
- Calories: 380
- Sugar: 28g
- Sodium: 140mg
- Fat: 19g
- Saturated Fat: 12g
- Unsaturated Fat: 6g
- Trans Fat: 0g
- Carbohydrates: 48g
- Fiber: 1g
- Protein: 5g
- Cholesterol: 100mg
Ingredients You’ll Need
For the Dry Ingredients:
- 2 cups all-purpose flour
- 2–3 tablespoons matcha powder (culinary-grade green tea powder; start with 2 tablespoons for mild flavor, 3 for intense)
- 1 teaspoon baking powder
- ¼ teaspoon salt
For the Wet Ingredients:
- 1 cup unsalted butter, room temperature (2 sticks; can substitute salted butter but omit added salt)
- 1¼ cups granulated sugar
- 3 large eggs, room temperature
- 1 teaspoon pure vanilla extract
- ½ cup whole milk or 2% milk, room temperature
- 1 tablespoon fresh lemon juice, optional (brightens matcha flavor and adds subtle tang)
For the Matcha Glaze (Optional):
- 1 cup powdered sugar (confectioners’ sugar)
- 1–2 teaspoons matcha powder
- 1–2 tablespoons milk (for consistency)
- Drop of vanilla extract, optional
Ingredient Notes
Matcha Powder: Quality matters here! Use culinary-grade matcha from brands like Jade Leaf, Encha, or Mizuba—it’s more affordable than ceremonial grade but still vibrant. Avoid stale matcha, which turns brownish-green and tastes bitter. Look for bright, vivid green powder and store it in the fridge or freezer to maintain freshness.
Matcha Amount: Start with 2 tablespoons for a subtle green tea flavor and pale green color, perfect for matcha beginners. Use 3 tablespoons for bold, earthy flavor and that signature vibrant green color you see in Japanese bakeries. More than 3 tablespoons can make the cake taste bitter.
Butter: Must be at room temperature (about 65–68°F) for proper creaming. Leave it out for 45–60 minutes or cut into cubes to speed softening. European-style butter adds extra richness but isn’t necessary.
Lemon Juice: This optional ingredient is a game-changer—the acidity brightens the earthy matcha and keeps the green color from oxidizing to brown. Highly recommended if you want the most vibrant results.
Milk: Whole milk creates the richest crumb, but 2% works perfectly fine. Avoid skim milk, which can make the cake slightly dry. Room temperature is crucial for smooth batter incorporation.
Where to Buy Matcha: Find culinary matcha at Whole Foods, Asian grocery stores, Trader Joe’s, or online at Amazon, Thrive Market, or specialty tea retailers. Avoid cheap matcha from regular supermarkets, which often tastes grassy and bitter.
Step-by-Step Instructions
Step 1: Prep Your Oven and Pan
Preheat your oven to 350°F (175°C)—standard baking temperature for this cake. Grease your 9×5-inch loaf pan generously with butter or cooking spray, then dust with flour, tapping out excess. For easiest removal, line the pan with parchment paper
Step 2: Sift and Mix Dry Ingredients
In a medium bowl, whisk together 2 cups all-purpose flour, 2–3 tablespoons matcha powder (sifted!), 1 teaspoon baking powder, and ¼ teaspoon salt. Sifting the matcha is absolutely essential—it’s naturally clumpy and won’t distribute evenly otherwise
Step 3: Cream Butter and Sugar
In a large bowl using an electric mixer on medium-high speed, beat the room-temperature butter and granulated sugar for 3–4 minutes until the mixture is light, fluffy, and pale in color. This creaming process incorporates air that gives your pound cake its tender, fine crumb, so don’t skimp on time.
Step 4: Add Eggs and Flavorings
Add the eggs one at a time, beating well for about 30 seconds after each addition to ensure proper emulsification. After all eggs are incorporated, mix in the vanilla extract and optional lemon juice, beating just until combined.
Step 5: Alternate Dry and Wet Ingredients
Add the dry mixture to the butter mixture in three additions, alternating with the milk in two additions, following this pattern: dry → milk → dry → milk → dry. Mix on low speed after each addition just until the flour disappears—you should still see a few streaks before the final addition. Stop mixing as soon as the batter comes together and looks silky; overmixing develops gluten and creates a dense, tough cake.
Step 6: Bake to Perfection
Pour the batter into your prepared loaf pan and smooth the top with a rubber spatula, creating a slight valley down the center (this helps the cake rise evenly). Bake for 50–60 minutes, checking at 50 minutes by inserting a toothpick into the center—it should come out clean or with just a few moist crumbs. If the top browns too quickly, tent loosely with aluminum foil during the last 10–15 minutes of baking.
Step 7: Cool Completely
Let the cake cool in the pan for 15 minutes to set—removing it too early can cause it to break apart. Run a butter knife around the edges, then lift out using parchment handles or invert onto a wire rack. Cool completely before glazing, at least 1–2 hours, or the glaze will melt and absorb into the cake rather than setting on top.
Step 8: Make the Matcha Glaze (Optional)
In a small bowl, whisk together 1 cup powdered sugar and 1–2 teaspoons sifted matcha powder. Add milk 1 tablespoon at a time, whisking until you reach a thick but pourable consistency—it should slowly drip off a spoon. Once the cake is completely cool, drizzle the glaze over the top, letting it cascade naturally down the sides. Let the glaze set for 15–20 minutes before slicing.
Pro Tips & Cooking Hacks
- Sift that matcha: Always sift matcha powder through a fine-mesh sieve before adding to dry ingredients. Matcha is naturally clumpy and won’t distribute evenly otherwise, creating unappetizing dark green spots.
- Room temperature matters: Cold eggs and butter won’t emulsify properly. Warm eggs quickly by placing them in a bowl of warm water for 5 minutes; soften butter by cutting it into small cubes.
- Don’t overbake: Matcha pound cake is best when slightly moist. Check at 50 minutes and pull it when a toothpick has a few moist crumbs—overbaking creates dry, crumbly texture.
- Preserve the green color: Add 1 tablespoon lemon juice to prevent oxidation that turns matcha brownish. Bake as soon as batter is mixed—letting it sit allows color to fade.
- Test your matcha first: Not sure about your matcha quality? Mix ½ teaspoon with hot water. It should taste grassy-sweet, not bitter or hay-like, and be vibrant green, not brownish.
- Prevent cracking: Create a shallow valley down the center of the batter before baking to encourage even rising. Lower oven temperature to 325°F if your oven runs hot.
- Make glaze pop: For extra visual impact, use 2 teaspoons matcha in the glaze for deep green color that contrasts beautifully with the cake.
Tips & Variations
Storage: Store glazed matcha pound cake at room temperature in an airtight container or wrapped tightly in plastic wrap for up to 4 days. The flavor actually improves after day one as it mellows. Unglazed cake can be wrapped tightly and frozen for up to 3 months—thaw overnight at room temperature before glazing and serving.
Make-Ahead Option: Bake the cake up to 2 days ahead, wrap tightly, and store at room temperature. Make and apply the glaze the day of serving for the freshest appearance and best texture.
White Chocolate Drizzle: Skip the matcha glaze and drizzle with melted white chocolate for a sweeter, more kid-friendly version. The white and green color combination is stunning.
Matcha-Vanilla Swirl: Divide batter in half, leaving one portion plain (no matcha) and adding all the matcha to the other half. Layer in the pan and swirl with a knife for a marbled effect.
Gluten-Free Version: Use a 1:1 gluten-free flour blend (like Bob’s Red Mill or King Arthur Measure for Measure) in place of all-purpose flour. Add 1 teaspoon xanthan gum if your blend doesn’t contain it. Texture will be slightly denser but still delicious.
Vegan Matcha Cake: Substitute vegan butter, use flax eggs (3 tablespoons ground flaxseed mixed with 9 tablespoons water, let sit 5 minutes), and use non-dairy milk. Results won’t be identical but still tasty.
Mini Loaves: Divide batter among 3–4 mini loaf pans and bake for 30–35 minutes. Perfect for gift-giving!
Serving Suggestions
This elegant Matcha Pound Cake is perfect for afternoon tea service—slice it thick and serve alongside hot green tea, English breakfast tea, or even coffee for a sophisticated mid-afternoon treat.
The subtle sweetness and earthy matcha flavor make it ideal for spring and summer gatherings, Mother’s Day brunches, or Japanese-themed dinner parties where you want to end on a lighter note than heavy chocolate desserts.
For a truly special presentation, serve slices with a dollop of sweetened whipped cream and fresh berries—strawberries and raspberries complement the green tea flavor beautifully. You can also toast slices lightly and spread with butter, cream cheese, or even red bean paste for an authentically Japanese-inspired breakfast treat that’ll make your weekend mornings feel extra special.
Common Mistakes
- Using old or low-quality matcha: Stale matcha tastes bitter and looks brownish-green instead of vibrant. Invest in fresh culinary-grade matcha and store it properly in the fridge or freezer.
- Not sifting the matcha: Matcha powder is extremely fine and clumps easily. Skipping the sifting step leaves you with green spots and uneven color throughout your cake.
- Overmixing the batter: Once flour is added, mix only until you can’t see dry streaks. Overmixing develops gluten, creating tough, dense cake with tunnels and a peaked top.
- Baking at too high temperature: Unlike some pound cakes that bake at 325°F, this recipe uses 350°F. If your oven runs hot, lower to 325°F to prevent over-browning.
- Glazing a warm cake: Always wait for complete cooling. Warm cake will absorb the glaze instead of letting it set on top, and you’ll lose that pretty drizzled effect.
- Using ceremonial-grade matcha: Save the expensive ceremonial matcha for drinking! Culinary-grade is specifically formulated for baking and much more affordable.
What to Serve With Matcha Pound Cake
This versatile cake pairs beautifully with hot beverages during afternoon tea time—serve with traditional green tea to complement the matcha, or contrast it with bold coffee or Earl Grey tea.
The subtle, earthy sweetness makes it an excellent follow-up to Asian-inspired dinners like sushi, ramen, or teriyaki, where a heavy chocolate dessert would feel out of place. It’s also wonderful at brunch alongside fruit salad, yogurt parfaits, and quiche for a sophisticated spread that feels special without being fussy.
Frequently Asked Questions
What’s the difference between culinary and ceremonial matcha?
Ceremonial-grade matcha is the highest quality, made from the youngest tea leaves, and is meant for traditional tea ceremonies—it’s smooth, sweet, and expensive ($25–40 per ounce). Culinary-grade matcha is made from slightly older leaves, has a stronger, more bitter flavor that stands up to sugar and butter, and costs much less ($10–20 per ounce). For baking, always use culinary-grade—it’s formulated for cooking and won’t break the bank.
Can I make this in a bundt pan instead of a loaf pan?
Absolutely! A 10-cup bundt pan works perfectly—bake at 350°F for 45–55 minutes, checking for doneness with a toothpick. The cake will look stunning with glaze dripping down the bundt’s ridges. You can also use two 8×4-inch loaf pans (bake 40–50 minutes) or a 9-inch round cake pan (bake 35–45 minutes).
Why did my matcha cake turn brown instead of staying green?
Matcha oxidizes when exposed to heat and air, especially in alkaline environments. To preserve green color: use fresh, high-quality matcha; add 1 tablespoon lemon juice (acid helps); don’t overmix or let batter sit before baking; and bake immediately once batter is ready. Some browning is natural and doesn’t affect flavor.
How do I know when the cake is done?
Insert a toothpick or cake tester into the deepest part of the cake (usually the center). It should come out clean or with just a few moist crumbs clinging to it—completely wet batter means it needs more time. The top should be golden (yes, it browns despite the green batter) and spring back when lightly pressed. Internal temperature should be 200–205°F on an instant-read thermometer.
Can I reduce the sugar without ruining the cake?
You can reduce the granulated sugar by up to ¼ cup without drastically affecting texture, though the cake will be less sweet and might not brown as nicely. Matcha has natural bitterness, so some sweetness is necessary to balance it—reducing sugar too much can make the cake taste overly earthy or grassy. Start with the full amount your first time, then adjust based on preference.
💬 Tried this Matcha Pound Cake? Leave a comment and rating below! I’d love to hear if you went with 2 or 3 tablespoons of matcha and what you thought of the flavor.