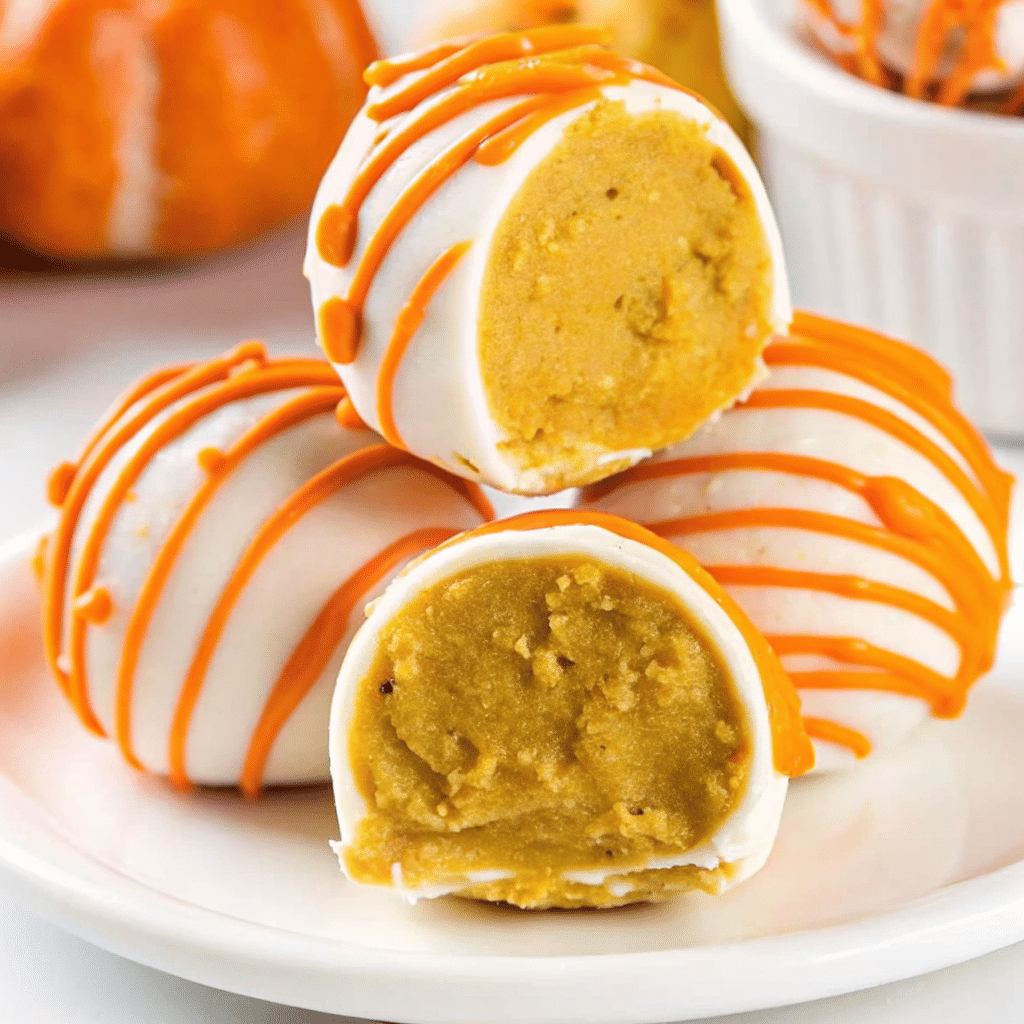
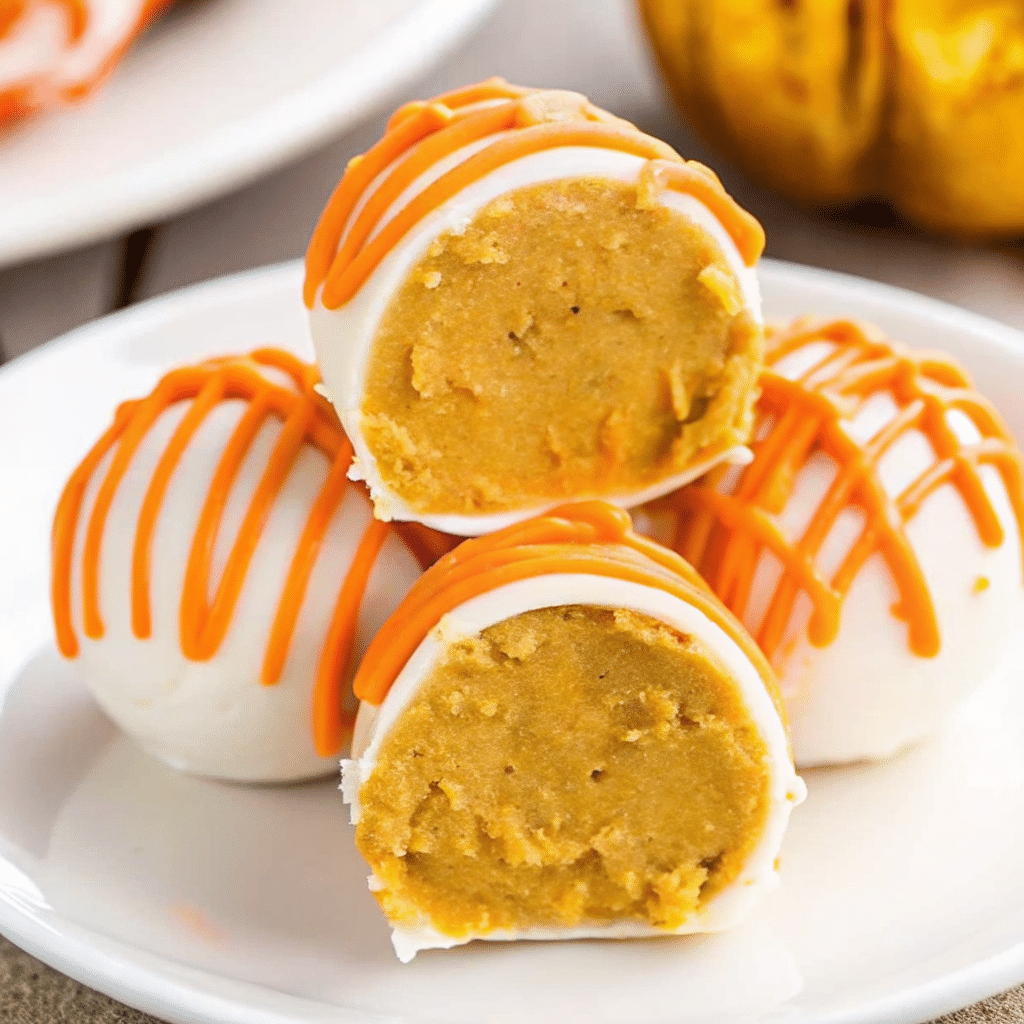
No Bake Pumpkin Cheesecake Balls were a last-minute lifesaver last Halloween when I needed something that looked impressive but had zero time to turn on the oven. My teenage daughter rolled her eyes as I started mixing cream cheese and pumpkin in a bowl—but twenty minutes later, she was sneaking thirds from the fridge.
Now they’re our go-to when we want a dessert that feels fancy but takes almost no effort. My neighbor Linda swears they’re better than anything from the bakery, and honestly, I kind of agree.

❤️ Why You’ll Love This Recipe
Look, I’ve made a lot of pumpkin desserts in my day, but these little guys hit different. You get this amazing cheesecake flavor without dealing with water baths or worrying about cracks. The white chocolate coating makes them look fancy enough for company, but they’re simple enough that my kids can help roll them. Best part? Make them Sunday night and you’ve got dessert sorted for the whole week.
Print
No Bake Pumpkin Cheesecake Balls
- Total Time: 3 hours 15 minutes
- Yield: About 4 dozen 1x
Description
Easy No Bake Pumpkin Cheesecake Balls recipe with cream cheese, pumpkin puree, and white chocolate coating. Perfect make-ahead fall dessert that’s ready in just 15 minutes of prep
Ingredients
For the Pumpkin Cheesecake Base:
- 8 oz cream cheese, softened (don’t skip the softening – it’s crucial!)
- ⅓ cup powdered sugar
- ⅔ cup pumpkin purée (canned works perfectly)
- 1 tsp pumpkin pie spice (or make your own blend)
- 1½ cups graham cracker crumbs
- 1½ cups gingersnap crumbs (adds that extra spice depth!)
- 2 cups white chocolate chips, melted
For the Coating & Finishing:
- 12 oz white almond bark or white chocolate coating
- 1 cup orange candy melts (optional but so pretty for drizzling!)
Instructions
1. Get Your Cream Cheese Right (5 minutes) Beat that cream cheese with the powdered sugar until it’s completely smooth. I learned the hard way – lumpy cream cheese means lumpy balls, and nobody wants that. Mix in your pumpkin and spices until everything’s evenly orange.
2. Add Your Cookie Crumbs (3 minutes) Fold in both types of crumbs until the mixture holds together. Don’t go crazy mixing – just until it’s combined.
3. Melt and Fold the White Chocolate (2 minutes) Melt those white chocolate chips in 30-second bursts, stirring each time. Let it cool just a bit, then fold it into your pumpkin mixture.
4. First Chill (2¼ hours) This is where patience pays off. Cover the bowl and stick it in the fridge until it’s firm enough to roll. I usually make the mixture in the morning and roll the balls after lunch.
5. Roll Into Balls (10 minutes) Use a small scoop or spoon to make uniform balls. Place them on parchment paper and chill another 30 minutes.
6. Dip in White Chocolate (15 minutes) Melt your almond bark slowly – patience here prevents seized chocolate. Dip each ball, tap off excess, and return to parchment. If you want the orange drizzle, do it while the coating’s still soft.
7. Final Set (30 minutes) One last chill to set everything perfectly.
Notes
If the mixture’s too soft to roll, stick it back in the fridge. Too hard? Let it sit on the counter for ten minutes.
Water is chocolate’s enemy. Even one drop will turn your smooth melted chocolate into a lumpy mess. Keep everything dry when you’re working with the coating.
Double-dip if your coating looks thin. Let the first layer set completely, then dip again for that thick candy shop look.
- Prep Time: 15 minutes
- Category: Dessert
- Method: No-bake
- Cuisine: American
Nutrition
- Serving Size: 2 balls
- Calories: 145 per serving
- Sugar: 12g
- Sodium: 85mg
- Fat: 8g
- Saturated Fat: 5g
- Unsaturated Fat: 2g
- Trans Fat: 0g
- Carbohydrates: 18g
- Fiber: 1g
- Protein: 3g
- Cholesterol: 15mg
📝 Ingredient List
For the Pumpkin Cheesecake Base:
- 8 oz cream cheese, softened (don’t skip the softening – it’s crucial!)
- ⅓ cup powdered sugar
- ⅔ cup pumpkin purée (canned works perfectly)
- 1 tsp pumpkin pie spice (or make your own blend)
- 1½ cups graham cracker crumbs
- 1½ cups gingersnap crumbs (adds that extra spice depth!)
- 2 cups white chocolate chips, melted
For the Coating & Finishing:
- 12 oz white almond bark or white chocolate coating
- 1 cup orange candy melts (optional but so pretty for drizzling!)
Smart Substitutions: No gingersnaps? Use all graham crackers or try vanilla wafer crumbs. Want it dairy-free? Use vegan cream cheese and dairy-free chocolate chips!
🔍 Why These Ingredients Work
After making these probably fifty times (no joke), I’ve learned why each ingredient matters. The cream cheese gives you that tangy cheesecake base we’re after, while the pumpkin keeps things moist without being soggy. Here’s where I get sneaky – using both graham crackers and gingersnaps instead of just one. Graham crackers add sweetness, gingersnaps bring the spice. It’s like having two different cookies in one bite.
That melted white chocolate stirred right into the mix? Pure genius move. It makes everything bind together without being too sweet, plus it adds this subtle richness that makes people ask what your secret is.
Essential Tools and Equipment
- Electric hand mixer or stand mixer
- Large mixing bowl
- Cookie scoop or tablespoon for uniform balls
- Baking sheets lined with parchment paper
- Microwave-safe bowls for melting chocolate
- Fork for dipping (or invest in chocolate dipping forks – game changer!)
👩🍳 How To Make No Bake Pumpkin Cheesecake Balls
1. Get Your Cream Cheese Right (5 minutes) Beat that cream cheese with the powdered sugar until it’s completely smooth. I learned the hard way – lumpy cream cheese means lumpy balls, and nobody wants that. Mix in your pumpkin and spices until everything’s evenly orange.
2. Add Your Cookie Crumbs (3 minutes) Fold in both types of crumbs until the mixture holds together. Don’t go crazy mixing – just until it’s combined.
3. Melt and Fold the White Chocolate (2 minutes) Melt those white chocolate chips in 30-second bursts, stirring each time. Let it cool just a bit, then fold it into your pumpkin mixture.
4. First Chill (2¼ hours) This is where patience pays off. Cover the bowl and stick it in the fridge until it’s firm enough to roll. I usually make the mixture in the morning and roll the balls after lunch.
5. Roll Into Balls (10 minutes) Use a small scoop or spoon to make uniform balls. Place them on parchment paper and chill another 30 minutes.
6. Dip in White Chocolate (15 minutes) Melt your almond bark slowly – patience here prevents seized chocolate. Dip each ball, tap off excess, and return to parchment. If you want the orange drizzle, do it while the coating’s still soft.
7. Final Set (30 minutes) One last chill to set everything perfectly.

Tips from Well-Known Chefs
Martha Stewart’s wisdom: “Temperature is everything in no-bake desserts. Each chilling step ensures your final product holds its shape beautifully.”
❗ You Must Know
Cream cheese MUST be fully softened – I cannot stress this enough! Leave it out for at least 2 hours, or microwave it in 10-second bursts. Lumpy cream cheese = lumpy balls, and nobody wants that.
Personal Secret: I always drain my pumpkin puree in a fine mesh strainer for about an hour before using it. Learned this after my first batch came out too soft to roll properly!
💡 Pro Tips & Cooking Hacks
Here’s what I’ve learned from making these countless times. Use a small cookie scoop – your balls will look way more professional than if you eyeball it. If the mixture’s too soft to roll, stick it back in the fridge. Too hard? Let it sit on the counter for ten minutes.
Water is chocolate’s enemy. Even one drop will turn your smooth melted chocolate into a lumpy mess. Keep everything dry when you’re working with the coating.
Double-dip if your coating looks thin. Let the first layer set completely, then dip again for that thick candy shop look.
🎨 Flavor Variations & Suggestions
Want to switch things up? Add a tiny pinch of cayenne to the pumpkin mix for some heat. My sister-in-law rolls hers in chopped pecans before dipping – looks gorgeous and tastes even better.
For chocolate lovers, swap the white coating for milk chocolate and drizzle with dark. I’ve also tried using maple syrup instead of some of the powdered sugar, and it gives them this amazing depth.
⏲️ Make-Ahead Options
These are perfect for busy weekends. You can make the filling up to three days ahead – just keep it covered in the fridge. I often shape the balls and freeze them on cookie sheets, then toss them in freezer bags. They keep for two months that way.
When you’re ready to serve, thaw them overnight and coat the next day. The coating is best done fresh, but everything else can be prepped way ahead.
Recipe Notes & Baker’s Tips
The two different cookie crumbs aren’t just me being fancy – they really do make a difference. Graham crackers give you that classic cheesecake crust flavor, while gingersnaps add warmth and spice. If you can only find one, use what you have, but hunt down both if you can.
Different pumpkin brands have different moisture levels. If your mixture seems wet after everything’s mixed in, just add more crumbs a little at a time.
🍽️ Serving Suggestions
These beauties are perfect for Halloween parties, Thanksgiving dessert tables, or anytime you need a show-stopping treat that doesn’t require oven space! Serve them on a pretty platter with some cinnamon sticks for garnish, or nestle them in mini cupcake liners for an elegant presentation.
They’re also fantastic alongside a warm cup of apple cider or your favorite fall latte!
I hope these become a new go-to in your kitchen – there’s something so satisfying about creating something this delicious without turning on a single appliance!
🧊 How to Store Your Pumpkin Cheesecake Balls
Store these gems in an airtight container in the refrigerator for up to 5 days. They actually taste even better after a day or two as the flavors meld together!
For longer storage, freeze the uncoated balls for up to 2 months. Thaw overnight in the fridge before coating and serving.
No reheating needed – these are perfect straight from the fridge!
⚠️ Allergy Information
Contains: Dairy (cream cheese, white chocolate), gluten (graham crackers, gingersnaps), and may contain nuts (check your chocolate brands).
Gluten-free option: Substitute gluten-free graham crackers and gingersnaps. Dairy-free option: Use vegan cream cheese and dairy-free white chocolate chips.
❓ Questions I Get Asked A Lot
Can I use fresh pumpkin instead of canned?
Absolutely! Just make sure to roast and purée it yourself, then drain excess moisture overnight in a fine-mesh strainer.
Why are my balls falling apart?
This usually means the mixture wasn’t chilled long enough, or your cream cheese wasn’t fully softened initially. Chill longer and try again!
Can I make these without the white chocolate in the filling?
Yes, but you might need to add extra crumbs to help bind everything together. The chocolate really helps with structure and richness.
How far ahead can I make these?
The filling can be made 3 days ahead, balls can be shaped and frozen for 2 months, but coat them the day of serving for best results.
What if I don’t have almond bark?
Regular white chocolate chips work fine – just add a teaspoon of coconut oil or shortening to help with smooth melting and coating.
💬 Tried this recipe? Leave a comment and rating below! I’d love to hear about your flavor variations and see photos of your beautiful balls! Did you try the orange drizzle? What’s your favorite fall no-bake treat?