Last summer, my grandmother handed me a recipe card so stained and worn I could barely read the words. It was her pimento cheese tomato pie recipe – the same one she’d been making for Sunday dinners since I was knee-high to a grasshopper. Three generations later, this pie still steals the show at every family gathering.
I’ve tweaked it just slightly over the years, but the heart remains the same. When August tomatoes are bursting with juice and the pimento cheese is creamy perfection, magic happens in that oven. My teenagers actually fight over the last slice – now that’s saying something!
❤️ Why You’ll Love This Recipe
This isn’t just another casserole – it’s comfort food that actually looks fancy enough for company. The sharp cheddar melts into creamy heaven while those garden tomatoes add the perfect sweet-tart bite. I love that you can throw it together in thirty minutes, then let the oven do the work while you catch up with friends on the porch.
Print
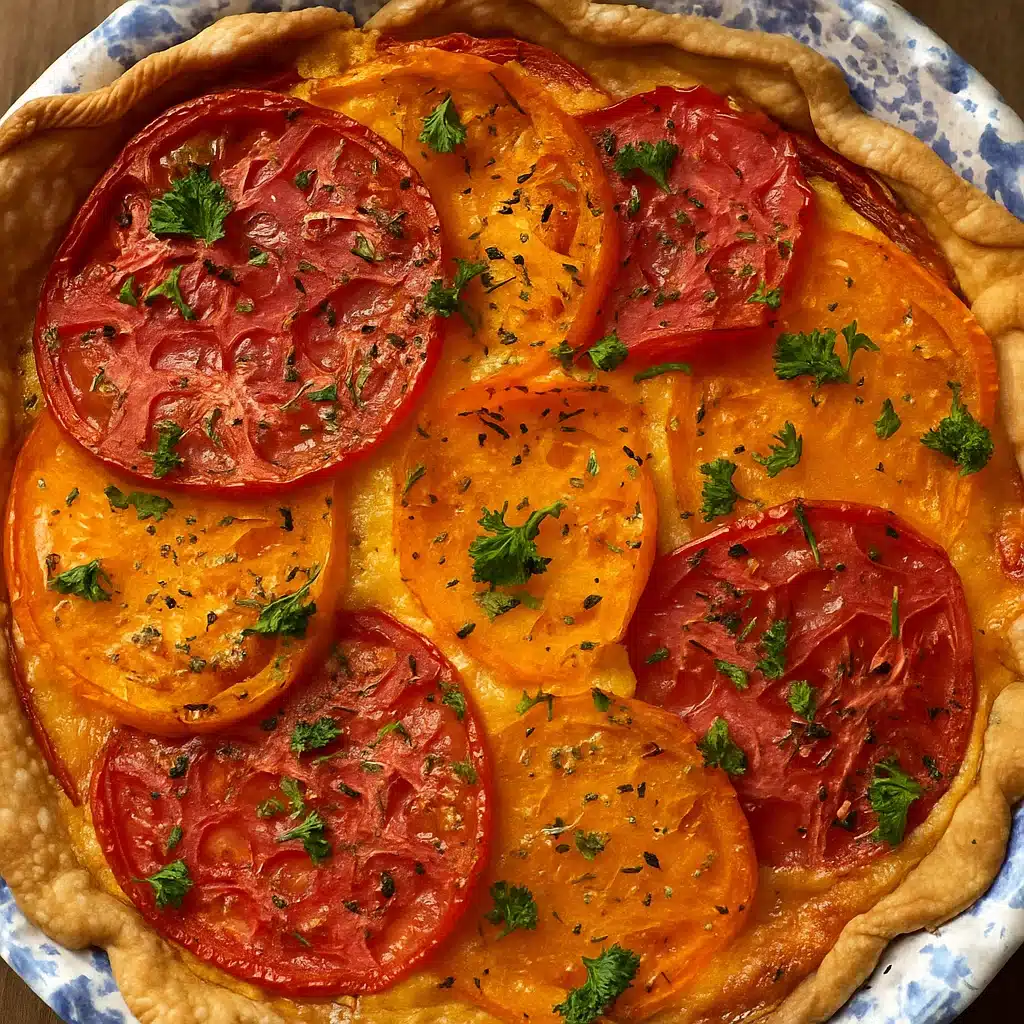
Pimento Cheese Tomato Pie
- Total Time: 1 hour 15 minutes
- Yield: 1 (9-inch) pie 1x
Description
A classic Southern recipe featuring layers of fresh sliced tomatoes and homemade pimento cheese mixture baked in a pastry crust until golden and bubbly. Perfect for summer entertaining and family gatherings.
Ingredients
For the Crust:
-
- 1 (9-inch) pastry pie crust (I use Pillsbury when I’m lazy, homemade when I’m feeling fancy)
For the Filling:
-
- 3–4 medium slicing tomatoes (whatever looks good at the farmer’s market)
-
- 1½ cups sharp cheddar cheese, shredded (Cracker Barrel brand is my go-to)
-
- ½ cup mayonnaise (Duke’s, obviously)
-
- 1 (2 oz) jar diced pimentos, drained
-
- 2 tablespoons fresh basil, chopped
-
- 2 tablespoons fresh parsley, chopped
-
- 1 teaspoon oregano
-
- ½ teaspoon smoked paprika
-
- Salt and black pepper
Instructions
Step 1: Get That Crust Ready Heat your oven to 400°F and press that pie crust into your dish. Stab the bottom all over with a fork – think of it as venting your frustrations from the day. Pop some foil on top with beans or pie weights and bake for 10 minutes. This prevents the dreaded puff-up that ruins everything.
Step 2: Tame Those Tomatoes Slice your tomatoes about ¼-inch thick and lay them on paper towels. Sprinkle with salt and let them sit for 10 minutes while you do other things. Pat them dry afterward – this step separates the soggy pies from the perfect ones.
Step 3: Mix Up the Magic Dump your shredded cheddar, mayo, pimentos, and that gorgeous smoked paprika into a bowl. Mix it up good – no fancy equipment needed, just a spoon and some elbow grease. Taste it and adjust the seasoning. This is your pimento cheese base, and it should make you want to eat it with a spoon.
Step 4: Layer Like You Mean It Turn your oven down to 350°F. Start with tomatoes in that pre-baked crust, overlapping them slightly like shingles on a roof. Sprinkle your herb mix over them, then spread half that pimento cheese mixture on top. Add more tomatoes, more herbs, then finish with the rest of the cheese mixture.
Step 5: Bake Until Golden Slide it into the oven and bake for 35-45 minutes. You’ll know it’s done when the top is golden and bubbly, and the whole thing doesn’t jiggle when you shake the pan gently. Trust your eyes and nose here – it should look irresistible and smell like heaven.
Step 6: Practice Patience Let it cool for 15 minutes before cutting. I know it’s torture, but this cooling time lets everything set up properly. Use this time to make yourself a sweet tea and admire your handiwork.
Notes
Pick tomatoes that feel firm but give slightly when you press them – overripe ones will turn to mush in the oven. I always grate my own cheese because the pre-shredded stuff has that anti-caking powder that affects how it melts. If you’re using dried herbs instead of fresh, rub them between your palms first to release their oils.
Here’s something most people don’t know – brush your pre-baked crust with beaten egg white before adding the filling. It creates an invisible barrier that keeps everything crisp. And if your tomatoes seem extra juicy, let them drain for up to 30 minutes. Better safe than sorry.
- Prep Time: 30 minutes
- Cook Time: 45 minutes
- Category: Main Dish
- Method: Baking
- Cuisine: Southern American
Nutrition
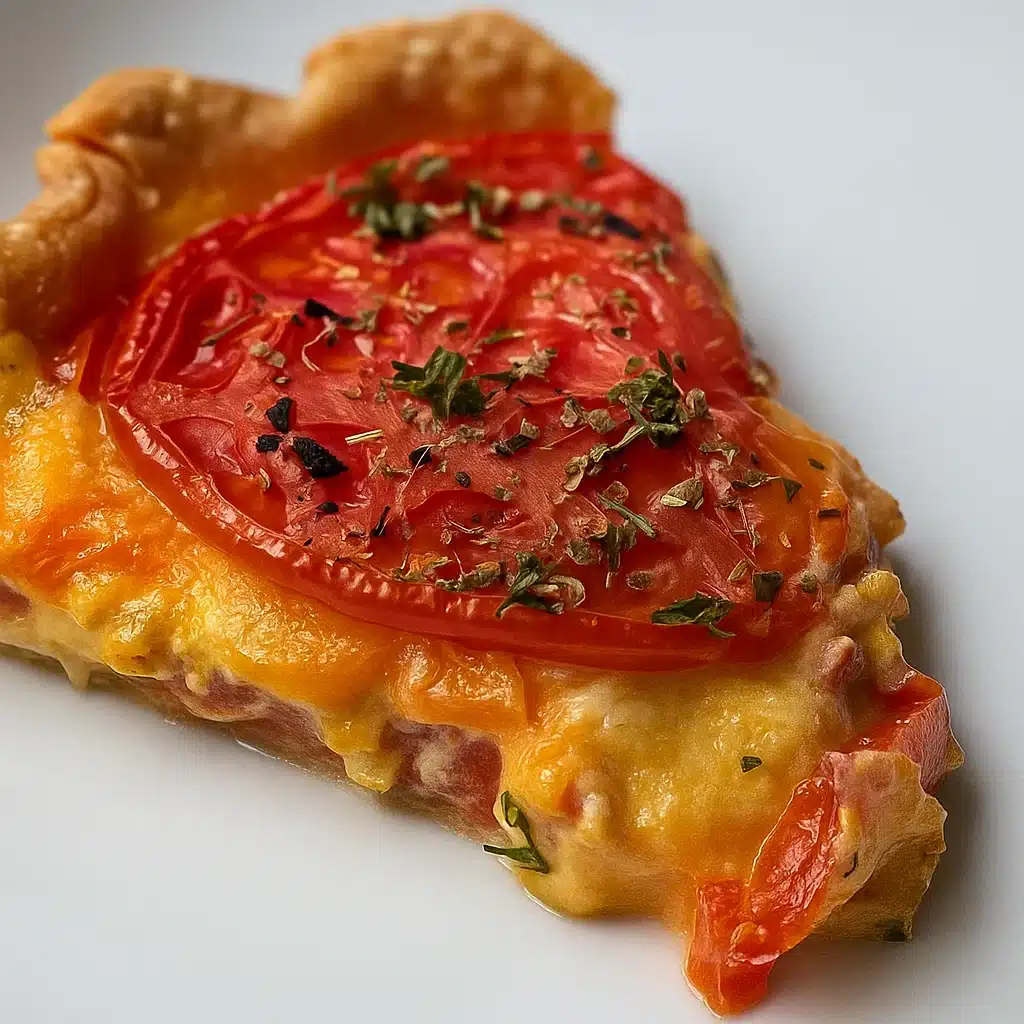
- Serving Size: 1 slice (1/8 of pie)
- Calories: 385
- Sugar: 6g
- Sodium: 495mg
- Fat: 28g
- Saturated Fat: 12g
- Unsaturated Fat: 14g
- Trans Fat: 0g
- Carbohydrates: 22g
- Fiber: 2g
- Protein: 12g
- Cholesterol: 45mg
📝 Ingredient List
For the Crust:
- 1 (9-inch) pastry pie crust (I use Pillsbury when I’m lazy, homemade when I’m feeling fancy)
For the Filling:
- 3-4 medium slicing tomatoes (whatever looks good at the farmer’s market)
- 1½ cups sharp cheddar cheese, shredded (Cracker Barrel brand is my go-to)
- ½ cup mayonnaise (Duke’s, obviously)
- 1 (2 oz) jar diced pimentos, drained
- 2 tablespoons fresh basil, chopped
- 2 tablespoons fresh parsley, chopped
- 1 teaspoon oregano
- ½ teaspoon smoked paprika
- Salt and black pepper
Look, if you don’t have fresh herbs, dried works fine – just use half as much. And yes, you can mix in some Monterey Jack if that’s what’s in your fridge.
🔍 Why These Ingredients Work
Sharp cheddar is non-negotiable here – mild cheese just won’t cut it. You need that tangy bite to stand up to all those sweet tomatoes. The mayo binds everything together without making it heavy like cream would. My secret weapon is that smoked paprika – just a pinch transforms ordinary pimento cheese into something special.
Those fresh herbs aren’t just for show either. Basil loves tomatoes (obviously), but the parsley and oregano add depth that dried herbs can’t match. When you salt those tomato slices first, you’re drawing out excess water that would otherwise turn your beautiful pie into tomato soup with a crust.
Essential Tools and Equipment
- 9-inch pie dish (mine’s from my wedding registry, still going strong after 15 years)
- Big mixing bowl
- Sharp knife (please tell me yours is actually sharp)
- Paper towels (buy the good ones for this)
- Measuring cups
- Fork for stabbing the crust
- Foil and some dried beans for weighing down the crust
👩🍳 How To Make Pimento Cheese Tomato Pie
Step 1: Get That Crust Ready Heat your oven to 400°F and press that pie crust into your dish. Stab the bottom all over with a fork – think of it as venting your frustrations from the day. Pop some foil on top with beans or pie weights and bake for 10 minutes. This prevents the dreaded puff-up that ruins everything.
Step 2: Tame Those Tomatoes Slice your tomatoes about ¼-inch thick and lay them on paper towels. Sprinkle with salt and let them sit for 10 minutes while you do other things. Pat them dry afterward – this step separates the soggy pies from the perfect ones.
Step 3: Mix Up the Magic Dump your shredded cheddar, mayo, pimentos, and that gorgeous smoked paprika into a bowl. Mix it up good – no fancy equipment needed, just a spoon and some elbow grease. Taste it and adjust the seasoning. This is your pimento cheese base, and it should make you want to eat it with a spoon.
Step 4: Layer Like You Mean It Turn your oven down to 350°F. Start with tomatoes in that pre-baked crust, overlapping them slightly like shingles on a roof. Sprinkle your herb mix over them, then spread half that pimento cheese mixture on top. Add more tomatoes, more herbs, then finish with the rest of the cheese mixture.
Step 5: Bake Until Golden Slide it into the oven and bake for 35-45 minutes. You’ll know it’s done when the top is golden and bubbly, and the whole thing doesn’t jiggle when you shake the pan gently. Trust your eyes and nose here – it should look irresistible and smell like heaven.
Step 6: Practice Patience Let it cool for 15 minutes before cutting. I know it’s torture, but this cooling time lets everything set up properly. Use this time to make yourself a sweet tea and admire your handiwork.
When the garden’s bursting with summer vegetables, I turn to recipes like my Southern Tomato Pie and Zucchini Onion Pie—both packed with fresh flavor and perfect for using up an abundance of homegrown produce. Whether it’s juicy tomatoes layered into a cheesy, savory pie or tender zucchini baked with sweet onions, these dishes make the most of what summer has to offer.
Tips from Well-Known Chefs
Southern chef Sean Brock always says the key to great tomato dishes is using tomatoes at their absolute peak ripeness and letting them shine. Chef Vivian Howard emphasizes the importance of properly draining tomatoes to avoid watery dishes – a technique that’s absolutely crucial for this pie!
❗ You Must Know
Listen to me on this one – do NOT skip salting those tomatoes. I’ve seen too many beautiful pies turn into watery messes because someone was in a hurry. Also, your crust needs to be completely cool before you add the filling, or that mayo mixture will start cooking too early and get weird.
My Personal Secret: I add the tiniest pinch of cayenne to my pimento cheese mixture. Not enough to make it spicy, but just enough to wake up your taste buds. My mother-in-law has been trying to figure out my “secret ingredient” for years!
💡 Pro Tips & Cooking Hacks
Pick tomatoes that feel firm but give slightly when you press them – overripe ones will turn to mush in the oven. I always grate my own cheese because the pre-shredded stuff has that anti-caking powder that affects how it melts. If you’re using dried herbs instead of fresh, rub them between your palms first to release their oils.
Here’s something most people don’t know – brush your pre-baked crust with beaten egg white before adding the filling. It creates an invisible barrier that keeps everything crisp. And if your tomatoes seem extra juicy, let them drain for up to 30 minutes. Better safe than sorry.
🎨 Flavor Variations & Suggestions
My brother-in-law insists this pie needs bacon, so I’ve started adding crispy crumbles between the layers for him. My sister prefers caramelized onions mixed in – she’s not wrong. For those who like heat, try adding diced jalapeños to the pimento cheese mixture or swap some pepper jack for part of the cheddar.
Last week I experimented with fresh thyme instead of oregano, and it was incredible. Sometimes I’ll add a layer of thinly sliced zucchini from the garden too. The beauty of this recipe is that it handles variations well – just don’t mess with the basic tomato-to-cheese ratio.
⏲️ Make-Ahead Options
This pie is actually perfect for busy schedules. I often prep the tomatoes the night before – just salt them, let them drain in a colander in the fridge overnight, then pat dry in the morning. The pimento cheese mixture keeps in the fridge for up to two days, which makes assembly super quick.
You can put the whole thing together up to four hours before baking – just cover it tight with plastic wrap and keep it cold. It might need an extra few minutes in the oven if you’re starting from the fridge. The baked pie freezes beautifully too, wrapped tight in foil for up to three months.
Recipe Notes & Baker’s Tips
The most important thing to remember is patience with those tomatoes. I used to rush this step and ended up with soggy disasters. Now I know better. Also, don’t be tempted to cut into the pie right away – I know it smells amazing, but those 15 minutes of cooling time make the difference between neat slices and a mess on your plate.
If you’re dealing with particularly watery tomatoes, extend that draining time. Better to wait an extra 15 minutes than to start over with a new pie crust.
🍽️ Serving Suggestions
This pie works for just about any meal you can think of. For dinner, I serve it with a simple salad dressed with good olive oil and vinegar – nothing fancy that competes with the pie. At brunch, it’s perfect alongside some crispy bacon and fresh fruit.
When I’m entertaining, I cut smaller wedges and serve them as appetizers. People go crazy for it. My neighbor always requests this pie for her book club meetings, and I’ve never seen grown women get so excited about food!
🧊 How to Store Your Pimento Cheese Tomato Pie
Store any leftover pie covered in the refrigerator for up to 3 days. It’s delicious cold, at room temperature, or gently reheated in a 300°F oven for about 10-15 minutes until just warmed through.
For freezing, wrap individual slices in plastic wrap and then aluminum foil. They’ll keep for up to 3 months. Thaw overnight in the refrigerator and reheat gently in the oven.
⚠️ Allergy Information
This recipe contains dairy (cheese, mayonnaise) and gluten (pie crust). For dairy-free options, you can substitute vegan mayonnaise and dairy-free cheese, though the flavor will be different. For gluten-free needs, use your favorite gluten-free pie crust recipe or store-bought option.
❓ Questions I Get Asked A Lot
Can I use different types of cheese?
Absolutely! While sharp cheddar is traditional, you can mix in Monterey Jack, Swiss, or even a little cream cheese for extra richness. Just keep the total amount the same.
What if I don’t have pimentos?
You can substitute with finely diced red bell pepper, though the flavor will be slightly different. Roasted red peppers work beautifully too!
Can I make this without mayonnaise?
Mayo is pretty essential for that classic pimento cheese texture, but you could try Greek yogurt mixed with a little sour cream, though the flavor will be tangier.
How do I know when it’s done baking?
The top should be golden brown and bubbly, and the pie should feel set when you gently shake the dish. A knife inserted in the center should come out mostly clean.
Can I add other vegetables?
Sure! Thinly sliced zucchini, roasted eggplant, or caramelized onions all make wonderful additions.
What’s the best way to slice this cleanly?
Use a sharp knife and wipe it clean between cuts. Make sure the pie has cooled for at least 15 minutes – this helps it hold together beautifully.
I hope this becomes a regular at your dinner table like it has at mine! There’s something magical about a recipe that brings people together, and this pie definitely does that. Every time I make it, I think about my grandmother and how proud she’d be that her recipe is still making people happy.
💬 Tried this recipe? Drop me a comment below! I want to hear all about your variations and family reactions. Did someone lick their plate clean? Did you add bacon? Share your photos too – I love seeing how everyone makes this recipe their own!