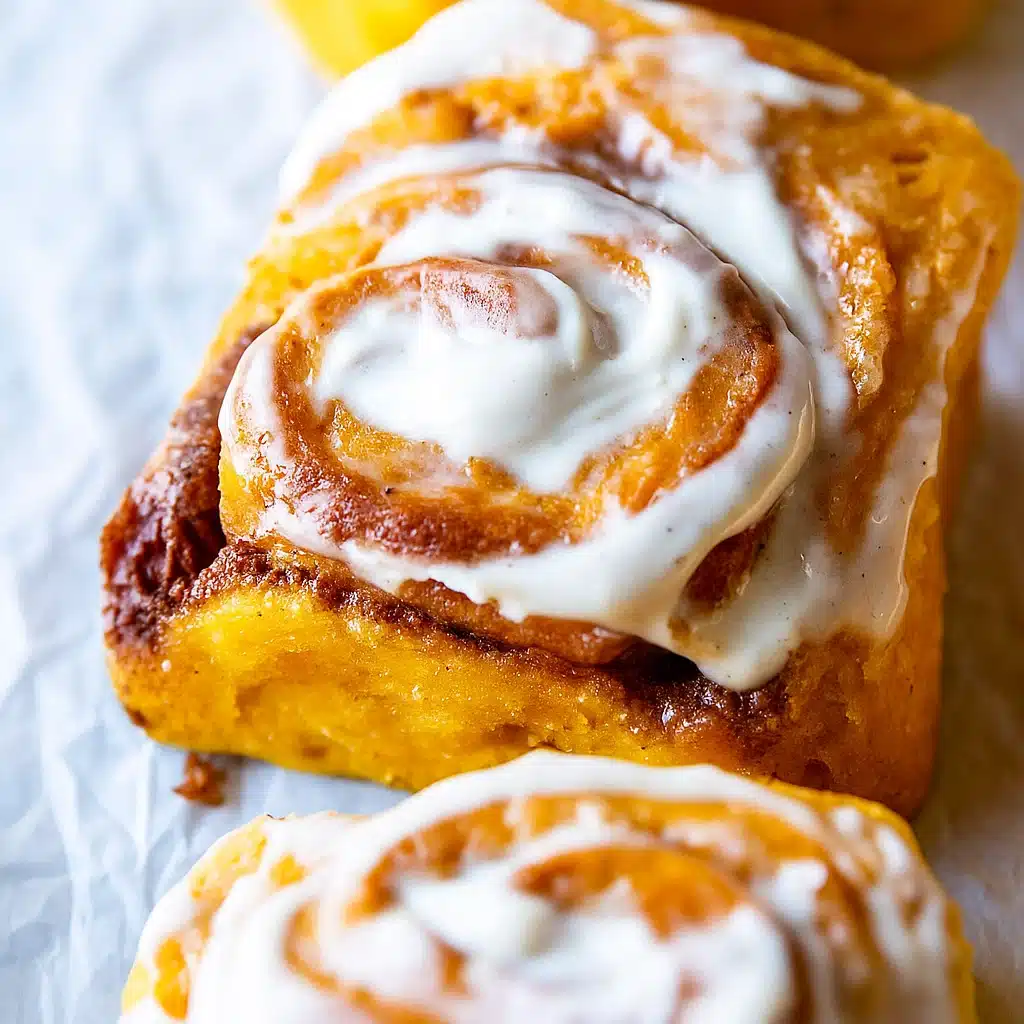
Last Sunday, my neighbor knocked on my door asking what smelled so good – turns out my pumpkin cinnamon rolls had basically turned my kitchen into a fall bakery! I’ve been perfecting this recipe for three years now, ever since my daughter came home from college raving about some fancy bakery rolls. Mine beat theirs hands down, and honestly, they’re so much easier than you’d think.
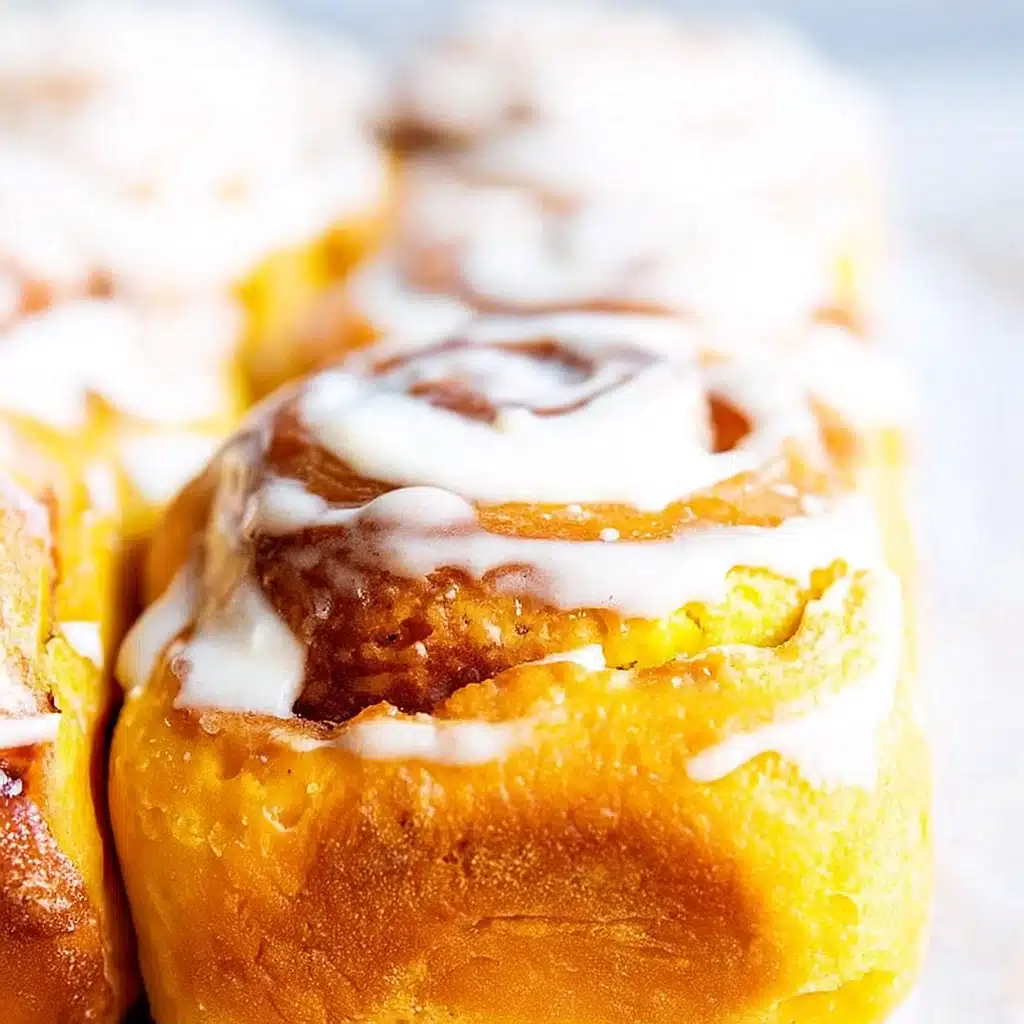
The secret isn’t just throwing pumpkin into regular dough – it’s how the pumpkin actually changes everything about these rolls. They stay soft for days, have this gorgeous orange color, and taste like autumn wrapped in bread. My husband literally hides one for his Monday morning coffee because he knows they disappear fast!
❤️ Why You’ll Love This Recipe
Look, I’m not gonna lie – these rolls ruined regular cinnamon rolls for me. The pumpkin makes the dough ridiculously soft, like cloud-level soft, and it stays that way for three whole days (if they last that long). My kids’ friends literally text me asking if I’m making “those orange rolls” before they come over. Plus, your house will smell like a Pinterest fall fantasy came to life.
Print
Pumpkin Cinnamon Rolls
- Total Time: 1 hour
- Yield: 1 dozen large cinnamon rolls 1x
Description
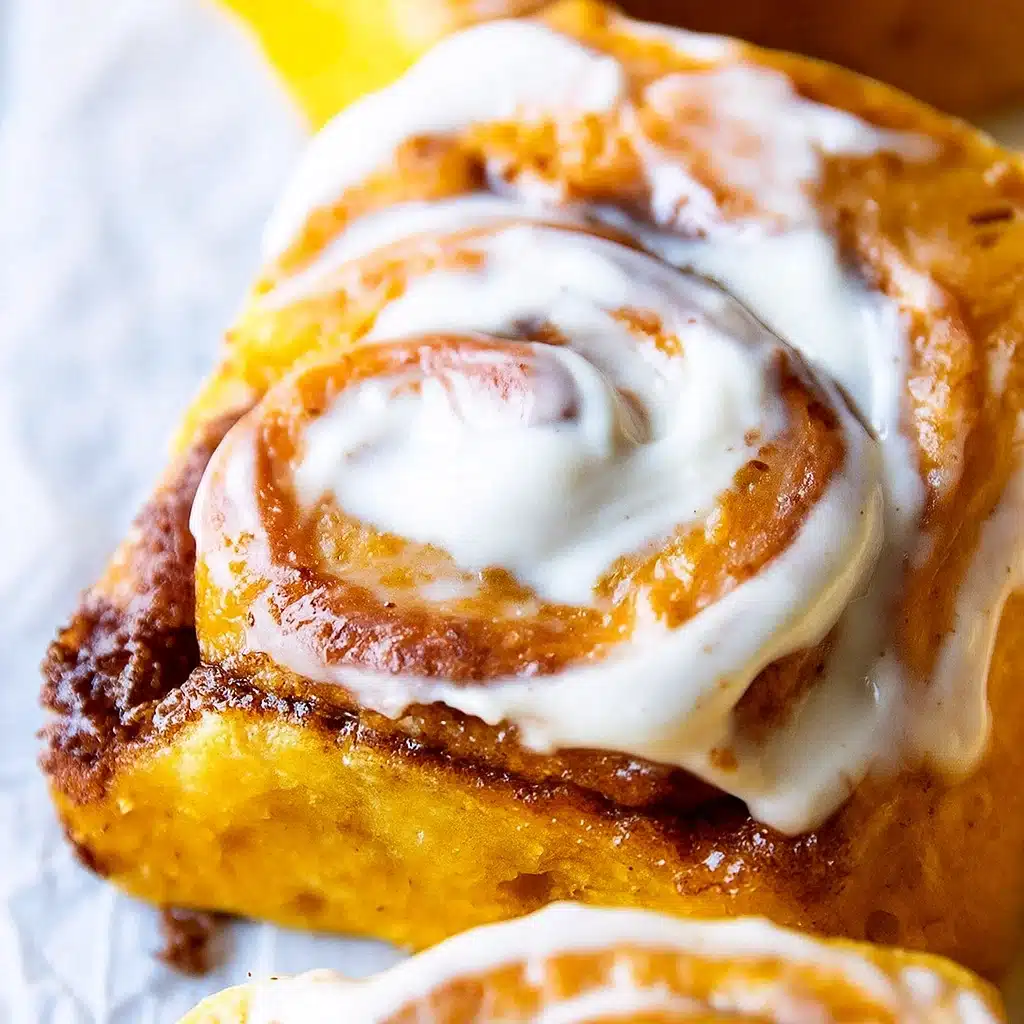
Ultra-soft pumpkin cinnamon rolls made with pumpkin puree, warm fall spices, and topped with maple cream cheese icing. Perfect for cozy autumn mornings and holiday brunches.
Ingredients
Pumpkin Dough Base:
-
- ½ cup canned pumpkin puree (I use Libby’s, fight me)
-
- ¾ cup whole milk
-
- 4 tablespoons butter, softened (leave it out for an hour)
-
- ¼ cup granulated sugar
-
- 1 large egg (room temp!)
-
- 2¼ teaspoons instant yeast (active dry works too)
-
- 1 teaspoon salt
-
- ¼ teaspoon ground nutmeg
-
- 3¼ cups all-purpose flour (don’t pack it down)
Filling:
-
- ⅔ cup brown sugar, packed tight
-
- 2 teaspoons ground cinnamon
-
- ¼ teaspoon nutmeg
-
- ¼ teaspoon allspice
-
- ¼ teaspoon ground ginger
-
- Pinch of ground cloves (tiny pinch!)
-
- 3 tablespoons butter, super soft
Maple Cream Cheese Icing:
-
- 4 oz cream cheese (the block kind, not the tub)
-
- 3 tablespoons real maple syrup
-
- 2–3 tablespoons milk
-
- 1½ cups powdered sugar
-
- Pinch of cinnamon if you’re feeling fancy
Instructions
So I heat up my milk and butter in the microwave for about 45 seconds – just until the butter’s melted. Don’t make it hot or you’ll kill the yeast (learned that one the hard way). Mix this with your pumpkin, sugar, egg, and yeast in a big bowl. Then dump in your flour bit by bit until it looks like shaggy dough.
Time to get your hands dirty! Knead this hot mess for around 8-10 minutes, or so, until, it’s no longer sticky, but begins to become smooth. Whenever I use my stand mixer, my children object to the noise, so I most often make the dough by hand as I watch Netflix. It’s done when you can poke it and it springs back.
I plop this in an oiled bowl, cover with a damp dish towel, and stick it somewhere warm. My favorite spot is on top of the fridge. Takes about 2 hours to double, sometimes longer if my house is freezing. Don’t rush this part even though it’s torture smelling the pumpkin.
Punch down your dough (so satisfying!) and roll it out on a floured counter. Mine’s never a perfect rectangle but whatever. Smear that soft butter all over, then dump your cinnamon sugar mixture on top. I use my hands to spread it around – forks are for quitters.
Roll it up from the long side, trying to keep it tight but not so tight it tears. Then comes the fun part – I use dental floss to cut because knives just squish everything. Slide the floss under, cross it over the top, and pull. Makes perfect rounds every time!
Plop these babies in a buttered 9×13 pan and cover again. Another hour of waiting while they get all puffy and start touching each other. This is when I prep my icing and try not to eat the leftover filling straight from the bowl.
Into a 350°F oven they go! (Though my oven is hot, so I check at 20 minutes.) They’re ready when they’re golden brown and no longer jiggle when you shake the pan. Just throw some foil over them if the tops are browning too quickly.
Notes
The pumpkin is why these stay soft for days – it’s like built-in moisture. I’ve had them stay perfect for three days covered on the counter. If you’re not into all the spices, just use cinnamon and call it good. The maple syrup in the icing is what makes people ask for the recipe, but vanilla works if that’s what you have.
Word of warning: don’t open the oven door too early or they’ll deflate. I learned this the hard way when I got impatient and peeked at 15 minutes. Also, if you’re doubling the recipe, don’t double the salt – use 1.5 times instead.
- Prep Time: 30 minutes
- Cook Time: 25-30 minutes
- Category: Breakfast, Brunch, Dessert
- Method: Baking
- Cuisine: American
Nutrition
- Serving Size: 1 roll
- Calories: 285
- Sugar: 22g
- Sodium: 285mg
- Fat: 8g
- Saturated Fat: 5g
- Unsaturated Fat: 2g
- Trans Fat: 0g
- Carbohydrates: 48g
- Fiber: 2g
- Protein: 6g
- Cholesterol: 35mg
📝 Ingredient List
Pumpkin Dough Base:
- ½ cup canned pumpkin puree (I use Libby’s, fight me)
- ¾ cup whole milk
- 4 tablespoons butter, softened (leave it out for an hour)
- ¼ cup granulated sugar
- 1 large egg (room temp!)
- 2¼ teaspoons instant yeast (active dry works too)
- 1 teaspoon salt
- ¼ teaspoon ground nutmeg
- 3¼ cups all-purpose flour (don’t pack it down)
Filling:
- ⅔ cup brown sugar, packed tight
- 2 teaspoons ground cinnamon
- ¼ teaspoon nutmeg
- ¼ teaspoon allspice
- ¼ teaspoon ground ginger
- Pinch of ground cloves (tiny pinch!)
- 3 tablespoons butter, super soft
Maple Cream Cheese Icing:
- 4 oz cream cheese (the block kind, not the tub)
- 3 tablespoons real maple syrup
- 2-3 tablespoons milk
- 1½ cups powdered sugar
- Pinch of cinnamon if you’re feeling fancy
🔍 Why These Ingredients Work
Okay, so here’s what took me forever to figure out – the pumpkin isn’t just for flavor, it’s like adding moisture insurance to your dough. I learned this the hard way after my first batch came out dry because I thought it was just for taste. The brown sugar was my mom’s suggestion (she said white sugar is for amateurs), and she was totally right – it gets all gooey and caramel-y. That maple syrup in the icing? Game changer. Regular icing tastes boring after you try this combo.
If you’re ready for all the cozy fall vibes, my Pumpkin Cinnamon Rolls are a must—soft, fluffy, and swirled with warm cinnamon spice, they’re perfect for chilly mornings or weekend baking. But if you’re still savoring the last of summer’s sweetness, don’t miss Mom’s Peaches and Cream Pie or my easy Peach Tart Recipe—both bursting with juicy peach flavor and perfect for that summer-to-fall transition. No matter the season, there’s always something delicious coming out of the oven.
Essential Tools and Equipment
- Big mixing bowl (the one you use for everything)
- Rolling pin (or a wine bottle in a pinch)
- 9×13 baking dish
- Clean towels for covering
- Sharp knife OR dental floss (seriously, try the floss)
- Your mitts for kneading (you can use a stand mixer if you’re lazy like me sometimes)
👩🍳 How To Make Pumpkin Cinnamon Rolls
Step 1: Make the Dough Base
So I heat up my milk and butter in the microwave for about 45 seconds – just until the butter’s melted. Don’t make it hot or you’ll kill the yeast (learned that one the hard way). Mix this with your pumpkin, sugar, egg, and yeast in a big bowl. Then dump in your flour bit by bit until it looks like shaggy dough.
Step 2: Knead It Out
Time to get your hands dirty! Knead this hot mess for around 8-10 minutes, or so, until, it’s no longer sticky, but begins to become smooth. Whenever I use my stand mixer, my children object to the noise, so I most often make the dough by hand as I watch Netflix. It’s done when you can poke it and it springs back.
Step 3: First Rise Time
I plop this in an oiled bowl, cover with a damp dish towel, and stick it somewhere warm. My favorite spot is on top of the fridge. Takes about 2 hours to double, sometimes longer if my house is freezing. Don’t rush this part even though it’s torture smelling the pumpkin.
Step 4: Roll and Fill
Punch down your dough (so satisfying!) and roll it out on a floured counter. Mine’s never a perfect rectangle but whatever. Smear that soft butter all over, then dump your cinnamon sugar mixture on top. I use my hands to spread it around – forks are for quitters.
Step 5: The Roll and Cut
Roll it up from the long side, trying to keep it tight but not so tight it tears. Then comes the fun part – I use dental floss to cut because knives just squish everything. Slide the floss under, cross it over the top, and pull. Makes perfect rounds every time!
Step 6: Second Rise
Plop these babies in a buttered 9×13 pan and cover again. Another hour of waiting while they get all puffy and start touching each other. This is when I prep my icing and try not to eat the leftover filling straight from the bowl.
Step 7: Bake Time
Into a 350°F oven they go! (Though my oven is hot, so I check at 20 minutes.) They’re ready when they’re golden brown and no longer jiggle when you shake the pan. Just throw some foil over them if the tops are browning too quickly.
Step 8: Ice While Warm
While they’re baking, I beat together all my icing stuff until it’s smooth and spreadable. The second those rolls come out, I slather this all over. Don’t wait – warm rolls make the icing slightly melty and it soaks in just right.
Tips from Well-Known Chefs
My friend Sarah who went to culinary school always says patience is everything with yeast dough – don’t rush it even when you’re starving. And that lady from the baking show (you know the one) swears by weighing flour, but honestly, I just scoop and level and it works fine.
❗ You Must Know
Here’s what nobody tells you – room temperature ingredients are everything! I used to just throw cold eggs and cold cream cheese into the mix and wonder why my dough was lumpy. Take them out an hour before you start. Also, don’t go crazy with flour when you’re rolling out the dough. You want it to stick a little so it rolls tight.
My secret: I always make extra filling and sprinkle some between layers as I roll. Creates these amazing pockets of spice throughout each roll that’ll make you famous at potlucks!
💡 Pro Tips & Cooking Hacks
Use dental floss to cut your rolls instead of a knife – learned this from watching my neighbor, and it changed my life. No more squished, ugly rolls! Should you work in a freezing-cold kitchen like I do, you can preheat your oven for exactly one minute, turn it off, then nestle your dough inside so it can rise.
The biggest mistake I made: Using too much flour, because I was afraid of the dough being sticky. Sticky = good! It means your rolls will be soft. Also, don’t rush the rising – I know it’s tempting, but good things take time.
🎨 Flavor Variations & Suggestions
Apple version: Dice up a small apple super fine and toss it in the filling – tastes like fall in a roll. Pecan lover’s dream: Chop pecans and mix them right into the filling, then add a splash of brown butter to your icing. Orange twist: My sister adds orange zest to the dough and uses orange juice instead of milk in the icing – surprisingly amazing. Total indulgence: Drizzle caramel sauce over the iced rolls because why not live a little?
⏲️ Make-Ahead Options
This is where these rolls really shine! Saturday night prep: Make them completely, stick the pan in the fridge overnight, then just let them warm up and finish rising Sunday morning. Takes about 30 minutes to come to room temperature. Freezer stash: I make double batches and freeze half. After cutting, freeze them on the pan, then transfer to freezer bags. Thaw overnight and let rise before baking. Already baked: These freeze beautifully after baking too. Wrap individually and they’ll keep for months.
Recipe Notes & Baker’s Tips
The pumpkin is why these stay soft for days – it’s like built-in moisture. I’ve had them stay perfect for three days covered on the counter. If you’re not into all the spices, just use cinnamon and call it good. The maple syrup in the icing is what makes people ask for the recipe, but vanilla works if that’s what you have.
Word of warning: don’t open the oven door too early or they’ll deflate. I learned this the hard way when I got impatient and peeked at 15 minutes. Also, if you’re doubling the recipe, don’t double the salt – use 1.5 times instead.
🍽️ Serving Suggestions
These are perfect for lazy Sunday mornings with coffee that’s way too strong. I love making them for Thanksgiving morning while the turkey’s in the oven – keeps everyone happy and out of my hair. They’re also killer as an afternoon snack with tea, or honestly, warmed up with vanilla ice cream for dessert. My teenager eats them cold straight from the fridge at midnight, so apparently they’re good anytime.
🧊 How to Store Your Pumpkin Cinnamon Rolls
I just leave mine covered with foil on the counter and they’re still soft two days later – three if you’re lucky. If you want them to last longer, stick them in the fridge but honestly they get a little weird after day four.
For reheating, I pop one in the microwave for maybe 15 seconds. Don’t overdo it or you’ll have a hockey puck. If I’m reheating a bunch, I’ll wrap them in damp paper towels first.
Freezing is where it gets tricky. I wrap each roll individually in plastic wrap, then throw them all in a freezer bag. They keep for months but the icing gets funky when you thaw them. I usually just make fresh icing when I’m ready to eat them.
Oh, and here’s something I learned from my disaster at book club – if you’re bringing these somewhere, let them thaw about 80% of the way so they finish perfectly when you arrive. Nobody wants to eat frozen cinnamon rolls while pretending to discuss chapter 7.
⚠️ Allergy Information
So yeah, these have gluten, dairy, and eggs – basically everything that makes food taste good but also everything people can’t eat.
If you can’t do dairy: I’ve used oat milk instead of regular milk and it works fine. For butter, that Earth Balance stuff is pretty good. The cream cheese is trickier – Kite Hill makes one that doesn’t taste like sadness, but it’s expensive.
Gluten-free people: King Arthur makes a flour blend that actually works in this recipe. Your rolls won’t be quite as fluffy but they’re still really good. Don’t use the cheap stuff from the bottom shelf – trust me on this one.
No eggs: My sister-in-law is allergic to everything, so I’ve made these without eggs. Combine a tablespoon of ground flaxseed with 3 tablespoons of water and allow to sit until it becomes slimy. Gross but it works. You can also use those weird egg replacer powders but I never remember to buy them.
❓Questions I Get Asked A lot
Q: Can I substitue fresh pumpkin instead of canned? Maybe, but you’ll want to roast it first and ensure it’s not watery. I tried this once with fresh and it turned into pumpkin soup dough. Not cute.
What if I don’t have all those spices? Just use cinnamon! Or grab some pumpkin pie spice from the store. Life’s too short to buy 5 different spices for one recipe.
Do I really need the maple syrup in the icing? You don’t NEED it, but it’s what makes people beg for the recipe. Honey works too if that’s what you’ve got.
How do I know they’re done? They’ll be golden brown and smell like heaven. If you tap the top and it sounds hollow-ish, you’re good.
Can I make tiny ones? Yeah! Cut into 18-20 mini rolls and bake for 18-20 min It is delicious!. Perfect for parties where people pretend they’re being “good” by taking smaller portions.
These rolls changed my entire fall baking game, and I’m betting they’ll do the same for yours. My kitchen counter is never empty during pumpkin season now because I’m always making another batch for someone.
Hope these become your new Saturday morning tradition like they did mine! 🧡
So did you make them? Are they sitting in your kitchen so that your house smells wonderful right this very minute? Drop me a comment and let me know how it went! I am super curious to know of you did any of those flavor variations because I’m always on the hunt for new things to do with my ridiculous stash of pumpkin.