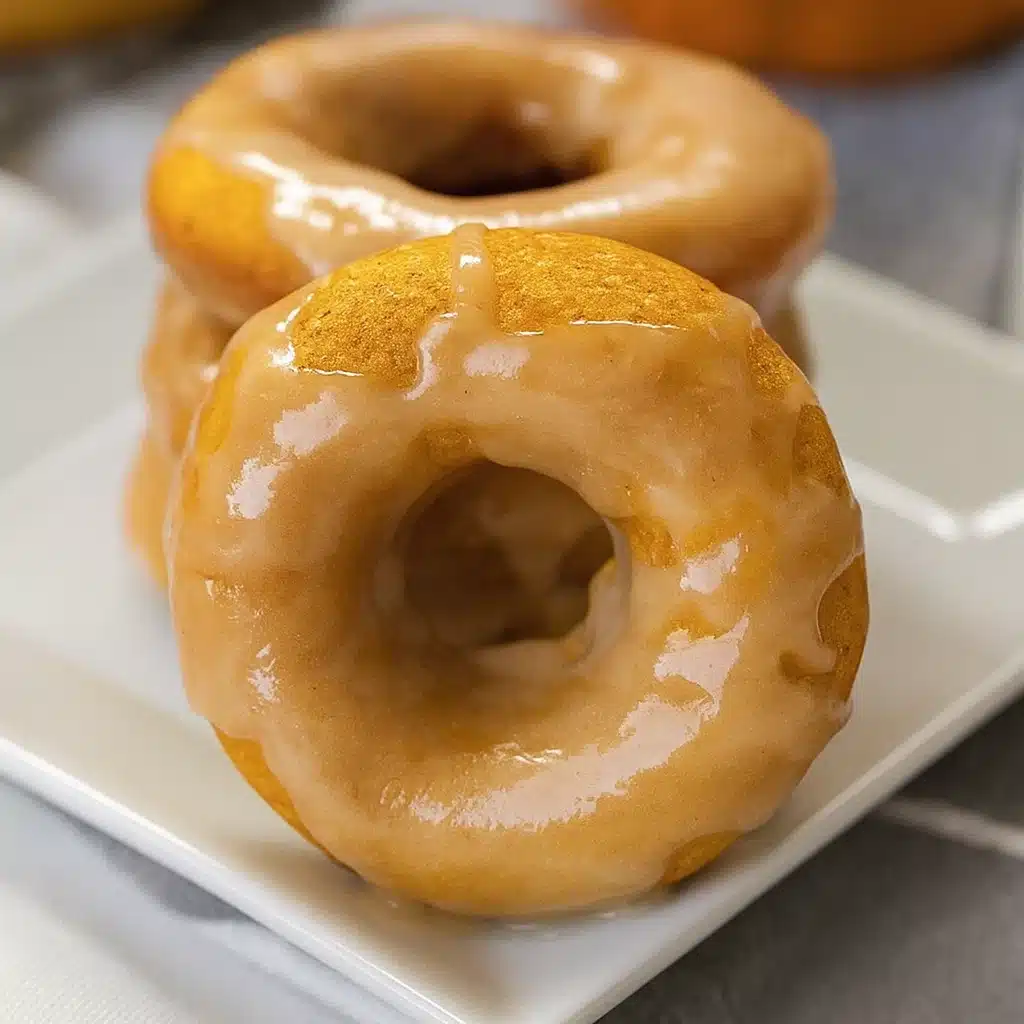
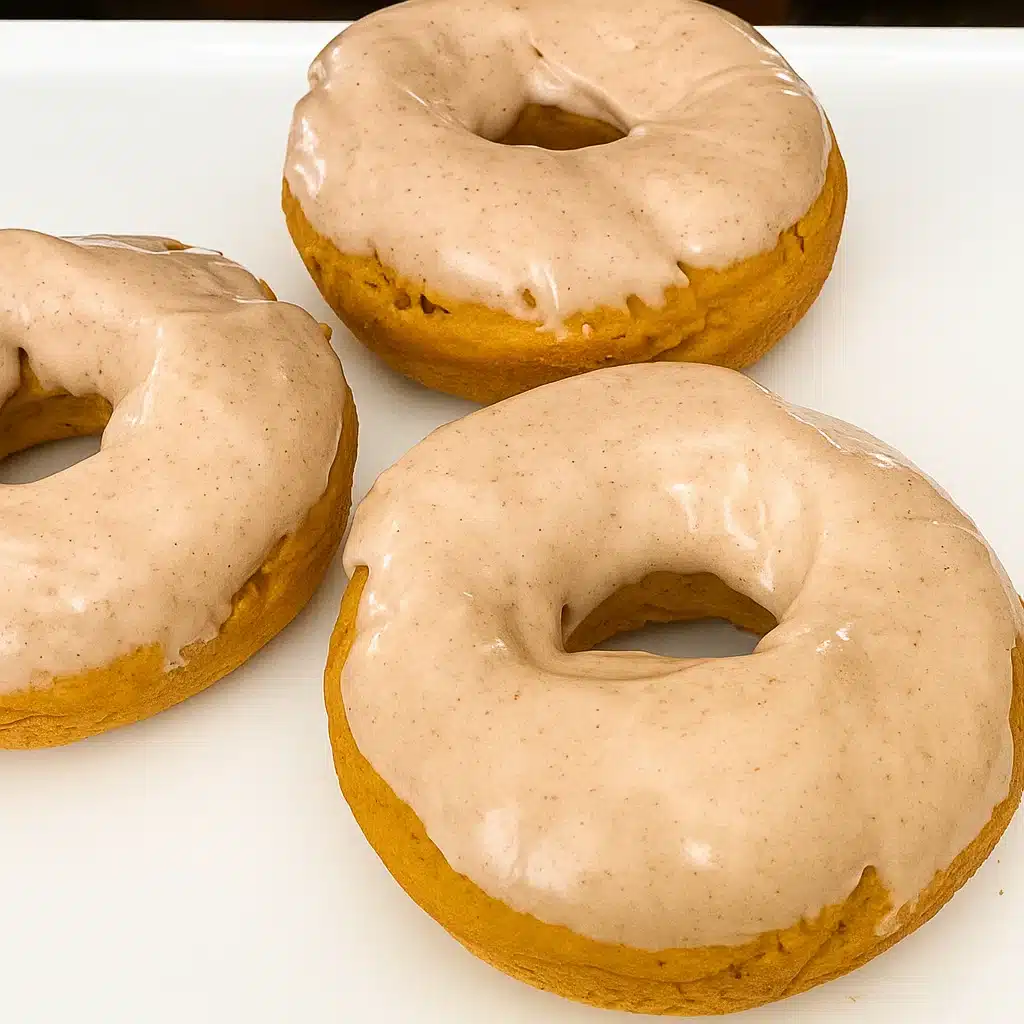
My Pumpkin Donuts with Maple Glaze recipe started as a complete disaster, honestly. Picture my kitchen counter covered in flour, my first batch burnt to a crisp, and me frantically googling “how to fix dense donuts” at 6 AM. But you know what they say about happy accidents – sometimes the best recipes come from the biggest kitchen fails.
After three tries and way too much coffee, I nailed it. These baked beauties are tender, full of warm spices, and that salted maple glaze? It’s the kind of thing that makes your neighbors become very suddenly friendly when they smell it through the windows.

❤️ Why You’ll Love This Recipe
Listen, I’ve tested a gazzilion donut recipes and they are either entirely too difficult or waaaaay too much like cardboard. These are different. They’re soft and my kids devour them, but they’re fancy, too, so I don’t mind serving them to grown-ups. Well, the pumpkin makes them stay moist for days after, and that glaze of maple with a smidge of salt? My husband literally licks the bowl clean every single time.
Print
Pumpkin Donuts with Maple Glaze
- Total Time: 26 minutes
- Yield: 8 mini donuts 1x
Description
Soft, spiced pumpkin donuts topped with salted maple glaze – the perfect fall treat that’s baked, not fried!
Ingredients
For the Donuts (makes 8):
- 1 cup all-purpose flour
- ½ tsp baking powder
- ½ tsp baking soda
- ½ tsp ground cinnamon
- ½ tsp pumpkin pie spice
- ¼ tsp salt
- ¼ cup unsalted butter, melted
- ½ cup pumpkin purée (plain, not pie filling – this is crucial!)
- ⅓ cup brown sugar, packed
- 1 large egg
- ½ tsp vanilla extract
For the Salted Maple Glaze:
- 1 cup powdered sugar
- 2 Tbsp pure maple syrup (don’t you dare use the fake stuff!)
- 1 Tbsp milk (dairy or non-dairy both work beautifully)
- 1 tsp vanilla extract (or vanilla bean paste for extra luxury)
- ¼ tsp sea salt
Instructions
1. Get Your Oven Ready Set it to 350°F – not 375°, not 325°. I learned this the hard way when my first batch came out looking like hockey pucks. Grease that donut pan like your life depends on it because nothing’s more heartbreaking than perfect donuts stuck in the pan.
Mix your dry stuff in one bowl, wet stuff in another. When I say “whisk,” I mean actually whisk – don’t just stir it around with a fork like I did the first time. The pumpkin mixture should look smooth and smell amazing.
2. The Most Important Step This is where most people mess up: fold the dry ingredients into the wet ones GENTLY. I’m talking barely mix it, stop as soon as you can’t see flour anymore. My grandma always said “tough donuts come from tough mixing,” and she was right. A few lumps are your friend here.
Fill those donut molds about 2/3 full – I use a spoon and just plop it in there. Bake for 9-11 minutes. They’re done when they spring back if you poke them lightly. Don’t overbake or they’ll be dry tomorrow.
3. That Glaze Though Mix the powdered sugar and maple syrup first – it’ll look chunky and weird, that’s normal. Add milk tiny bits at a time until it’s thick but pourable. Think honey consistency. Add that vanilla and salt last.
Dip the tops while the donuts are still barely warm. The glaze sets better this way and looks prettier too.
Notes
Use plain pumpkin purée, not the pie filling – learned that one the hard way when my first batch tasted like baby food. If your glaze gets thick after sitting, just whisk in a few drops of milk. These are definitely best day-of, but they’ll still be good for 2-3 days if you store them right.
- Prep Time: 15 minutes
- Cook Time: 11 minutes
- Category: Breakfast
- Method: Baking
- Cuisine: American
Nutrition
- Serving Size: 1 donut
- Calories: 195
- Sugar: 18g
- Sodium: 185mg
- Fat: 4g
- Saturated Fat: 2.5g
- Trans Fat: 0g
- Carbohydrates: 38g
- Fiber: 1g
- Protein: 3g
- Cholesterol: 35mg
📝 Ingredient List
For the Donuts (makes 8):
- 1 cup all-purpose flour
- ½ tsp baking powder
- ½ tsp baking soda
- ½ tsp ground cinnamon
- ½ tsp pumpkin pie spice
- ¼ tsp salt
- ¼ cup unsalted butter, melted
- ½ cup pumpkin purée (plain, not pie filling – this is crucial!)
- ⅓ cup brown sugar, packed
- 1 large egg
- ½ tsp vanilla extract
For the Salted Maple Glaze:
- 1 cup powdered sugar
- 2 Tbsp pure maple syrup (don’t you dare use the fake stuff!)
- 1 Tbsp milk (dairy or non-dairy both work beautifully)
- 1 tsp vanilla extract (or vanilla bean paste for extra luxury)
- ¼ tsp sea salt
🔍 Why These Ingredients Work
Here’s the thing about pumpkin – it’s not just there for Instagram vibes. The pumpkin purée actually does the heavy lifting for moisture, way better than oil or extra butter. That baking powder/inmates soda act like a tag team to give these donuts that fluffy vibe without being cakey. I sub in brown sugar for white, which gets on better than white with pumpkin flavors and which, let’s just be honest, tastes better.
The pumpkin pie spice saves you from measuring out five different spices, and melted butter gives you that rich flavor without the fuss of creaming. Now, about that glaze – pure maple syrup is worth the extra three dollars, I promise. The fake stuff tastes like disappointment. That sea salt is what makes people ask “what’s your secret?” because it makes the sweetness pop without being obvious about it.
Essential Tools and Equipment
- 8-cup mini-donut pan (this is essential – regular muffin tins won’t give you that classic donut shape!)
- Two medium mixing bowls
- Wire whisk
- Rubber spatula for folding
- Small bowl for glaze
- Cooling rack
👩🍳 How To Make Pumpkin Donuts with Maple Glaze
1. Get Your Oven Ready Set it to 350°F – not 375°, not 325°. I learned this the hard way when my first batch came out looking like hockey pucks. Grease that donut pan like your life depends on it because nothing’s more heartbreaking than perfect donuts stuck in the pan.
Mix your dry stuff in one bowl, wet stuff in another. When I say “whisk,” I mean actually whisk – don’t just stir it around with a fork like I did the first time. The pumpkin mixture should look smooth and smell amazing.
2. The Most Important Step This is where most people mess up: fold the dry ingredients into the wet ones GENTLY. I’m talking barely mix it, stop as soon as you can’t see flour anymore. My grandma always said “tough donuts come from tough mixing,” and she was right. A few lumps are your friend here.
Fill those donut molds about 2/3 full – I use a spoon and just plop it in there. Bake for 9-11 minutes. They’re done when they spring back if you poke them lightly. Don’t overbake or they’ll be dry tomorrow.
3. That Glaze Though Mix the powdered sugar and maple syrup first – it’ll look chunky and weird, that’s normal. Add milk tiny bits at a time until it’s thick but pourable. Think honey consistency. Add that vanilla and salt last.
Dip the tops while the donuts are still barely warm. The glaze sets better this way and looks prettier too.

Tips from Well-Known Chefs
Dorie Greenspan always says to measure your flour by spooning it into the cup and leveling off – don’t pack it down! This ensures your donuts stay tender.
Ina Garten recommends using room temperature eggs for better mixing – they incorporate more easily and create a smoother batter.
❗ You Must Know
Personal Secret: Don’t overmix that batter! I know I sound like a broken record, but my first three batches were tough as rocks because I kept mixing until it looked “perfect.” Stop mixing the second you can’t see dry flour. Lumps are good here – they mean tender donuts.
💡 Pro Tips & Cooking Hacks
- Your ingredients matter: Room temperature egg mixes way better than cold. I take mine out when I start my coffee.
- Test that glaze: Should drip off a spoon like thick honey. Too thick? Add milk drops. Too thin? More powdered sugar.
- Salt is everything: Don’t skip it in the glaze. It’s what makes people say “wow, what’s different about these?”
- Oven door stays closed: First 8 minutes, don’t even peek. I learned this after my curious neighbor made me open it and they all fell flat.
- Day-old hack: Warm them for 30 seconds in the microwave and they taste fresh-baked again.
🎨 Flavor Variations & Suggestions
- Chocolate version: Add 2 tablespoons cocoa powder, remove 2 tablespoons flour. My kids go crazy for these.
- Extra spicy: Throw in a pinch of cardamom or fresh grated ginger. Fancy coffee shop vibes.
- Cream cheese glaze: Skip the maple, mix cream cheese with powdered sugar and milk. Tangy and amazing.
- Apple swap: Use applesauce instead of pumpkin and add tiny diced apples. Fall in a different way.
⏲️ Make-Ahead Options
You can make the batter the night before and stick it in the fridge. Just let it come to room temp before baking – about 20 minutes on the counter. The plain donuts freeze great for up to 3 months in a freezer bag. When you want them, thaw on the counter and make fresh glaze. They taste just as good as the day you made them.
Recipe Notes & Baker’s Tips
Use plain pumpkin purée, not the pie filling – learned that one the hard way when my first batch tasted like baby food. If your glaze gets thick after sitting, just whisk in a few drops of milk. These are definitely best day-of, but they’ll still be good for 2-3 days if you store them right.
🍽️ Serving Suggestions
Perfect with morning coffee, obviously. But I also love them as an afternoon snack with tea, or packed in my kids’ lunchboxes for a special treat. They’re great for fall brunches, work meetings where you want to be the hero, or just because it’s Tuesday and you deserve something nice. Serve them with vanilla ice cream for dessert and watch everyone’s faces light up.
🧊 How to Store Your Pumpkin Donuts
Counter storage in an airtight container for 1-2 days, fridge for up to a week. For longer storage, freeze the plain ones (before glazing) for up to 3 months. When you want them, thaw at room temperature and make fresh glaze. If the glaze looks dull after a day, pop them in a 200°F oven for 2-3 minutes to refresh them.
⚠️ Allergy Information
These have gluten (flour), eggs, and dairy. Gluten-free: Use 1:1 gluten-free flour blend – I like Bob’s Red Mill. Dairy-free: Plant milk in the glaze, coconut oil instead of butter. Egg-free: Try a flax egg (1 tablespoon ground flaxseed + 3 tablespoons water, let sit 5 minutes). I haven’t tested all these swaps personally, but my sister-in-law makes them dairy-free and they’re still delicious.
❓ Questions I Get Asked A Lot
No donut pan – can I still make these?
Mini muffin tins work! They’ll just be donut holes instead of rings. Bake for 8-10 minutes.
My donuts are dense and heavy – what happened?
Overmixing strikes again! Next time, mix just until you can’t see flour. Don’t worry about lumps.
Can I make a double batch? A: Absolutely! Just bake in batches if you only have one pan. The batter waits nicely.
How do I know they’re actually done?
Press the top lightly – it should spring back. A toothpick should come out clean or with just a few moist crumbs.
Fresh pumpkin instead of canned?
Yes! Roast it, purée it smooth, and drain any extra liquid. More work but totally doable.
These better become a regular thing in your house! I love when simple recipes turn into family traditions. My kids ask for them every weekend now, and honestly, I don’t mind making them because they’re so easy and the house smells incredible.
Hope your kitchen smells like fall and your family fights over the last one! 🍂
💬 Made these? Tell me how they turned out! Did you try any variations? Share your photos – I love seeing these donuts in your kitchens! And if you burned the first batch like I did, don’t worry – the second one will be perfect.