These zucchini garlic bites saved my sanity last summer when my garden was drowning in zucchini and my toddler was on a veggie strike. I was scrolling Facebook, feeling defeated, when I saw this woman making tater tots from shredded zucchini. My brain went “WAIT – what if I add garlic and herbs and make them actually taste amazing?”
Y’all, I wish I was lying when I say my child inhaled these and asked for seconds. These little golden nuggets are crisp and golden on the outside, tender and aromatic inside, and they fill your kitchen with the scent of an Italy olive garden. You have my word, there will be no left overs!

❤️ Why You’ll Love This Recipe
Listen, I’ve tried every zucchini recipe under the sun, and these are the ONLY ones my picky eater will actually eat. He calls them “the green nuggets” and literally dances when I make them. They’re crispy like tater tots but way healthier, and they freeze beautifully so I always have emergency snacks ready.
What gets me every time is how they actually taste GOOD – not like I’m trying to hide vegetables. The garlic and herbs make them taste fancy enough for company but simple enough for a Tuesday night when everyone’s hangry.
Print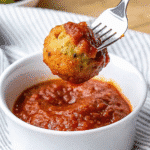
Crispy Zucchini Garlic Bites
- Total Time: 30 minutes
- Yield: About 24 bites 1x
Description
Easy baked zucchini garlic bites made with fresh herbs, Parmesan cheese, and simple ingredients. Kid-friendly, freezer-friendly, and irresistibly delicious.
Ingredients
For the Zucchini Bites:
-
- 2 medium zucchini (the bigger ones work fine, don’t stress)
-
- 1 egg (room temp is best but cold works too)
-
- 1/4 cup real Parmesan cheese, grated fresh (please don’t use the shaker stuff)
-
- 1/3 cup breadcrumbs (I use whatever I have)
-
- 1 garlic clove, grated super fine
-
- 2 Tbsp fresh chives, chopped small
-
- 2 Tbsp fresh parsley, chopped
-
- 1 Tbsp fresh basil (or 1 tsp dried if that’s all you got)
-
- 1/2 tsp fresh oregano (1/4 tsp dried)
-
- Salt and pepper
For dipping:
-
- Your favorite marinara sauce
-
- Maybe some extra cheese for sprinkling
If you need substitutions:
-
- No gluten? Use gluten-free breadcrumbs or almond flour
-
- Vegan? Try a flax egg and nutritional yeast instead of real cheese
-
- No fresh herbs? Use half as much dried stuff
Instructions
1. Shred Those Zucchini (5 minutes) Wash your zucchini and grate them with the big holes on your box grater. I do this right over a big bowl because I’m lazy and it catches everything.
2. SQUEEZE THE LIFE OUT OF THEM (seriously!) This is where most people mess up. Put all that shredded zucchini in a clean kitchen towel, twist it up like a pouch, and squeeze over the sink. Keep squeezing until your arms hurt and no more water comes out. I’m talking about squeezing out at least half a cup of water here. If you skip this, your bites will be soggy mush.
3. Get Your Oven Ready Crank it to 400°F and line a baking sheet with parchment paper. Don’t skip the parchment – trust me on this.
4. Mix It All Up Dump that squeezed-dry zucchini into a bowl with the egg, cheese, breadcrumbs, grated garlic, and all your herbs. Season with salt and pepper like you mean it. Mix it all together until it looks like it wants to hold together.
5. Roll ‘Em Out I use a small cookie scoop for this because it keeps them all the same size, but a spoon works too. Roll them into little balls about the size of a walnut and plop them on your baking sheet.
6. Bake Until Golden 15-18 minutes at 400°F. They’re done when they look golden and feel firm when you poke them. Don’t open the oven door too early – let them do their thing!
Notes
Here’s what I wish someone had told me before I started making these. First, make a test bite before you shape them all – bake one little guy for a few minutes and see if it holds together. If it falls apart, add more breadcrumbs one tablespoon at a time.
Use a cookie scoop if you have one – they’ll all cook evenly that way. And don’t crowd them on the pan! They need space to get crispy. If you’re using dried herbs instead of fresh, use way less – like half the amount – and let them sit in the mixture for a few minutes to wake up.
Oh, and here’s a weird tip my mom taught me: take out that green center bit from your garlic clove. It makes garlic taste bitter, and nobody wants bitter bites.
- Prep Time: 12 minutes
- Cook Time: 18 minutes
- Category: Appetizer
- Method: Baking
Nutrition
- Serving Size: 1bite
- Calories: 95
- Sugar: 3g
- Sodium: 180mg
- Fat: 4g
- Saturated Fat: 2g
- Unsaturated Fat: 2g
- Carbohydrates: 8g
- Fiber: 2g
- Protein: 6g
- Cholesterol: 35mg
📝 Ingredient List
For the Zucchini Bites:
- 2 medium zucchini (the bigger ones work fine, don’t stress)
- 1 egg (room temp is best but cold works too)
- 1/4 cup real Parmesan cheese, grated fresh (please don’t use the shaker stuff)
- 1/3 cup breadcrumbs (I use whatever I have)
- 1 garlic clove, grated super fine
- 2 Tbsp fresh chives, chopped small
- 2 Tbsp fresh parsley, chopped
- 1 Tbsp fresh basil (or 1 tsp dried if that’s all you got)
- 1/2 tsp fresh oregano (1/4 tsp dried)
- Salt and pepper
For dipping:
- Your favorite marinara sauce
- Maybe some extra cheese for sprinkling
If you need substitutions:
- No gluten? Use gluten-free breadcrumbs or almond flour
- Vegan? Try a flax egg and nutritional yeast instead of real cheese
- No fresh herbs? Use half as much dried stuff
🔍 Why These Ingredients Work
Okay, here’s what I learned after making these about fifty times (no joke – my family is obsessed). The zucchini gives you that mild sweetness that kids love, while the fresh garlic – and I mean FRESH, not that jarred stuff – adds just enough kick without being overwhelming.
The Parmesan is doing double duty here – it’s adding that nutty, salty flavor AND helping everything stick together. Don’t cheap out on this; get the good stuff and grate it yourself. The egg and breadcrumbs are your binding team, and those fresh herbs? And that’s where the magic is. My neighbor came over and begged to know what my secret was, and I was like, “Fresh herbs in place of dried.
Essential Tools and Equipment
You don’t need anything fancy here. A box grater (the big holes), a clean kitchen towel that you don’t mind getting zucchini-stained, and a mixing bowl. I use a small cookie scoop to make them all the same size, but honestly a regular spoon works fine too.
You’ll need a baking sheet and some parchment paper. Don’t skip the parchment – I learned that lesson when half my first batch stuck to the pan and I had to scrape them off with a spatula like some kind of kitchen disaster.
👩🍳 How To Make Zucchini Garlic Bites
1. Shred Those Zucchini (5 minutes) Wash your zucchini and grate them with the big holes on your box grater. I do this right over a big bowl because I’m lazy and it catches everything.
2. SQUEEZE THE LIFE OUT OF THEM (seriously!) This is where most people mess up. Put all that shredded zucchini in a clean kitchen towel, twist it up like a pouch, and squeeze over the sink. Keep squeezing until your arms hurt and no more water comes out. I’m talking about squeezing out at least half a cup of water here. If you skip this, your bites will be soggy mush.
3. Get Your Oven Ready Crank it to 400°F and line a baking sheet with parchment paper. Don’t skip the parchment – trust me on this.
4. Mix It All Up Dump that squeezed-dry zucchini into a bowl with the egg, cheese, breadcrumbs, grated garlic, and all your herbs. Season with salt and pepper like you mean it. Mix it all together until it looks like it wants to hold together.
5. Roll ‘Em Out I use a small cookie scoop for this because it keeps them all the same size, but a spoon works too. Roll them into little balls about the size of a walnut and plop them on your baking sheet.
6. Bake Until Golden 15-18 minutes at 400°F. They’re done when they look golden and feel firm when you poke them. Don’t open the oven door too early – let them do their thing!
And if you’re looking for more quick healthy recipes, check out my Crustless Spinach, Onion and Feta Quiche Or Keto Zucchini Fritters

Tips from Well-Known Chefs
My friend who went to culinary school always tells me the secret to any vegetable dish is getting rid of the water first. She’s right – it concentrates all the flavors and stops everything from turning into mush. Same reason restaurants salt their eggplant and let it sit before cooking.
❗ You Must Know
I’m gonna be real with you – if you don’t squeeze out that water from the zucchini, these will be a soggy disaster. I learned this the hard way after my first batch turned into green mush. Now I squeeze until my hands cramp up, and it’s worth every squeeze.
My Personal Secret: I grate my garlic with a microplane instead of chopping it. This way you get garlic flavor in every single bite without anyone biting into a chunk of raw garlic and making that face. You know the face I’m talking about!
💡 Pro Tips & Cooking Hacks
Here’s what I wish someone had told me before I started making these. First, make a test bite before you shape them all – bake one little guy for a few minutes and see if it holds together. If it falls apart, add more breadcrumbs one tablespoon at a time.
Use a cookie scoop if you have one – they’ll all cook evenly that way. And don’t crowd them on the pan! They need space to get crispy. If you’re using dried herbs instead of fresh, use way less – like half the amount – and let them sit in the mixture for a few minutes to wake up.
Oh, and here’s a weird tip my mom taught me: take out that green center bit from your garlic clove. It makes garlic taste bitter, and nobody wants bitter bites.
🎨 Flavor Variations & Suggestions
Once you get the basic recipe down, you can mess around with it. I’ve tried adding sun-dried tomatoes and olives for a Mediterranean thing – my husband loved those. My kids like them when I add a tiny bit of red pepper flakes for heat.
Sometimes I throw in some cooked bacon bits because bacon makes everything better. Or if I have leftover herbs from my garden, I’ll use whatever I’ve got – dill is surprisingly good in these. One time I used sharp cheddar instead of all Parmesan and they were amazing.
⏲️ Make-Ahead Options
This is where these bites really shine for busy moms like me. You can shape them up to a day ahead and just keep them covered in the fridge until you’re ready to bake. Perfect for when you know company’s coming but don’t want to be stuck in the kitchen.
For the freezer, I shape them all, put them on a cookie sheet, and freeze them solid. Then I toss them in a freezer bag where they keep for months. Whenever I want a smaller portion- I bake mine straight from the freezer – it only takes maybe 5 minutes extra. It’s like having homemade chicken nuggets, only they really are homemade and they’re better for you!
Recipe Notes & Baker’s Tips
So here’s the thing – I’ve made these probably a hundred times now, and every single zucchini behaves differently. Some are like water balloons, others are pretty dry. My mother-in-law’s garden zucchini are always super wet, but the ones from the farmer’s market seem drier. Don’t freak out if your first batch doesn’t look exactly like mine.
Last week I was making these and realized I was out of fresh basil. Used dried instead and they were still delicious. Sometimes I grab whatever herbs are dying in my fridge and throw them in. My kids don’t even notice. The key is just getting that water out and making sure everything sticks together. If you mess up the first batch, just learn from it and make another – that’s what I did!
🍽️ Serving Suggestions
These are perfect for so many things. I pack them in my kids’ lunch boxes and they actually eat them cold. For parties, I make a huge batch and put out different dipping sauces – marinara, ranch, that garlic aioli from Costco.
They’re great with grilled chicken or as a snack when everyone is starving at 4 pm but dinner’s not. I often dress them up a little more by whisking them onto a pretty plate with some fresh basil on top, but most times they don’t live long enough to become Instagrammable.
I hope these become your new go-to like they are mine! Seriously, I make these at least twice a week during zucchini season, and my family still gets excited every time. There’s something magical about turning boring old zucchini into these addictive little bites. 🍽️

🧊 How to Store Your Zucchini Garlic Bites
Okay, so nobody ever has leftovers of these at my house, but just in case you do… I stick them in whatever container I have handy and they stay good in the fridge for maybe three days. Don’t you dare put them in the microwave though – I did that once and they turned into sad, soggy little hockey pucks.
When I want to eat them again, I just toss them back in the oven at 400 for maybe five minutes. They get crispy again like magic. Oh, and freezing them is genius – I make double batches now and freeze half. My kids think I’m some kind of superhero when I pull out “fresh” zucchini bites in the middle of winter. They go straight from freezer to oven, takes about fifteen minutes, and boom – instant healthy snack when everyone’s cranky.
⚠️ Allergy Information
Look, I’m not a doctor or anything, but these do have eggs, cheese, and regular breadcrumbs in them. My sister-in-law can’t do gluten, so I’ve made them with those gluten-free breadcrumbs from Trader Joe’s and they work fine. They’re a little more expensive but whatever.
For the egg thing, I tried that weird flax mixture once when my friend came over – she’s doing some kind of vegan thing. You just mix a tablespoon of ground flax with three tablespoons of water and let it sit until it gets all goopy. Honestly, it worked better than I expected. And my neighbor who can’t do dairy uses that nutritional yeast stuff instead of Parmesan – she says it tastes cheesy enough for her kids.
❓ Questions I Get Asked A Lot
Can I use an air fryer for these?
Yes! I got an air fryer for Christmas and I’m obsessed. I do them at 375 for maybe ten or twelve minutes, and I shake the basket halfway through because I’m paranoid about them burning. Just watch them the first time because every air fryer seems to cook differently.
Mine fell apart – what happened?
Ugh, this happened to me SO many times when I started making these. Usually it’s because I didn’t squeeze the zucchini hard enough, or I needed more breadcrumbs. Now I always make one test bite first and see how it holds up. If it’s falling apart, I just dump more breadcrumbs in.
Can I skip the cheese?
You can try, but honestly the Parmesan really helps everything stick together. My cousin tried to make them without cheese once and they were kind of a disaster. If you absolutely have to skip it, maybe add extra breadcrumbs? Or try that nutritional yeast stuff – it’s not the same but it’s something.
How do I know when they’re done?
They should look golden and feel firm when you poke them with your finger. If they’re still pale and squishy, just leave them in a few more minutes. I usually check them around 15 minutes and then keep an eye on them.
Can I use yellow squash?
Totally! My mom grows both in her garden and sometimes I mix them together. It looks prettier and tastes exactly the same. Just do the same squeezing thing with the yellow squash.
💬 Tried this recipe? Leave a comment and rating below! I’d love to hear about your variations and how your family enjoyed these bites. Did you try any of the flavor variations? Share your favorite dipping sauce combinations!